The TWELITE STAGE series is a collection of evaluation and development tools for TWELITE.
This is the multi-page printable view of this section. Click here to print...
For suitable output, we recommend to use Google Chrome (15+) or Microsoft Edge (79+).
TWELITE STAGE
Evaluation and Development Tools
1 - TWELITE STAGE HAT
Model: MW-STA-RPi-1
TWELITE STAGE HAT is a HAT board for connecting TWELITE DIP to a Raspberry Pi.
1.1 - TWELITE STAGE HAT Datasheet
Latest Edition
TWELITE STAGE HAT is a board that enables easy connection between Raspberry Pi and TWELITE DIP.
When used with the TWELITE STAGE APP, it can send commands such as monitoring data from TWELITE or TWELITE PAL, or turning on child device LEDs. Additionally, it allows configuration and rewriting of TWELITE without the need for TWELITE R2.
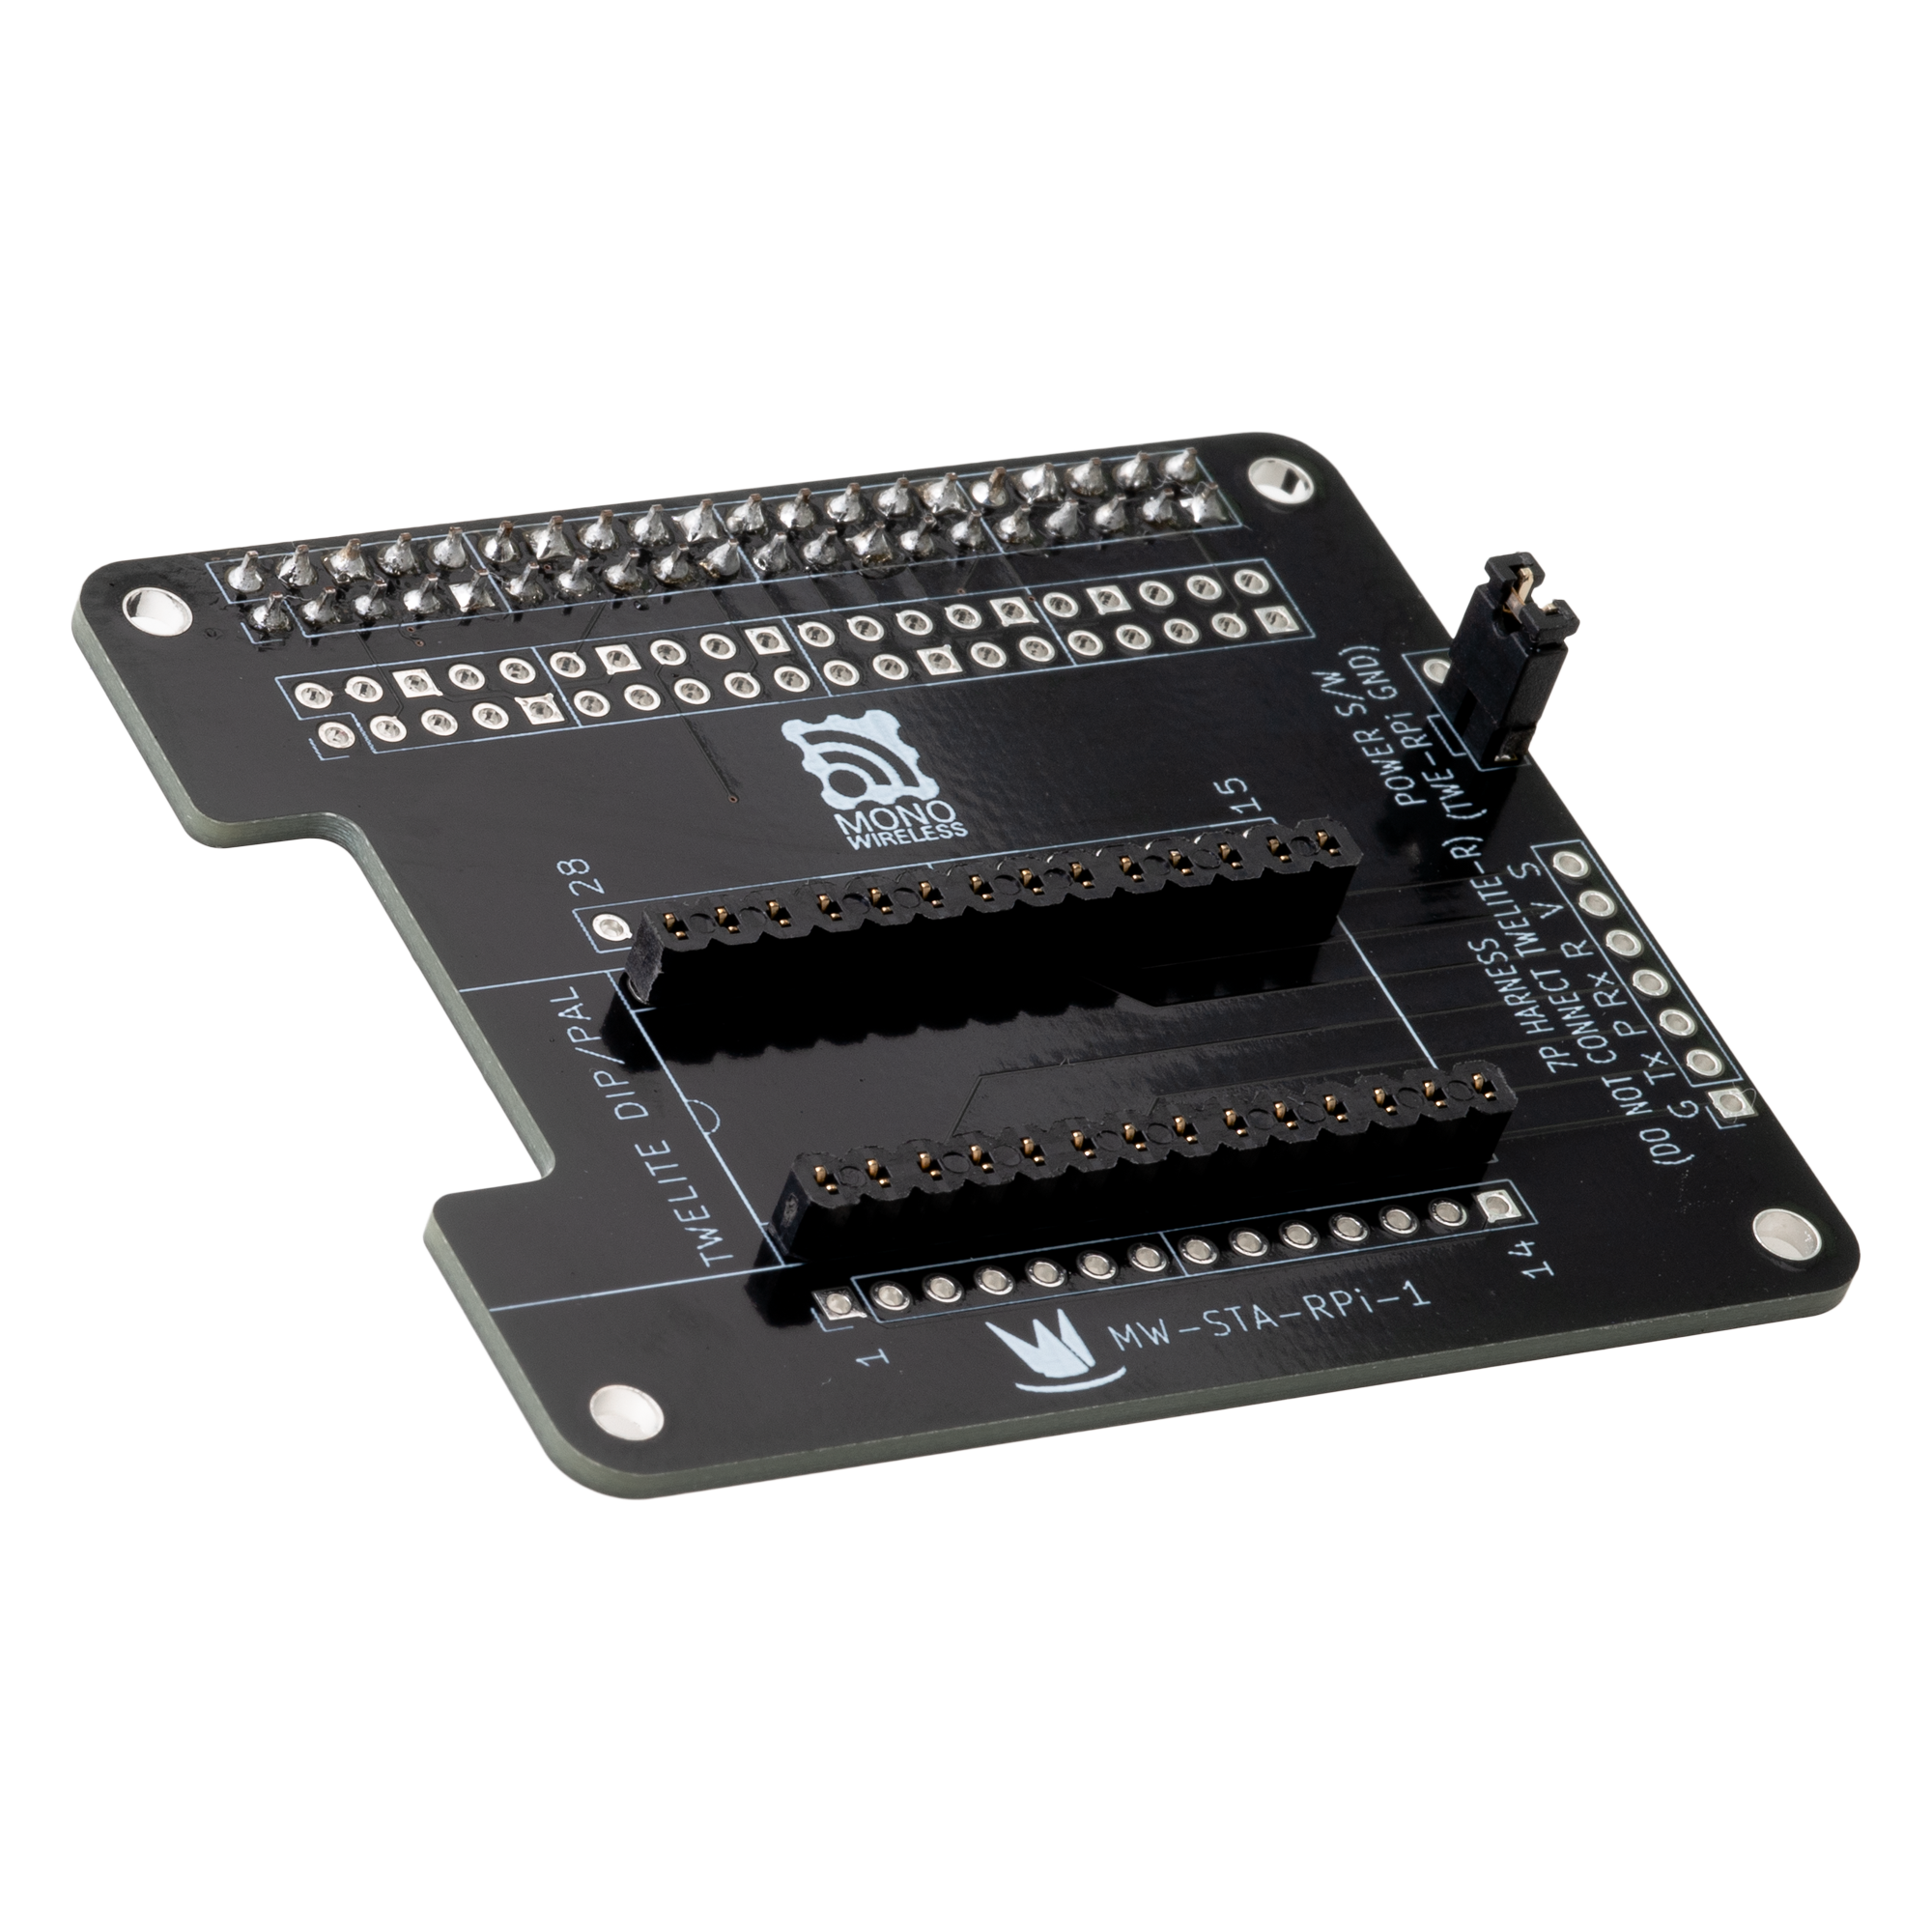
Appearance
Component Names
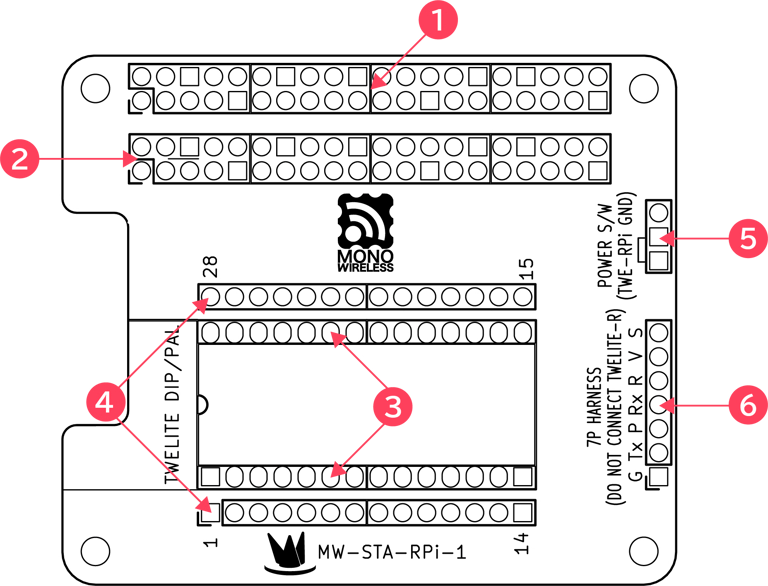
1 Raspberry Pi Connector
Connector for connecting to the GPIO port of the Raspberry Pi.
2 HAT Test Terminals
Test terminals for Raspberry Pi GPIO pins.
The pin layout is the same as the Raspberry Pi connector, so you can freely use it for signal checking or connecting sensors.
3 DIP Connector
Connector for connecting TWELITE DIP or PAL.
Ensure Raspberry Pi is powered off before inserting or removing TWELITE.
Incorrect orientation of TWELITE DIP or PAL can cause damage. Be sure to connect in the orientation shown below.
Be sure to connect in the orientation shown below.

Correctly oriented connection example
Frequent insertion/removal of TWELITE should be avoided as it may damage the connector.
Also, since TWELITE DIP has thin pin headers, after using TWELITE PAL especially, the fit may become unstable.
To avoid contact failures of the connector, please use the TWELITE R Attachment Kit.
4 DIP Test Terminals
Terminals to check input/output of TWELITE DIP or PAL.
LEDs or sensors can be connected to TWELITE. Also, connecting these to the HAT Test Terminals allows arbitrary pin connections between Raspberry Pi and TWELITE.
5 Power Check Terminals
Connects GND between TWELITE and Raspberry Pi via jumper pin.
Removing the jumper turns off TWELITE power. A switch can be installed to control power. You can also measure current by connecting a tester.
6 Operation Check Terminals
Used to check signals between Raspberry Pi and TWELITE.
By extending a harness and connecting to a 7P interface on TWELITE PAL or TWELITE CUE/ARIA/UART, application writing and configuration can be done from Raspberry Pi.
These terminals are for checking connection/communication with TWELITE PAL.
Do not connect TWELITE R2/R3, as VCC from Raspberry Pi and R2/R3 would short and cause damage.
How to Use
Connect TWELITE to TWELITE STAGE HAT
Connect TWELITE DIP or PAL to the TWELITE STAGE HAT.
TWELITE DIP connected
Incorrect orientation of TWELITE may cause damage.
Connect TWELITE STAGE HAT to Raspberry Pi
Connect the TWELITE STAGE HAT to the Raspberry Pi.
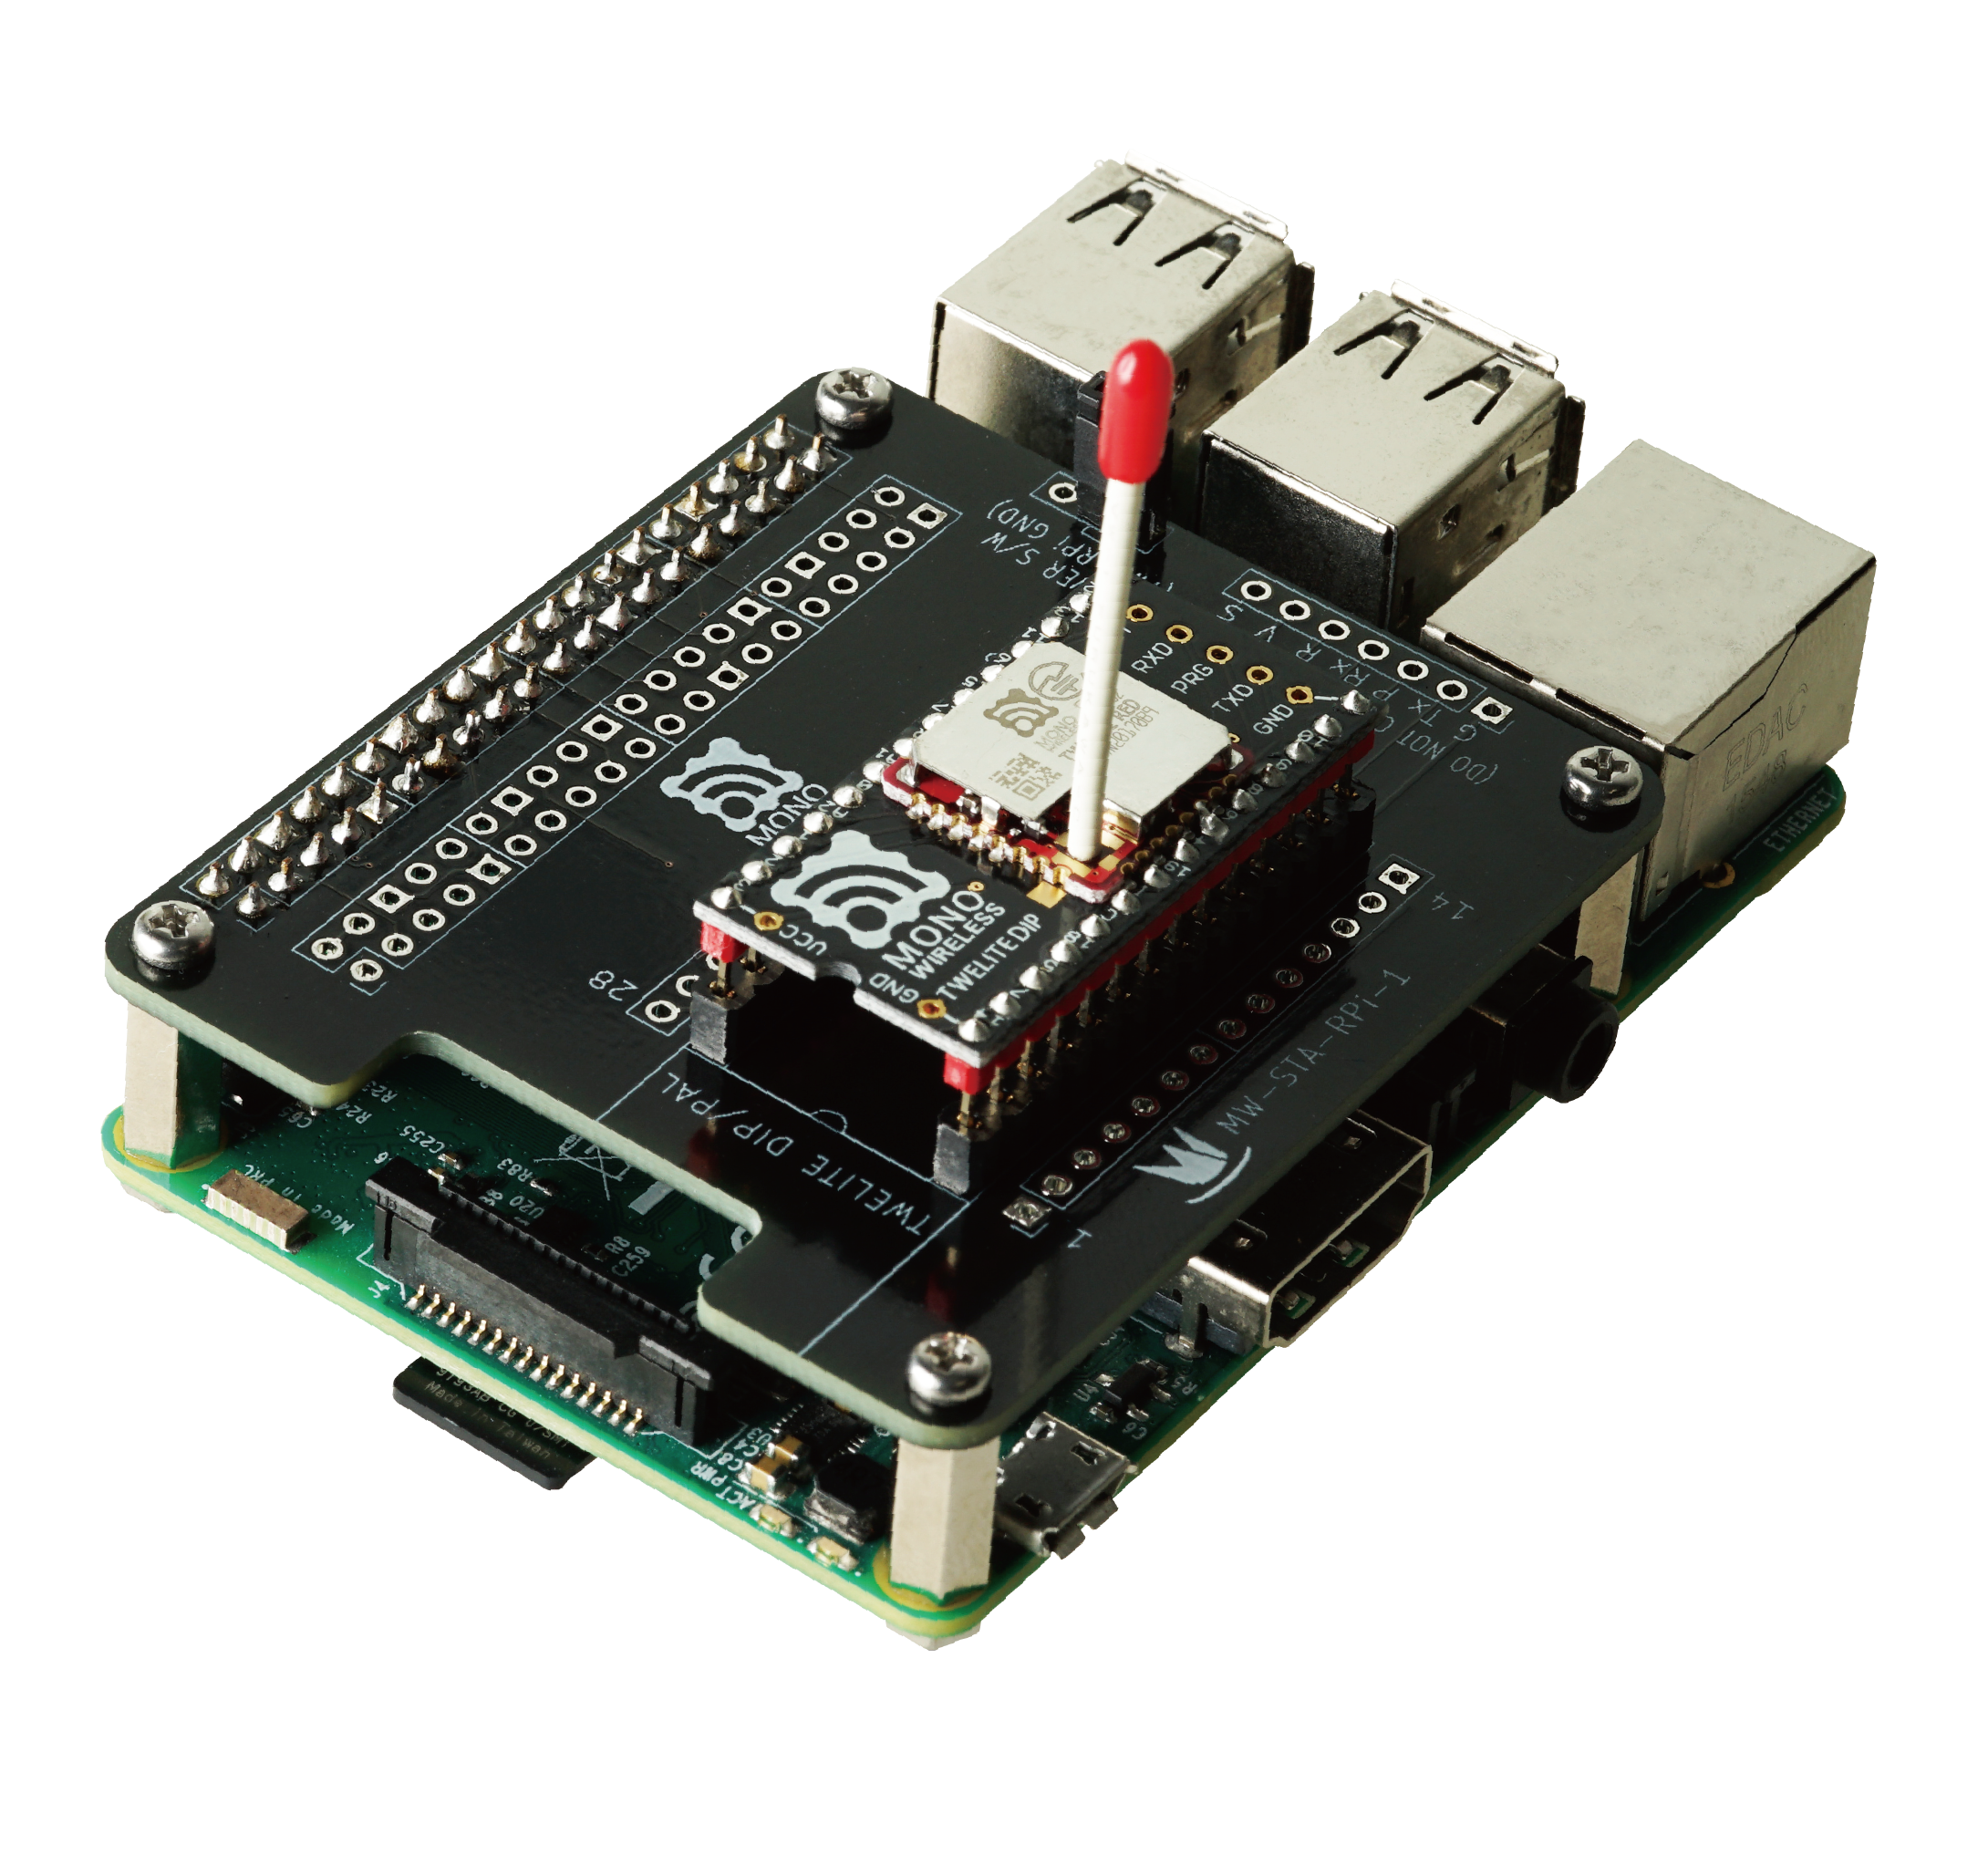
Connected to Raspberry Pi
Use M2.5 or M2.6 screws and spacers of 11–11.5 mm (11 mm recommended).
Power On the Raspberry Pi
Connect the power cable to the Raspberry Pi power connector and turn on the power.
Launch the TWELITE STAGE App
Install the TWELITE STAGE App in advance.
Raspberry Pi needs appropriate setup. See Precautions for Raspberry Pi.
Launch the TWELITE STAGE App and select ‘UART (serial0)’ in Serial Port Selection.
Hardware Specifications
Dimensions
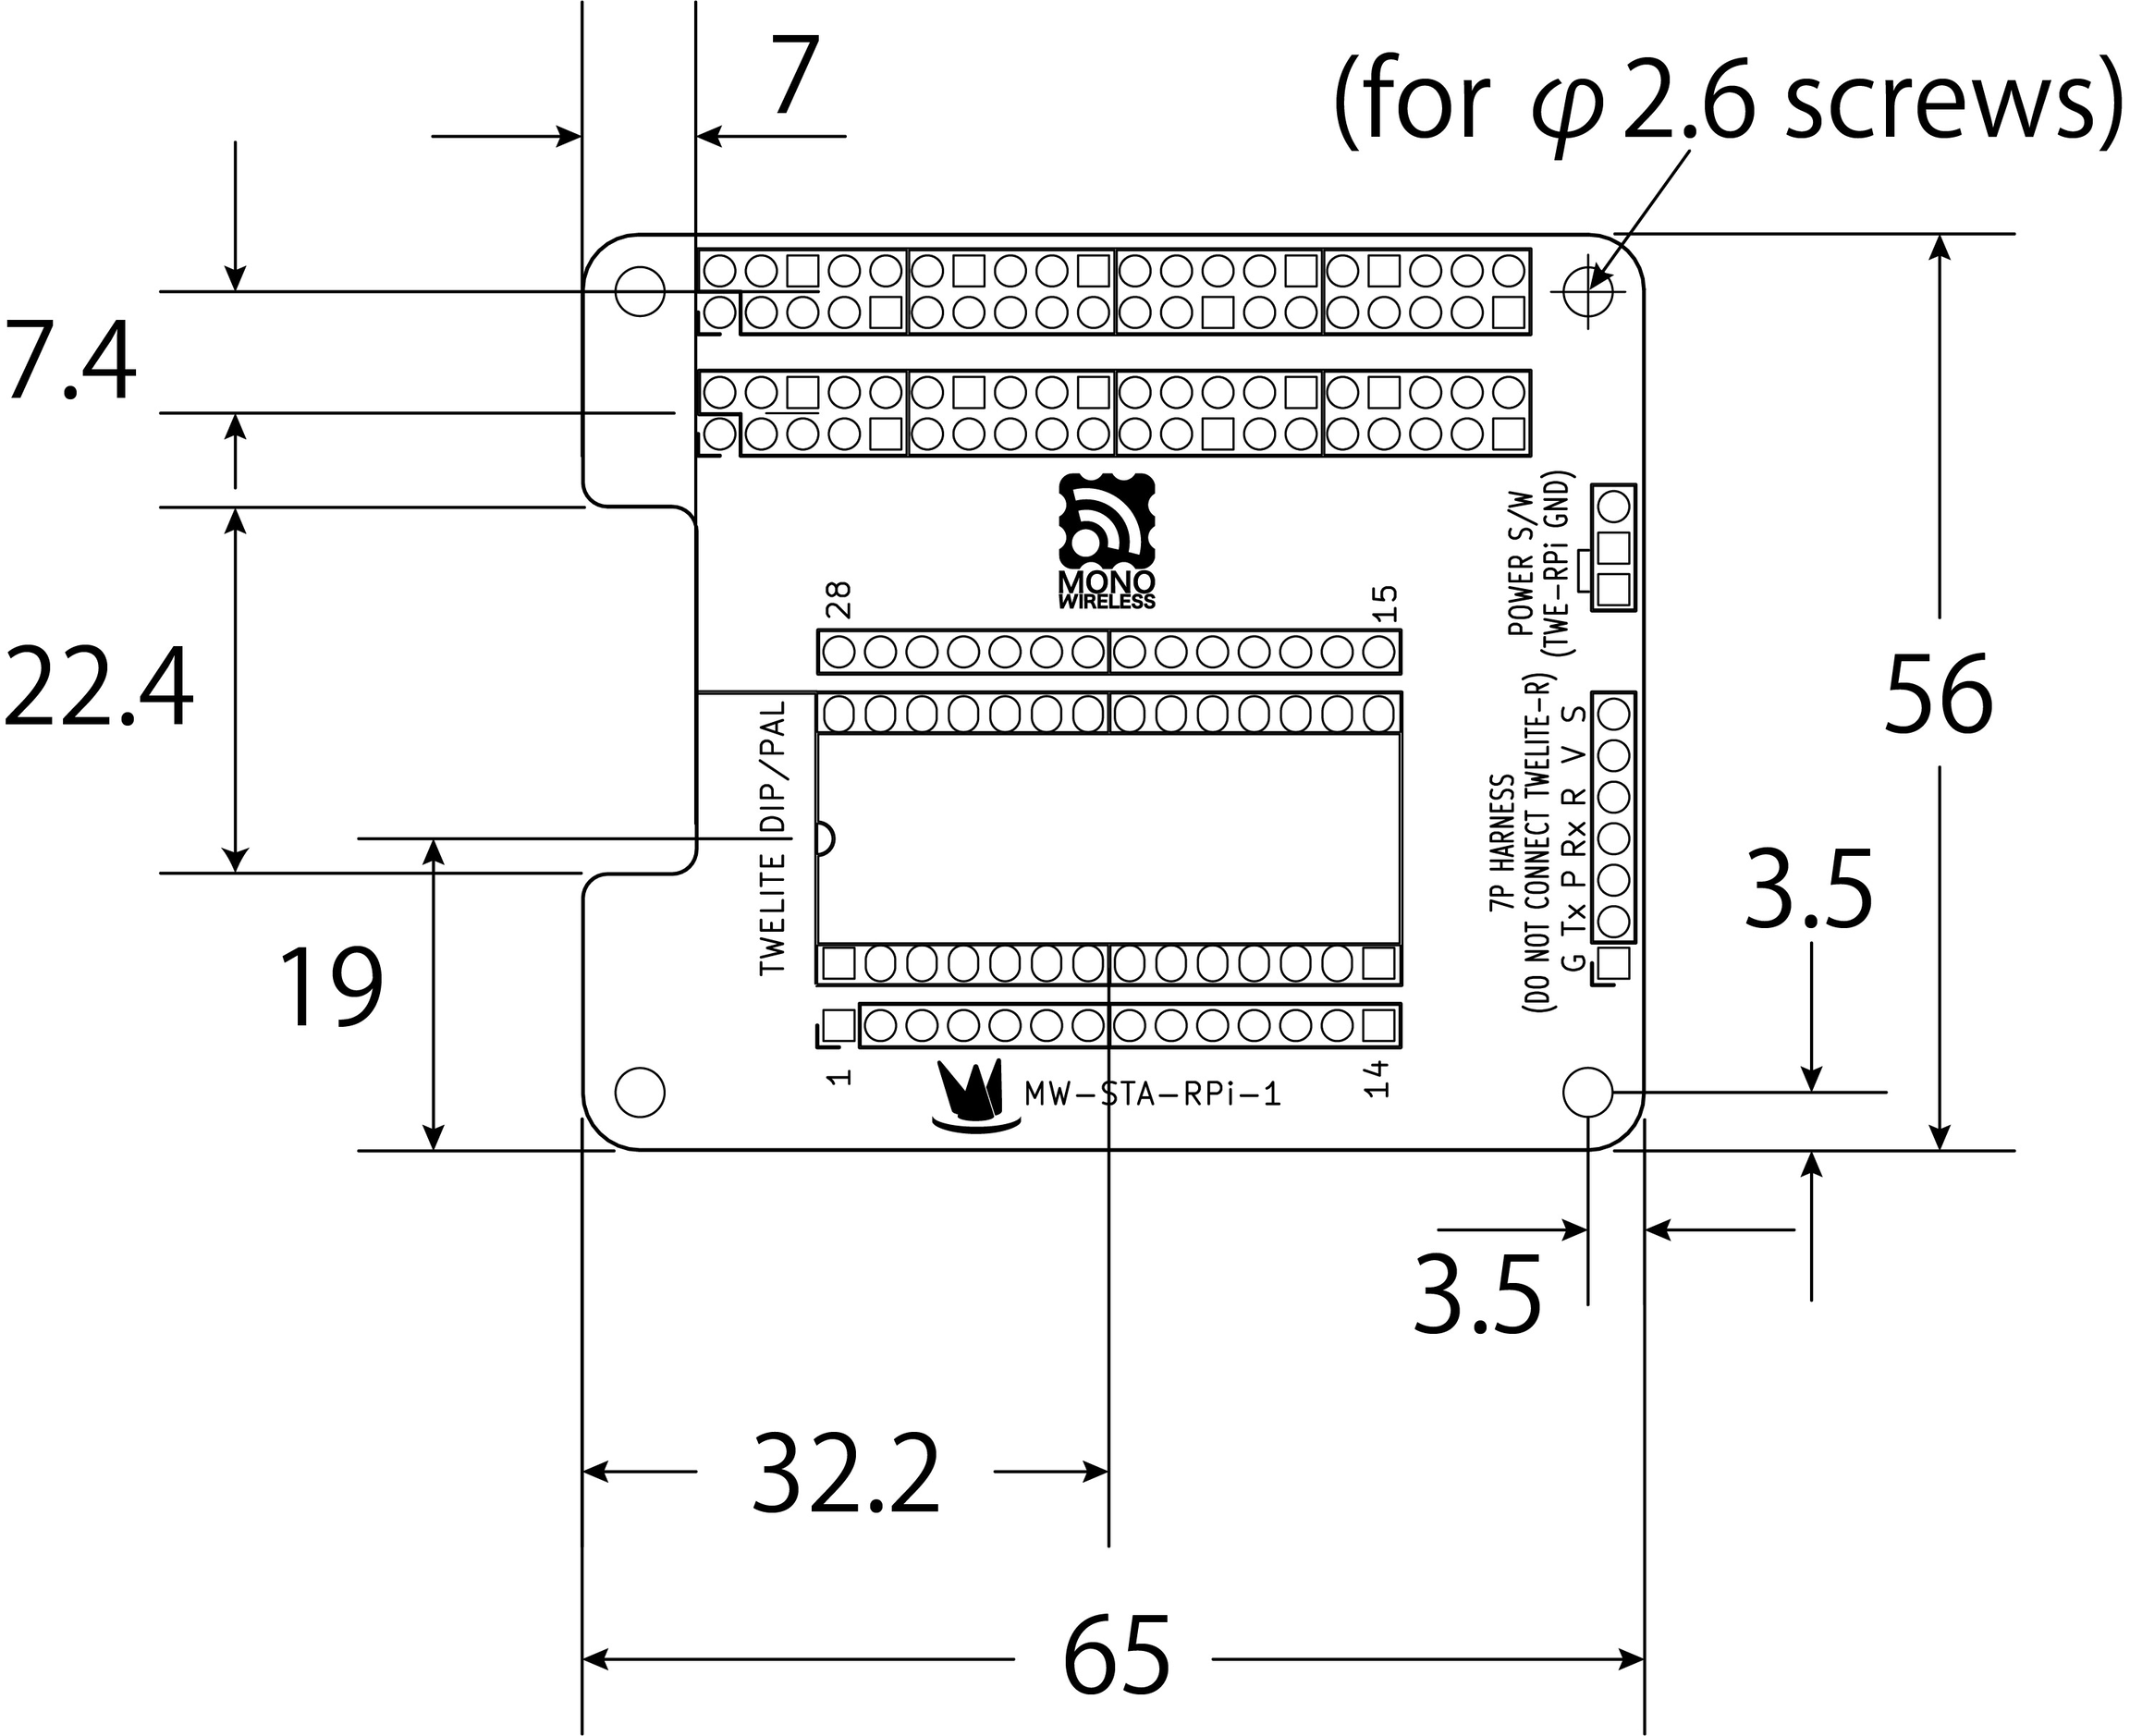
Dimensions
Pin Mapping
| TWELITE DIP/PAL | Raspberry Pi |
|---|---|
#3 / DIO7 / RX | #8 / GPIO14 |
#10 / DIO6 / TX | #10 / GPIO15 |
#7 / DO1 / PWM3 / PRG | #16 / GPIO23 |
#21 / RST | #15 / GPIO22 |
#15 / DIO12 / DI1 / SET | #32 / GPIO12 |
Circuit Diagram
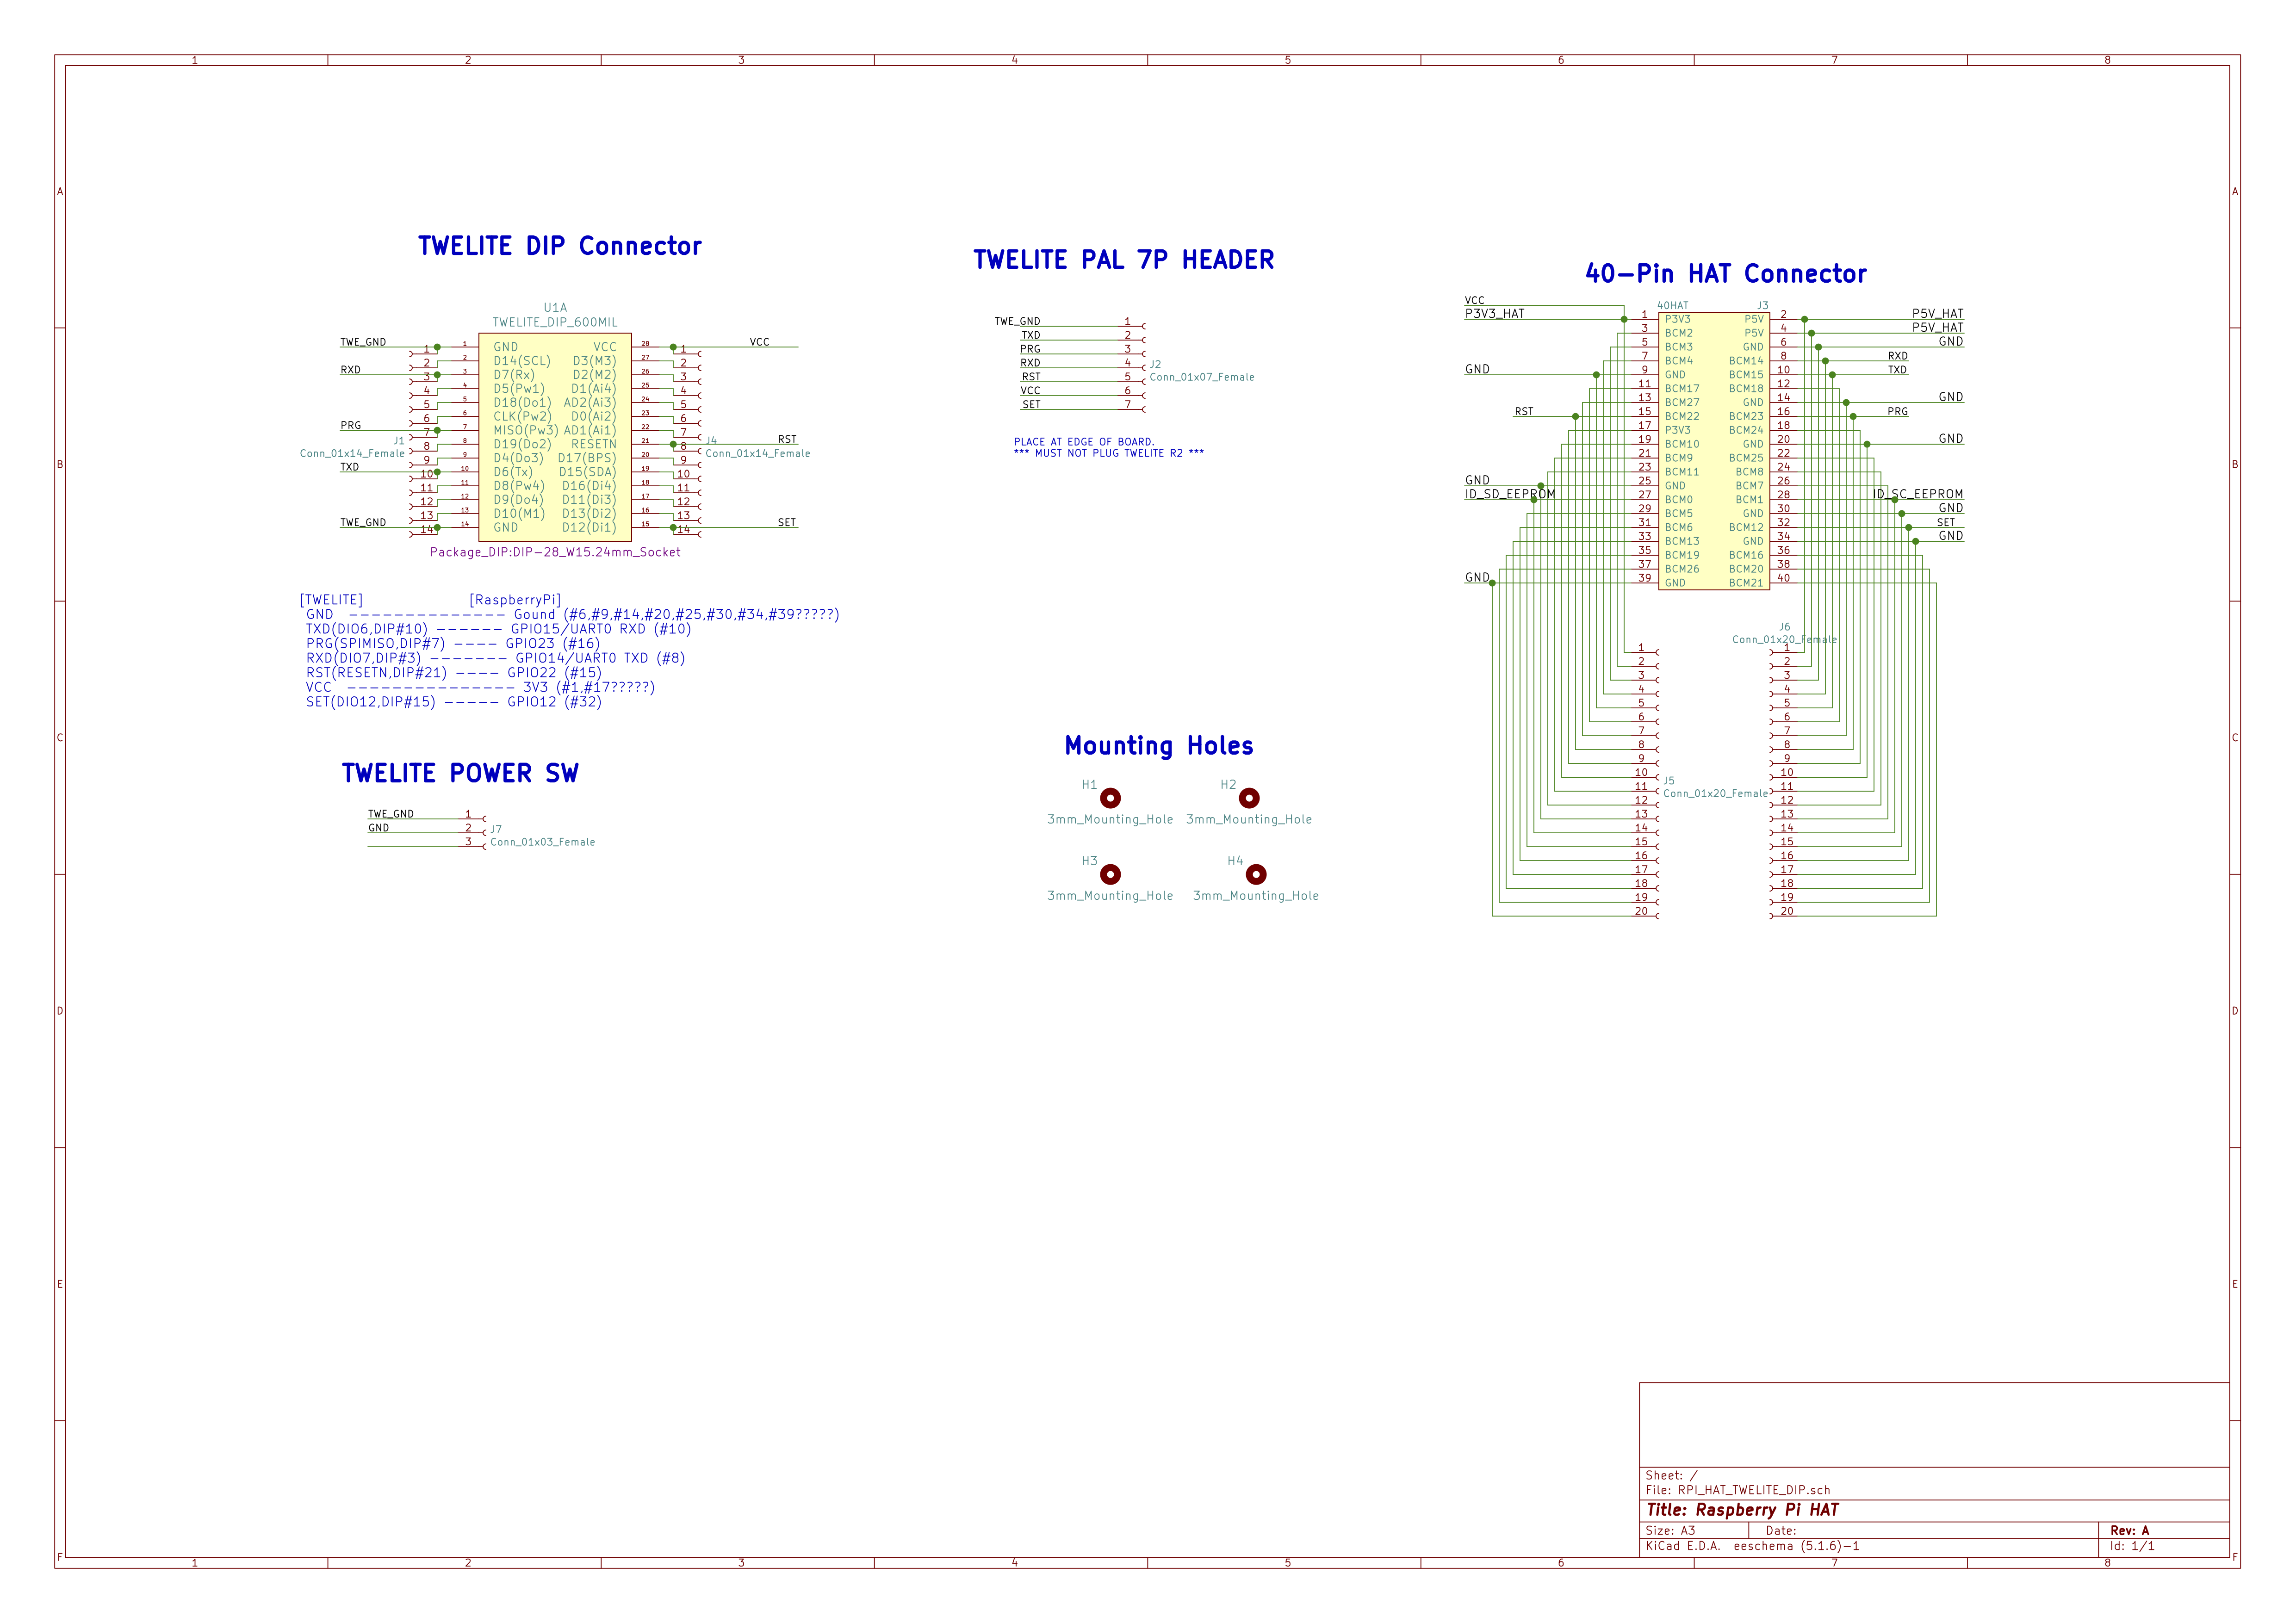
Circuit Diagram
Precautions
During Raspberry Pi Startup
Due to GPIO23 behavior on boot, TWELITE may start in program mode. Before communicating, reset TWELITE by setting GPIO22 Low for approx. 10 ms.
Static Electricity and Short-Circuit Precautions
This is an electronic component. Observe general handling precautions, particularly avoiding short-circuits or ESD during operation.
Revision History
| Version | Date | Details |
|---|---|---|
| 1.0.0 | 2021-02-26 | Initial Version |
| 1.0.1 | 2025-03-18 | Migrated to this site; updated structure |