How to Upload Files to ESP32 (Arduino IDE 2.x)
data/ folder) to the ESP32 mounted on TWELITE SPOT.This section covers advanced topics (how to treat the flash area of the ESP32 mounted on TWELITE SPOT as a file system and upload files like HTML).
If you don’t have requirements such as uploading HTML files to TWELITE SPOT to make it function as a web server (achieved in the spot-server sample) or uploading encryption key files to TWELITE SPOT, you can ignore this section.
This section uses third-party open source software.
We cannot provide detailed usage instructions for third-party software. Also, we assume no responsibility for any damage caused by using third-party software.
Installing the Plugin
Install the Arduino IDE 2.x plugin (earlephilhower/arduino-littlefs-upload) for uploading files to the ESP32 flash area.
Download the Plugin
Download arduino-littlefs-upload-x.x.x.vsix from the following page:
Releases · earlephilhower/arduino-littlefs-upload
Install the Plugin
Place the downloaded arduino-littlefs-upload-x.x.x.vsix in .arduinoIDE/plugins under your user directory.
- Windows example:
C:\Users\foo\.arduinoIDE\plugins\ - macOS/Linux example:
~/.arduinoIDE/plugins/
Host Connection
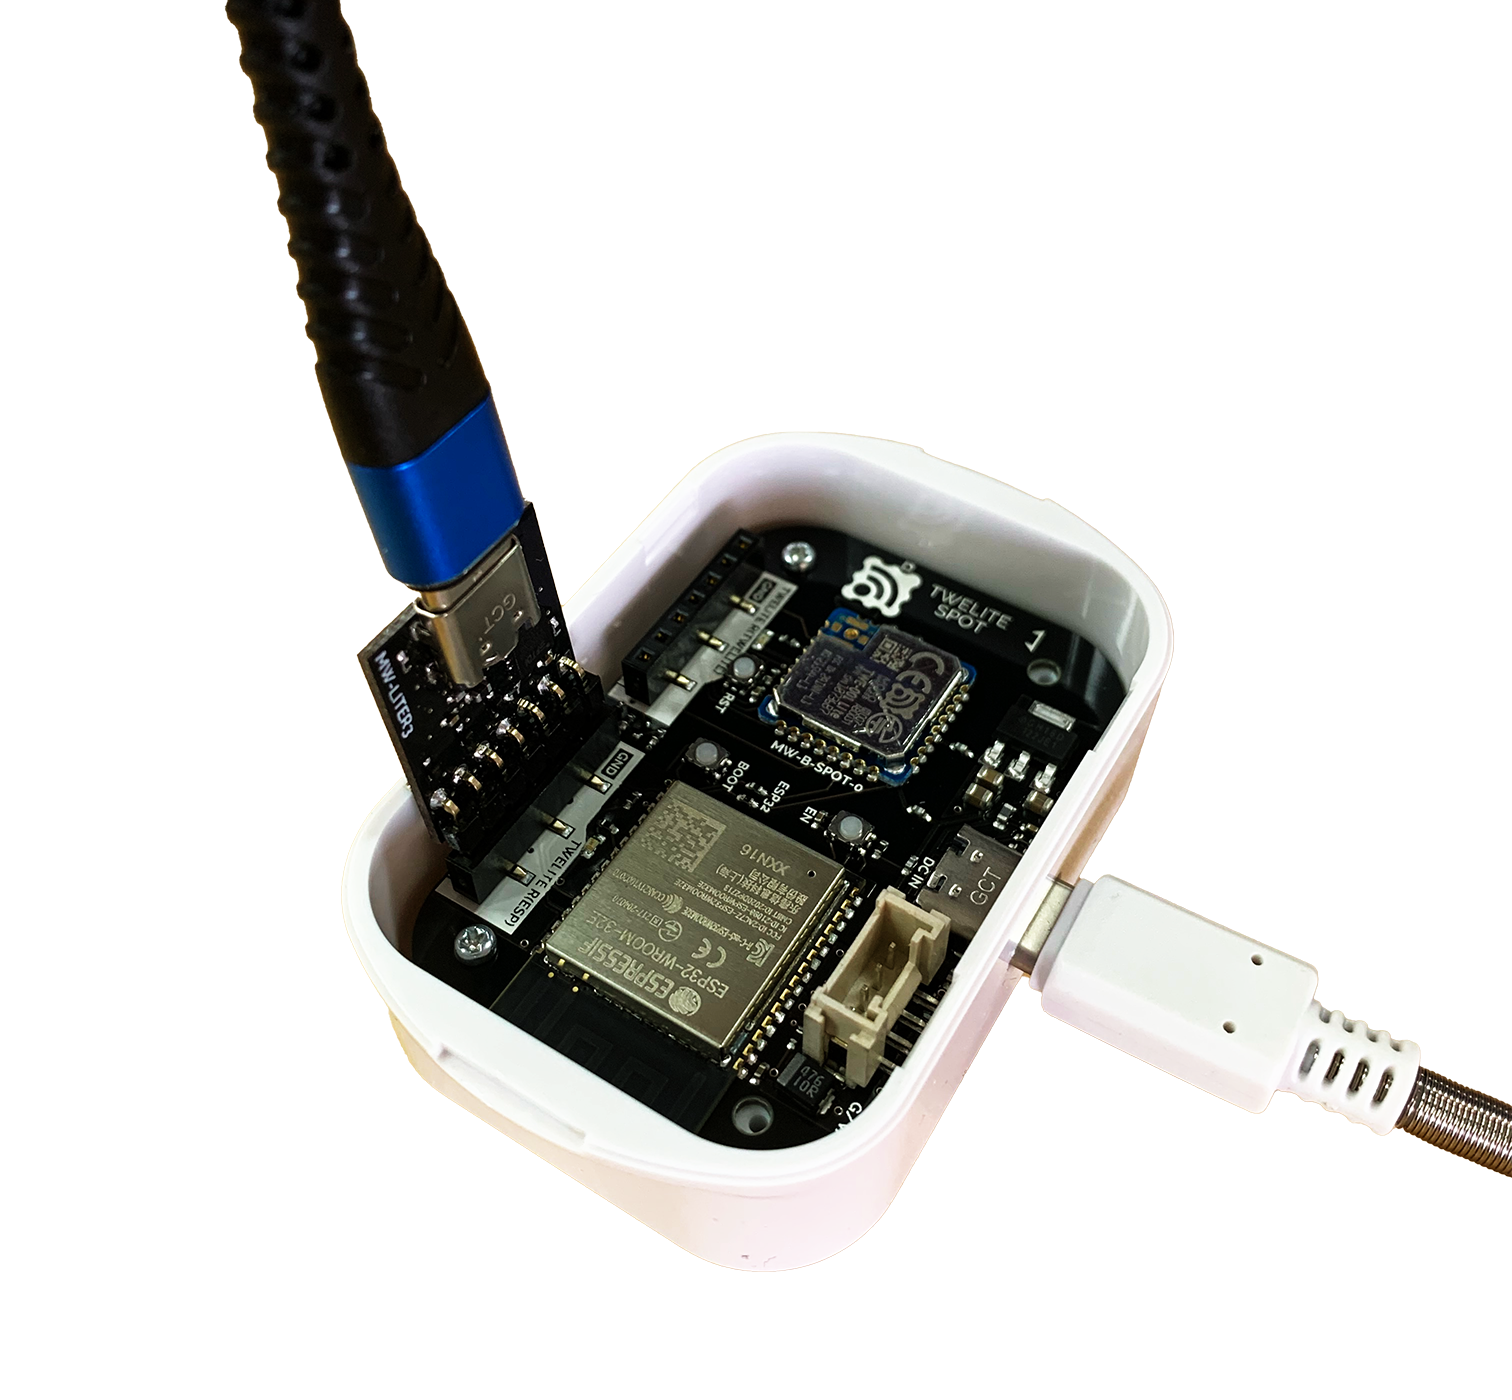
Connect TWELITE R3 / R2
Connect TWELITE R3 / R2 to the 7P interface (the side marked ESP32).
Connect Power
Supply 5V power to the side USB-C connector.
Connection example (ESP32)
Arduino IDE Operations
Open Sketch
Launch Arduino IDE and open your sketch.
Place Files to Upload
Open the sketch folder from Sketch -> Show Sketch Folder.
Create a
datafolder at the same level as the sketch file (.ino).Place the files you want to upload inside the
datafolder.
data folder is preserved in the flash area.Select Serial Port
Select the TWELITE R3 / R2 port from Tools -> Port menu.
COM? on Windows, and /dev/tty? on macOS / Linux.Start ESP32 in Program Mode
Press the ESP32 reset switch EN(RST) and ESP32 boot switch BOOT on TWELITE SPOT, then release them in the order EN(RST) -> BOOT.
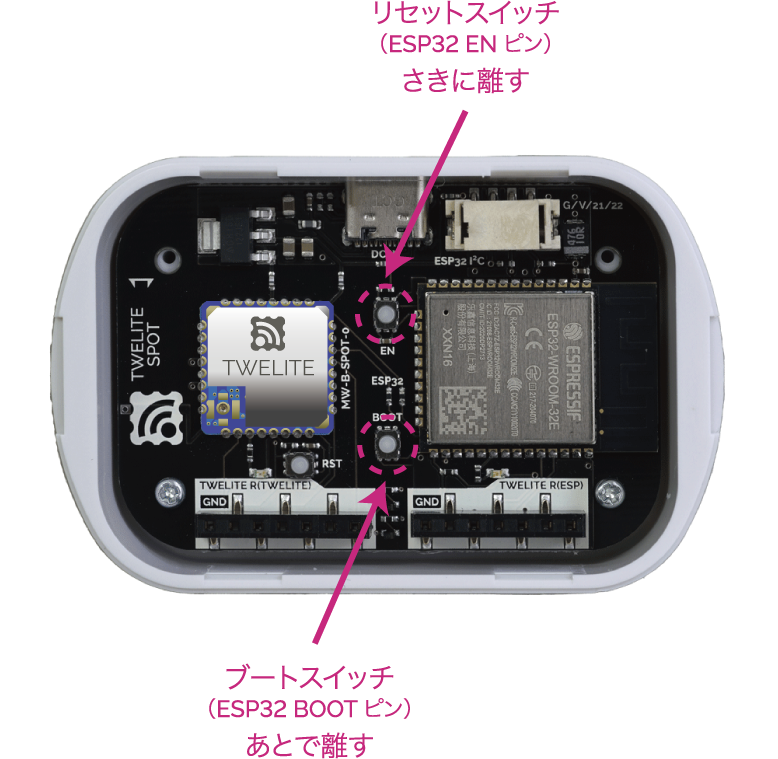
Button locations
BOOT while resetting, you can put the ESP32 into program mode.Execute Upload
Press
Ctrl+Shift+P(or⌘+Shift+Pon macOS) to open the command palette.Select
Upload LittleFS to Pico/ESP8266/ESP32.
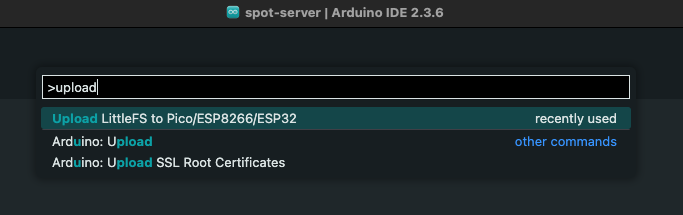
Command palette screen
Completed upload. will be displayed at the bottom of the screen.Reset ESP32
After the upload is complete, press and release the ESP32 reset switch EN(RST) on TWELITE SPOT to reset the ESP32.
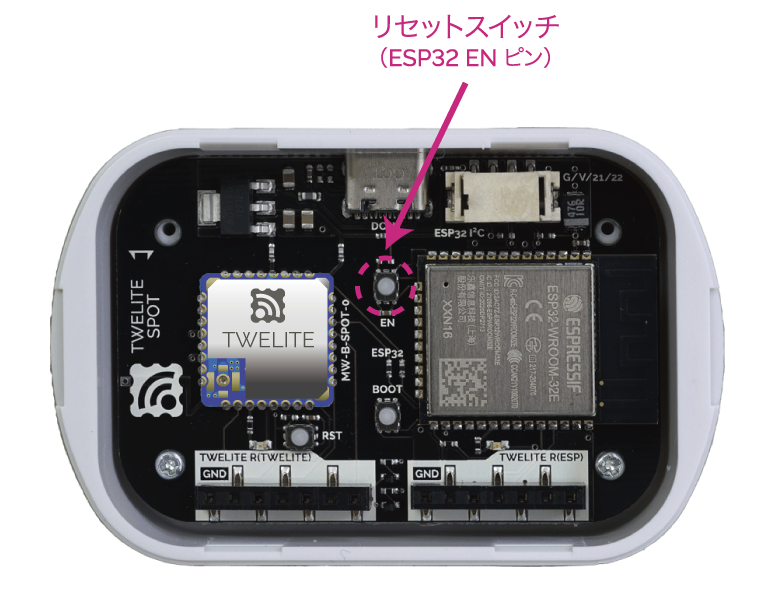
Reset switch location