How to Write Files to ESP32 (Arduino IDE 1.x)
data/ folder) to the ESP32 mounted on TWELITE SPOT.This article introduces an advanced topic (how to treat the flash area of the ESP32 mounted on TWELITE SPOT as a file system and write files such as HTML).
For example, if you do not need to write HTML files to TWELITE SPOT to behave as a web server (implemented in the spot-server sample) or write encryption key files to TWELITE SPOT, you can ignore the contents of this article.
This article uses third-party open-source software.
We cannot provide detailed instructions on third-party software usage. Also, we assume no responsibility for any damages caused by using third-party software.
The method introduced in this article requires Arduino IDE 1.x. Due to technical constraints, as of May 2023, Arduino IDE 2.x is not supported.
Because the plugin used here is written in Java, it does not work with Arduino IDE 2.x, which is not Java-based unlike Arduino IDE 1.x. For more details, see the Arduino IDE GitHub issue (Missing support for external tools / plugins · Issue #58 · arduino/arduino-ide) (in English).
Installing the Plugin
Install the Arduino plugin (arduino-esp32fs-plugin) to write files to the ESP32 flash area.
Downloading the Plugin
Download esp32fs.zip from the following page:
Release Update to support Big Sur · lorol/arduino-esp32fs-plugin
Installing the Plugin
Extract the downloaded
esp32fs.zip.If there is no
toolsfolder in your Arduino sketchbook location (set in Arduino IDE preferences, e.g.,C:\Users\foo\Documents\Arduino), create it.Create the folder
ESP32FS/toolinside thetoolsfolder and place theesp32fs.jarfile extracted from the zip there. (Example path:C:\Users\foo\Documents\Arduino\tools\ESP32FS\tool\esp32fs.jar).The plugin will be available the next time you start Arduino IDE.
Connecting to the Host
Connect TWELITE R3 / R2
Connect TWELITE R3 / R2 to the 7P interface side labeled ESP32.
Connect Power
Supply 5V power to the USB-C connector on the side.
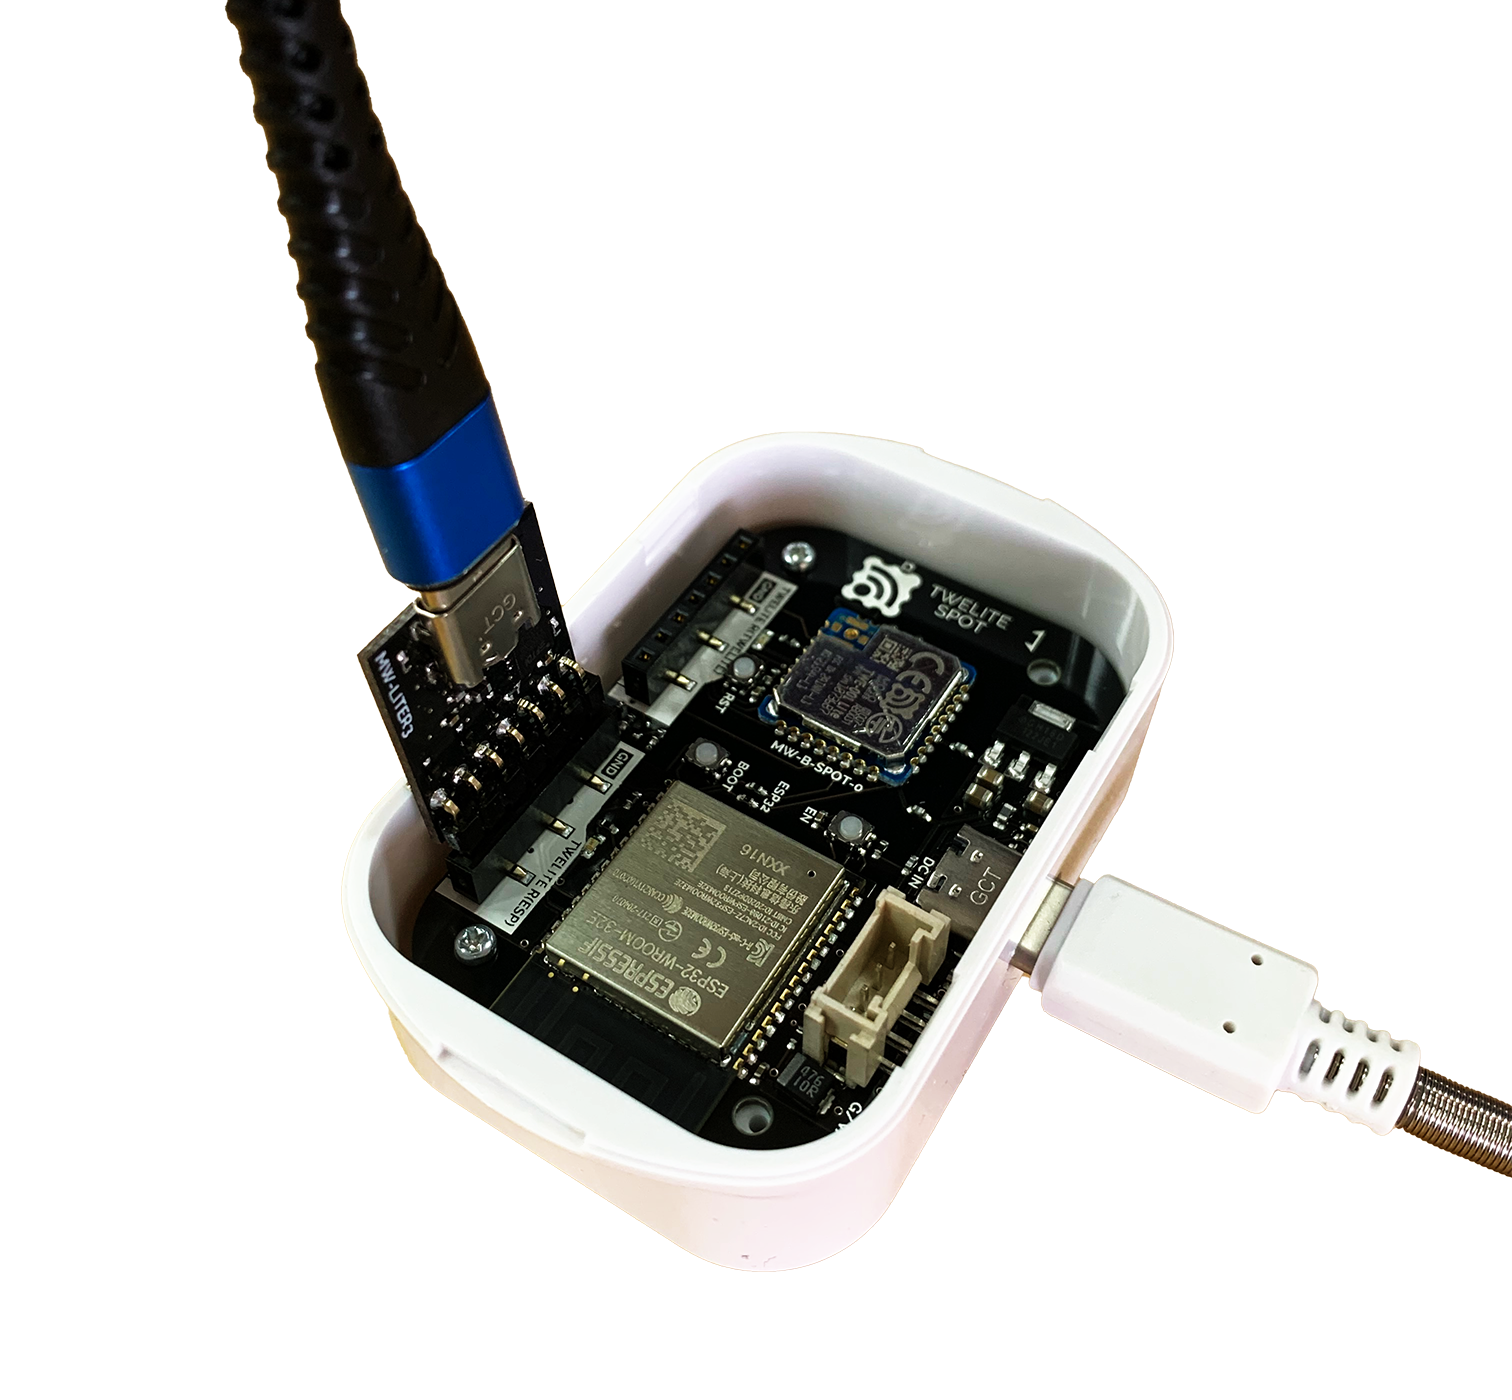
Connection Example (ESP32)
Arduino IDE Operations
Open the Sketch
Start Arduino IDE and open the sketch.
Place Files to Write
Open Sketch -> Show Sketch Folder.
Create a
datafolder at the same level as the sketch file (.ino).Place the files to write inside the
datafolder.
data folder is preserved in the flash area.Select Serial Port
From the Tools -> Port menu, select the port for TWELITE R3 / R2.
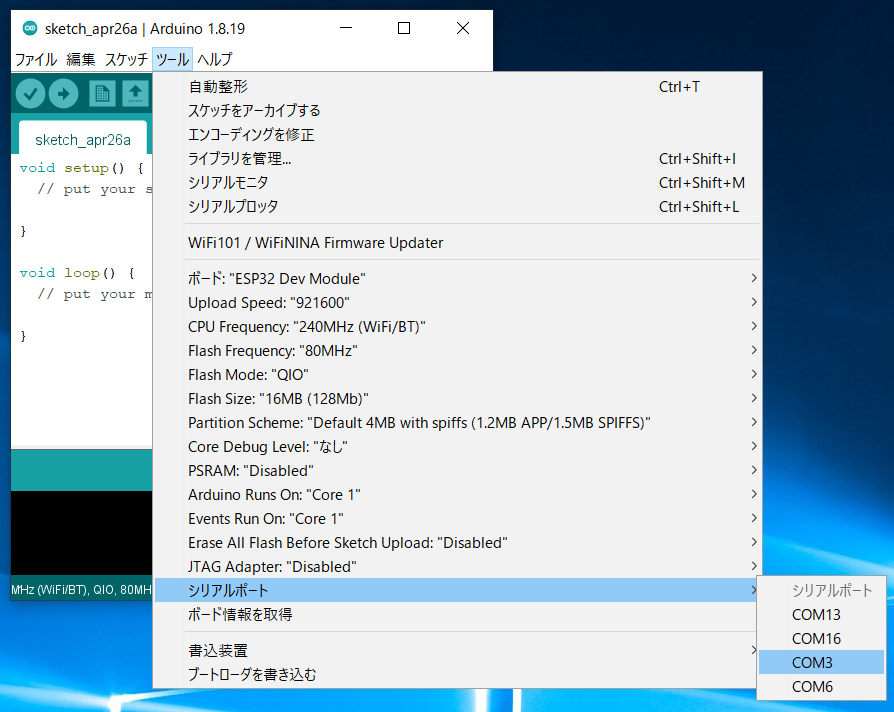
Serial Port Selection
COM?, and on macOS/Linux, like /dev/tty?.Boot ESP32 in Programming Mode
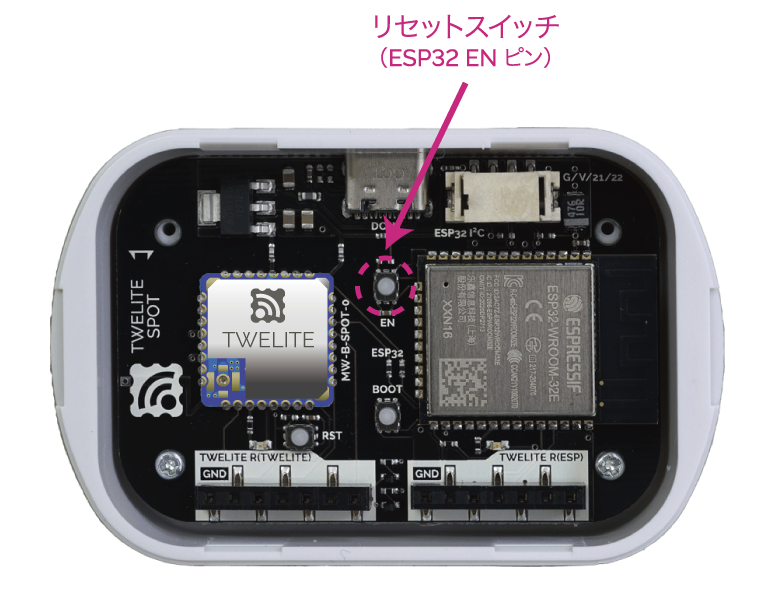
Press the ESP32 reset switch EN(RST) and the ESP32 boot switch BOOT on TWELITE SPOT, then release them in the order EN(RST) -> BOOT.
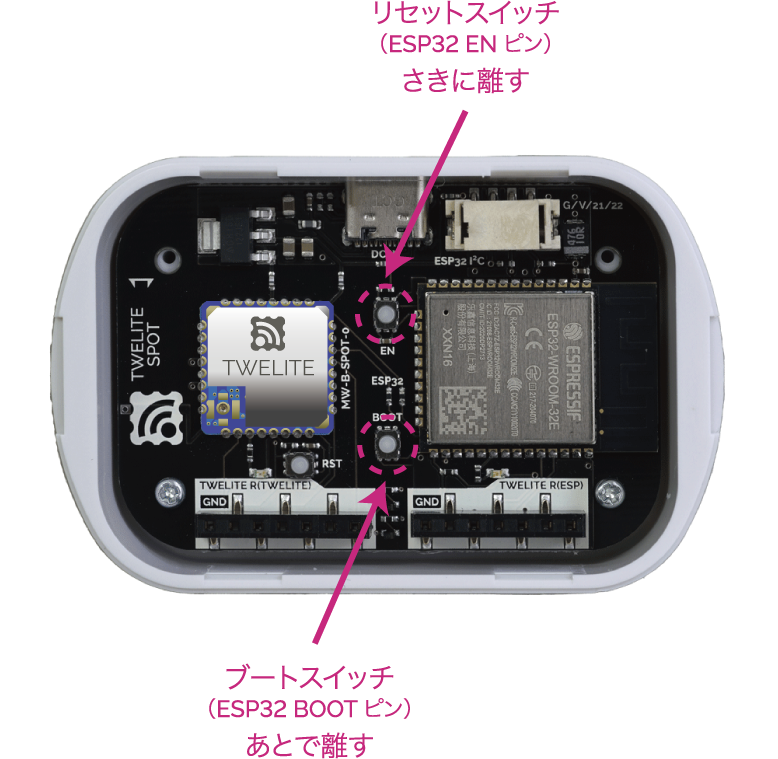
Button Positions
BOOT switches ESP32 into programming mode.Execute Writing
Click Tools -> ESP32 Sketch Data Upload.
At Select FS for
/data folder, select LittleFS.
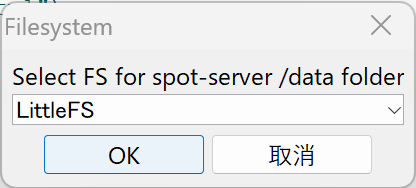
File System Selection Screen
- Click OK.
Hard resetting via RTS pin... is displayed at the bottom of the screen.Depending on your environment, writing may fail with a message like this (confirmed on macOS):
`Error: esptool not found!`
In that case, placing esptool.py in the Arduino15 folder/packages/esp32/tools/esptool_py/<version>/esptool.py might resolve the issue.
For example, on macOS, obtain esptool.py and create a symbolic link as follows:
/usr/bin/pip3 install esptool
ln -s ~/Library/Python/3.9/bin/esptool.py ~/Library/Arduino15/packages/esp32/tools/esptool_py/4.5.1/esptool.py
Note: Specify
/usr/bin/pip3to avoid installing in the Homebrew directory.
Reset ESP32
After writing completes, press and release the ESP32 reset switch EN(RST) on TWELITE SPOT to reset ESP32.
Reset Switch Position