How to Write Sketches to ESP32
Connecting to the Host
Connect TWELITE R3 / R2
Connect the TWELITE R3 / R2 to the 7P interface (the side labeled ESP32).
Connect Power
Supply 5V power to the USB-C connector on the side.
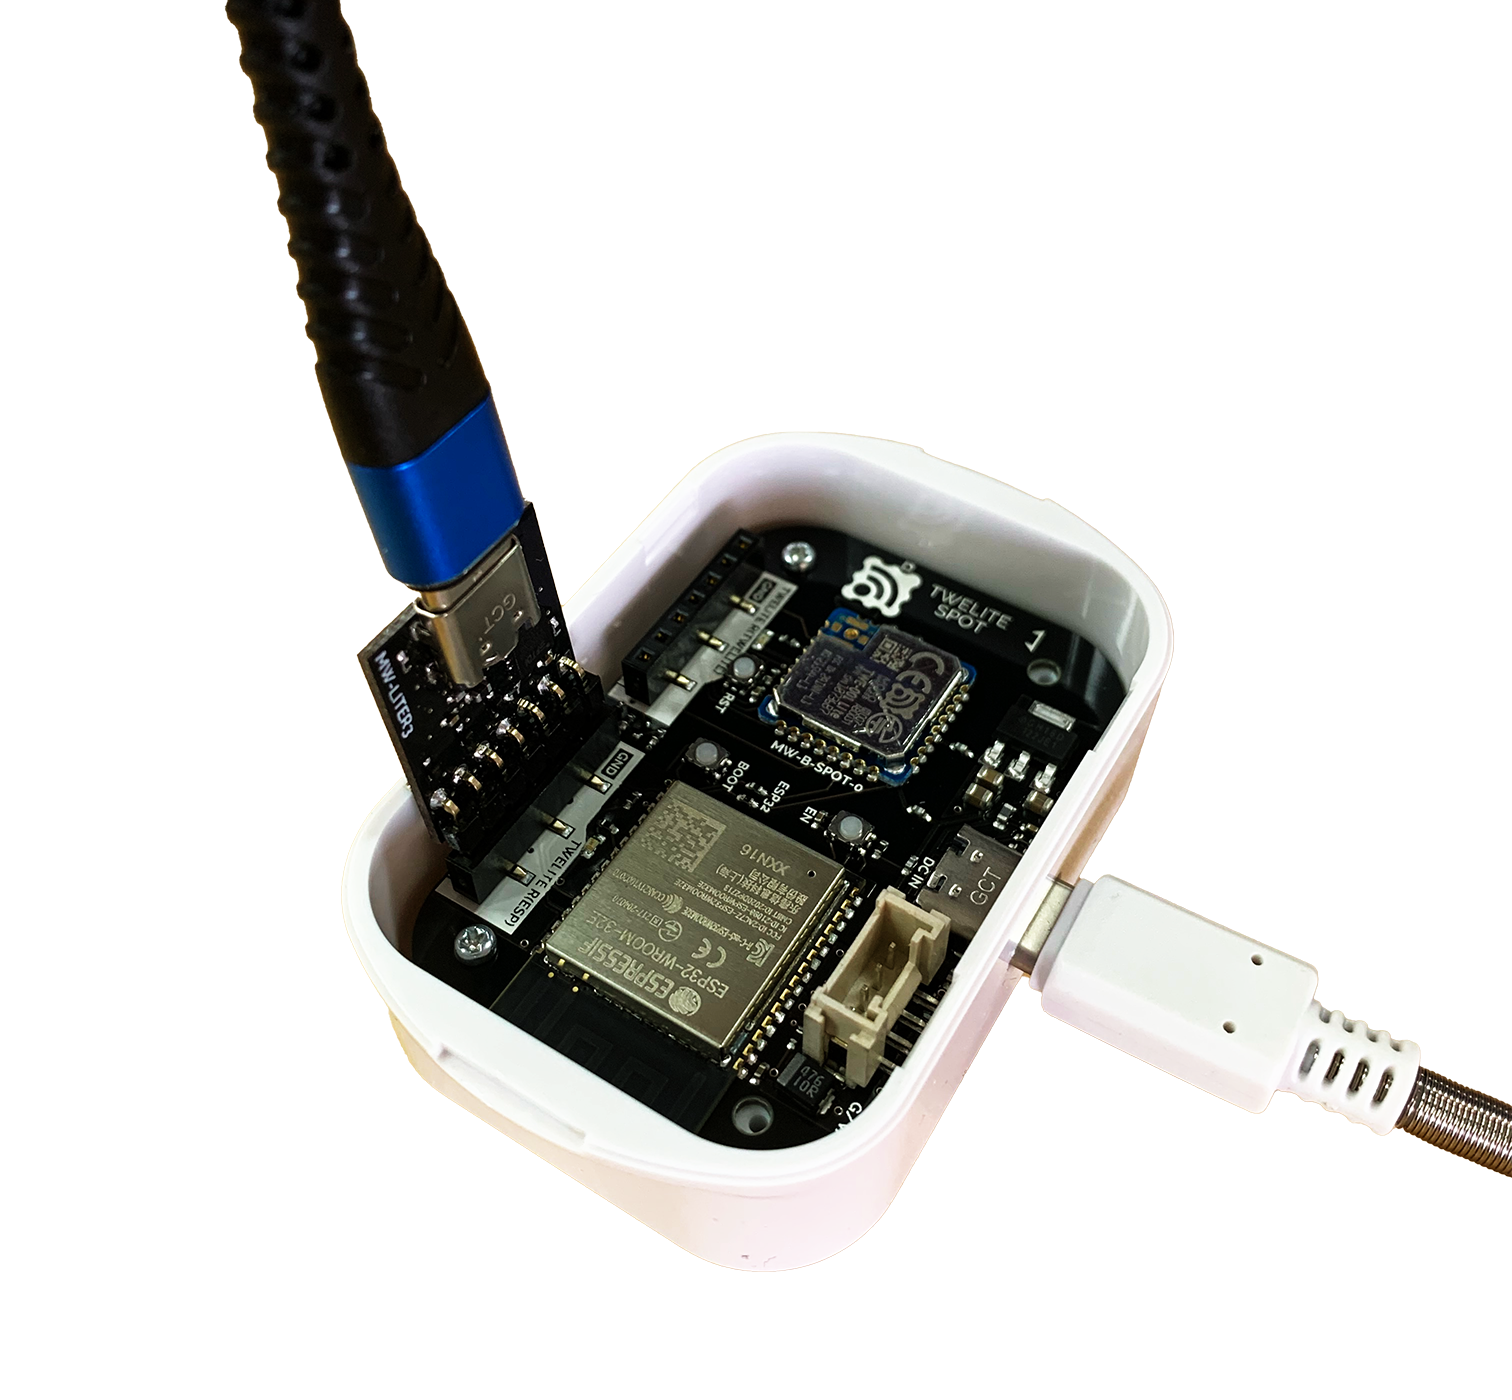
Connection Example (ESP32)
Operating Arduino IDE
Open the Sketch
Launch the Arduino IDE and open the sketch you want to write.
Select the Serial Port
From the Tools -> Serial Port menu, select the port for the TWELITE R3 / R2.
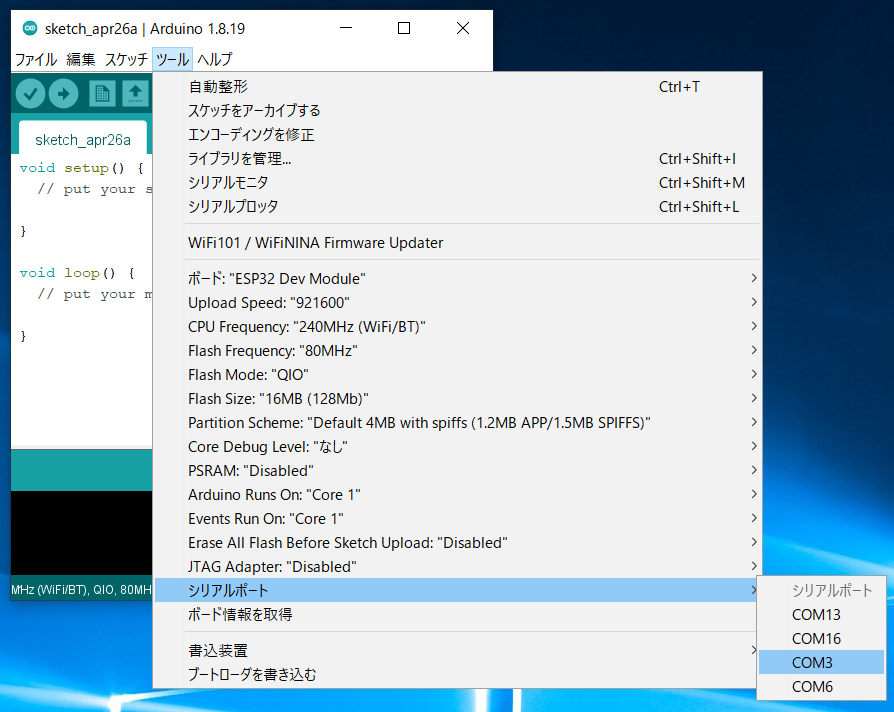
Selecting the Serial Port
COM?, and on macOS/Linux, it will be like /dev/tty?.Start ESP32 in Programming Mode
Press the ESP32 reset switch EN(RST) and the ESP32 boot switch BOOT on the TWELITE SPOT, then release them in the order of EN(RST) -> BOOT.
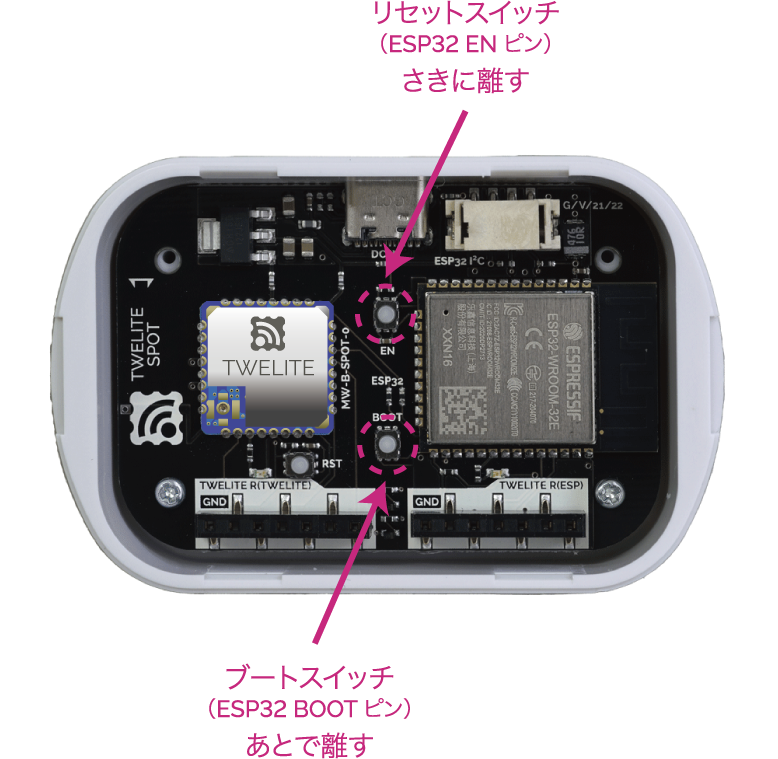
Button Positions
BOOT while resetting, you can enter the ESP32 programming mode.Execute Writing
Click the Write to Microcontroller Board button in Arduino IDE.
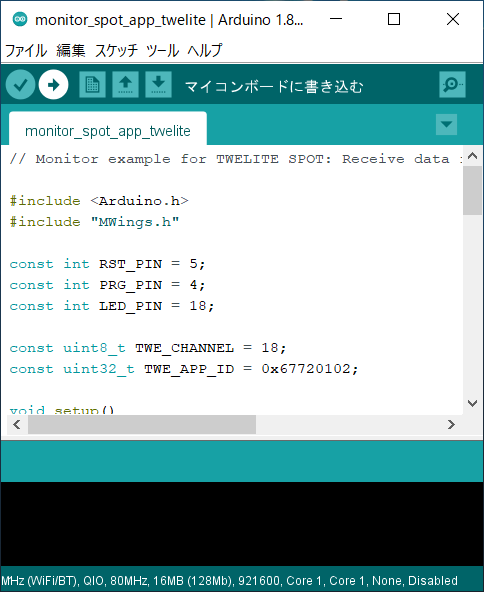
Write to Microcontroller Board
Hard resetting via RTS pin... will appear at the bottom of the screen.If writing fails and the following message appears, try changing the USB port or USB cable you are using.
A serial exception error occurred: Could not configure port: (6, 'Device not configured')
Reset ESP32
After writing is complete, press and release the ESP32 reset switch EN(RST) on the TWELITE SPOT to reset the ESP32.
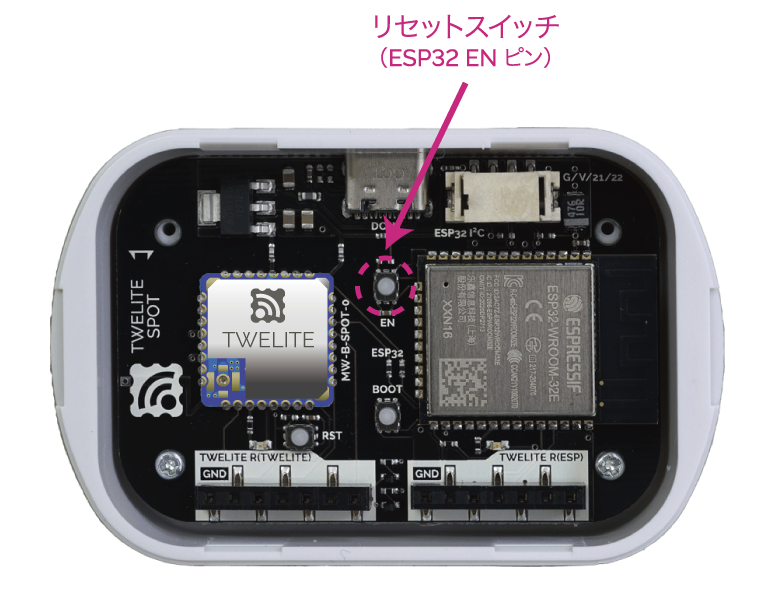
Reset Switch Position
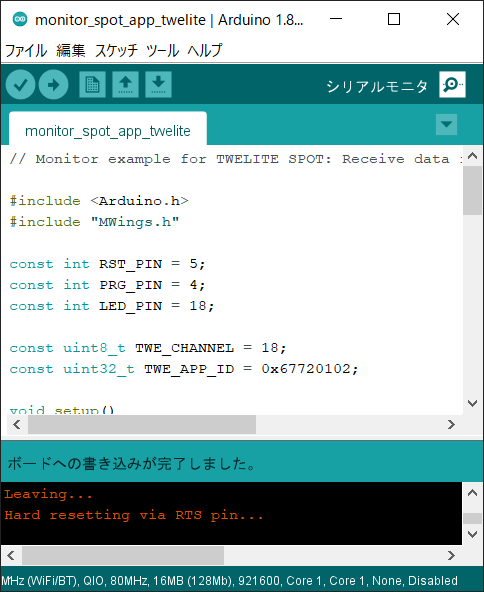
Writing Completion Screen