How to Write Firmware to TWELITE
How to write firmware to the TWELITE mounted on TWELITE SPOT
This guide explains how to write firmware to the TWELITE mounted on TWELITE SPOT.
The TWELITE SPOT shipped from the factory has the parent/relay application (App_Wings_SPOT) already written to the TWELITE. In the factory default state, there is no need to rewrite the TWELITE firmware.
The TWELITE mounted on TWELITE SPOT does not support configuration changes via interactive mode.
To set the TWELITE frequency channel or application ID, send commands via serial communication from the ESP32. In the Arduino environment, please use Twelite.begin().
Install TWELITE STAGE APP
The following is a simplified explanation for Windows. For macOS/Linux instructions or more detailed information about the TWELITE STAGE APP, please refer to the TWELITE STAGE APP Manual.
Download the TWELITE STAGE SDK and extract the downloaded file directly under the C drive.
Connect to Host
Connect TWELITE R3 / R2
Connect the TWELITE R3 / R2 to the 7P interface (the side labeled TWELITE).
Connect Power
Supply 5V power to the USB-C connector on the side.
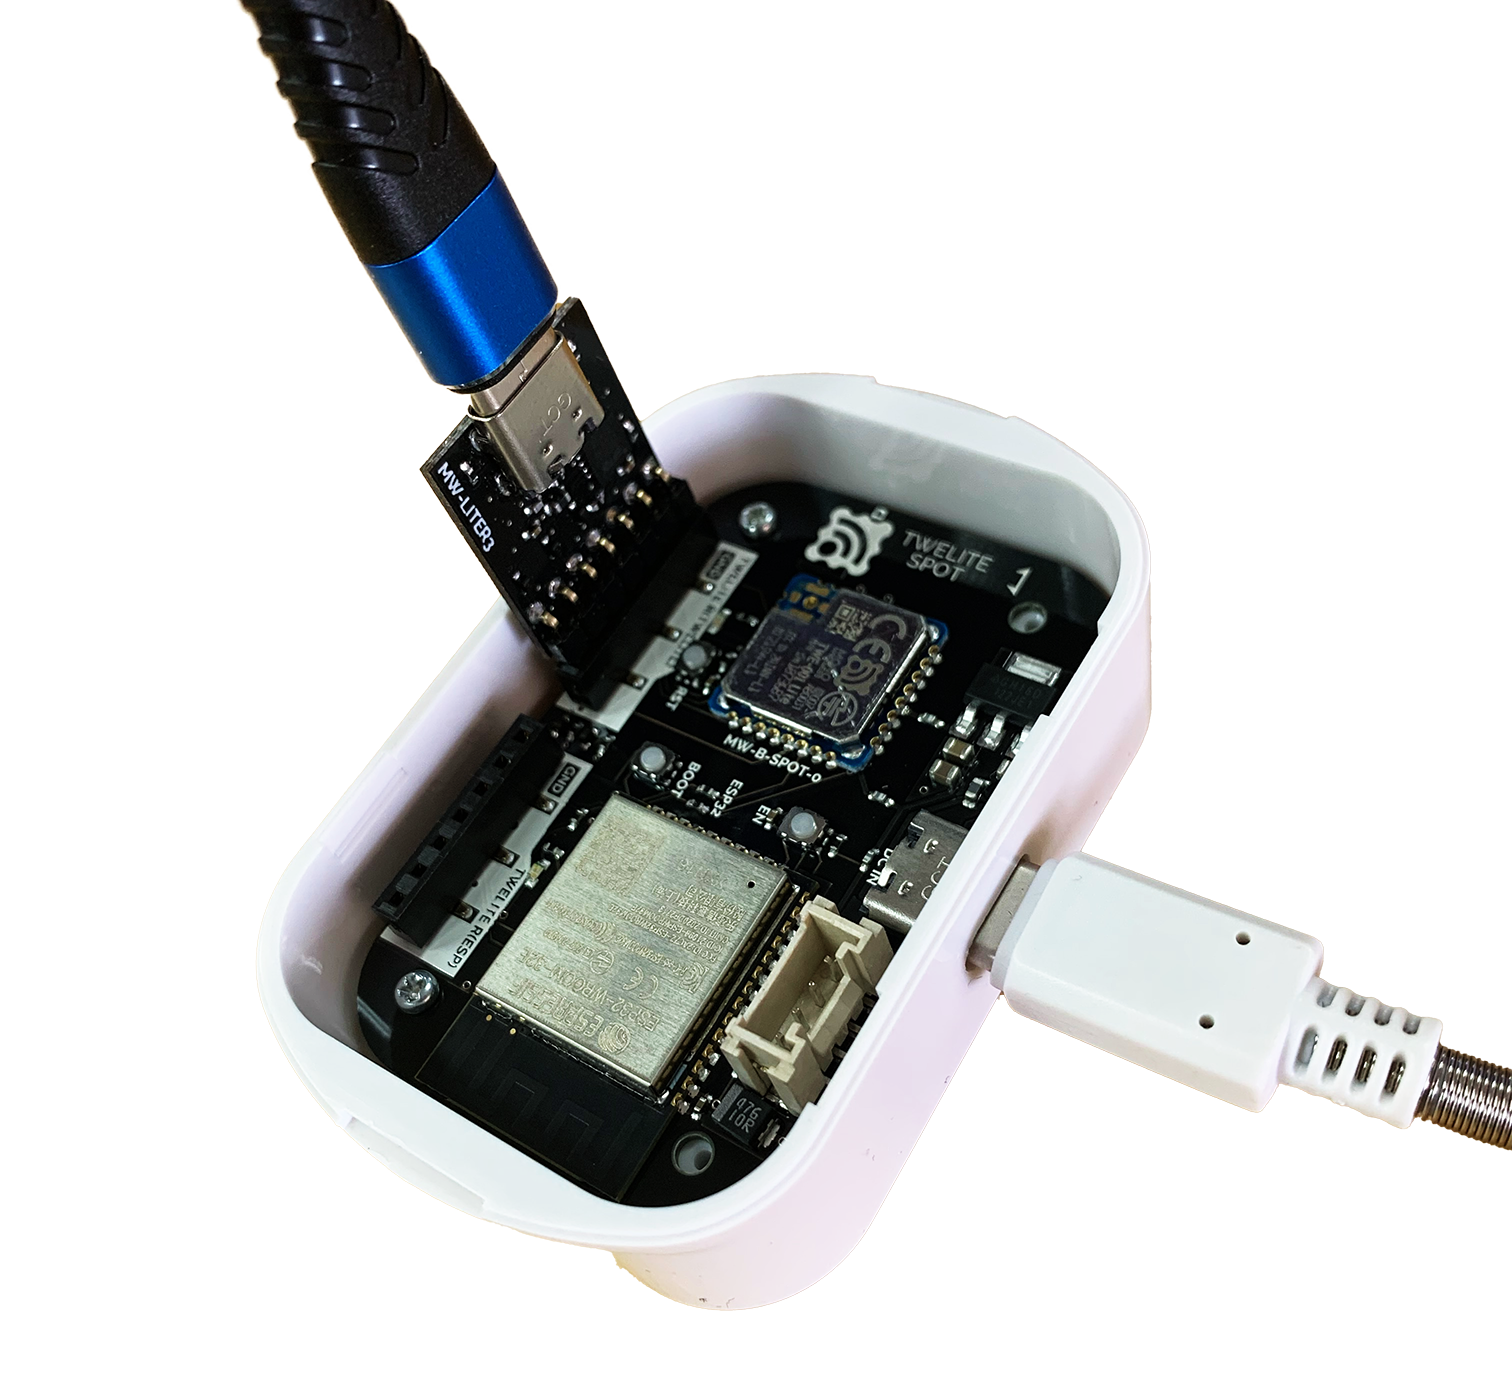
Connection Example (TWELITE)
Always connect the TWELITE R3 / R2 to the TWELITE SPOT in the orientation shown above. Connecting it incorrectly may damage the TWELITE SPOT or the TWELITE R3 / R2.
Operating the TWELITE STAGE APP
Launch the TWELITE STAGE APP (
TWELITE_Stage.exe).Select the TWELITE R3 / TWELITE R2 on the serial port selection screen.
From the main menu, select “Rewrite Application” and choose the application you want to rewrite.
For more details, please refer to the TWELITE STAGE APP Manual.