This guide provides the steps to set up tools for TWELITE SPOT firmware development.
This is the multi-page printable view of this section. Click here to print...
For suitable output, we recommend to use Google Chrome (15+) or Microsoft Edge (79+).
How to Set Up a Firmware Development Tools
How to set up tools for TWELITE SPOT firmware development
- 1: How to Set Up Development Tools With Arduino IDE 1.x
- 1.1: Installing Arduino IDE 1.x
- 1.2: Installing Arduino core for the ESP32
- 1.3: Configuring Arduino core for the ESP32
- 1.4: Installing the MWings Library
- 2: Setting Up Development Environment with Arduino IDE 2.x
1 - How to Set Up Development Tools With Arduino IDE 1.x
Instructions for setting up a development tools with Arduino IDE 1.x
This guide explains the procedure for setting up a development tools with Arduino IDE 1.x.
Although you can upload sketches using the latest Arduino IDE 2.x just like with Arduino IDE 1.x, as of May 2023, Java-based plugins such as
arduino-esp32fs-plugin and EspExceptionDecoder do not work, so the Legacy IDE (1.x) is recommended.1.1 - Installing Arduino IDE 1.x
How to install the integrated development environment (IDE)
This guide explains the installation procedure for Arduino IDE 1.x.
If you have already installed Arduino IDE 1.x, you can ignore this article.
Download
Open the Arduino official download page in your web browser and download the Legacy IDE (1.8.X).
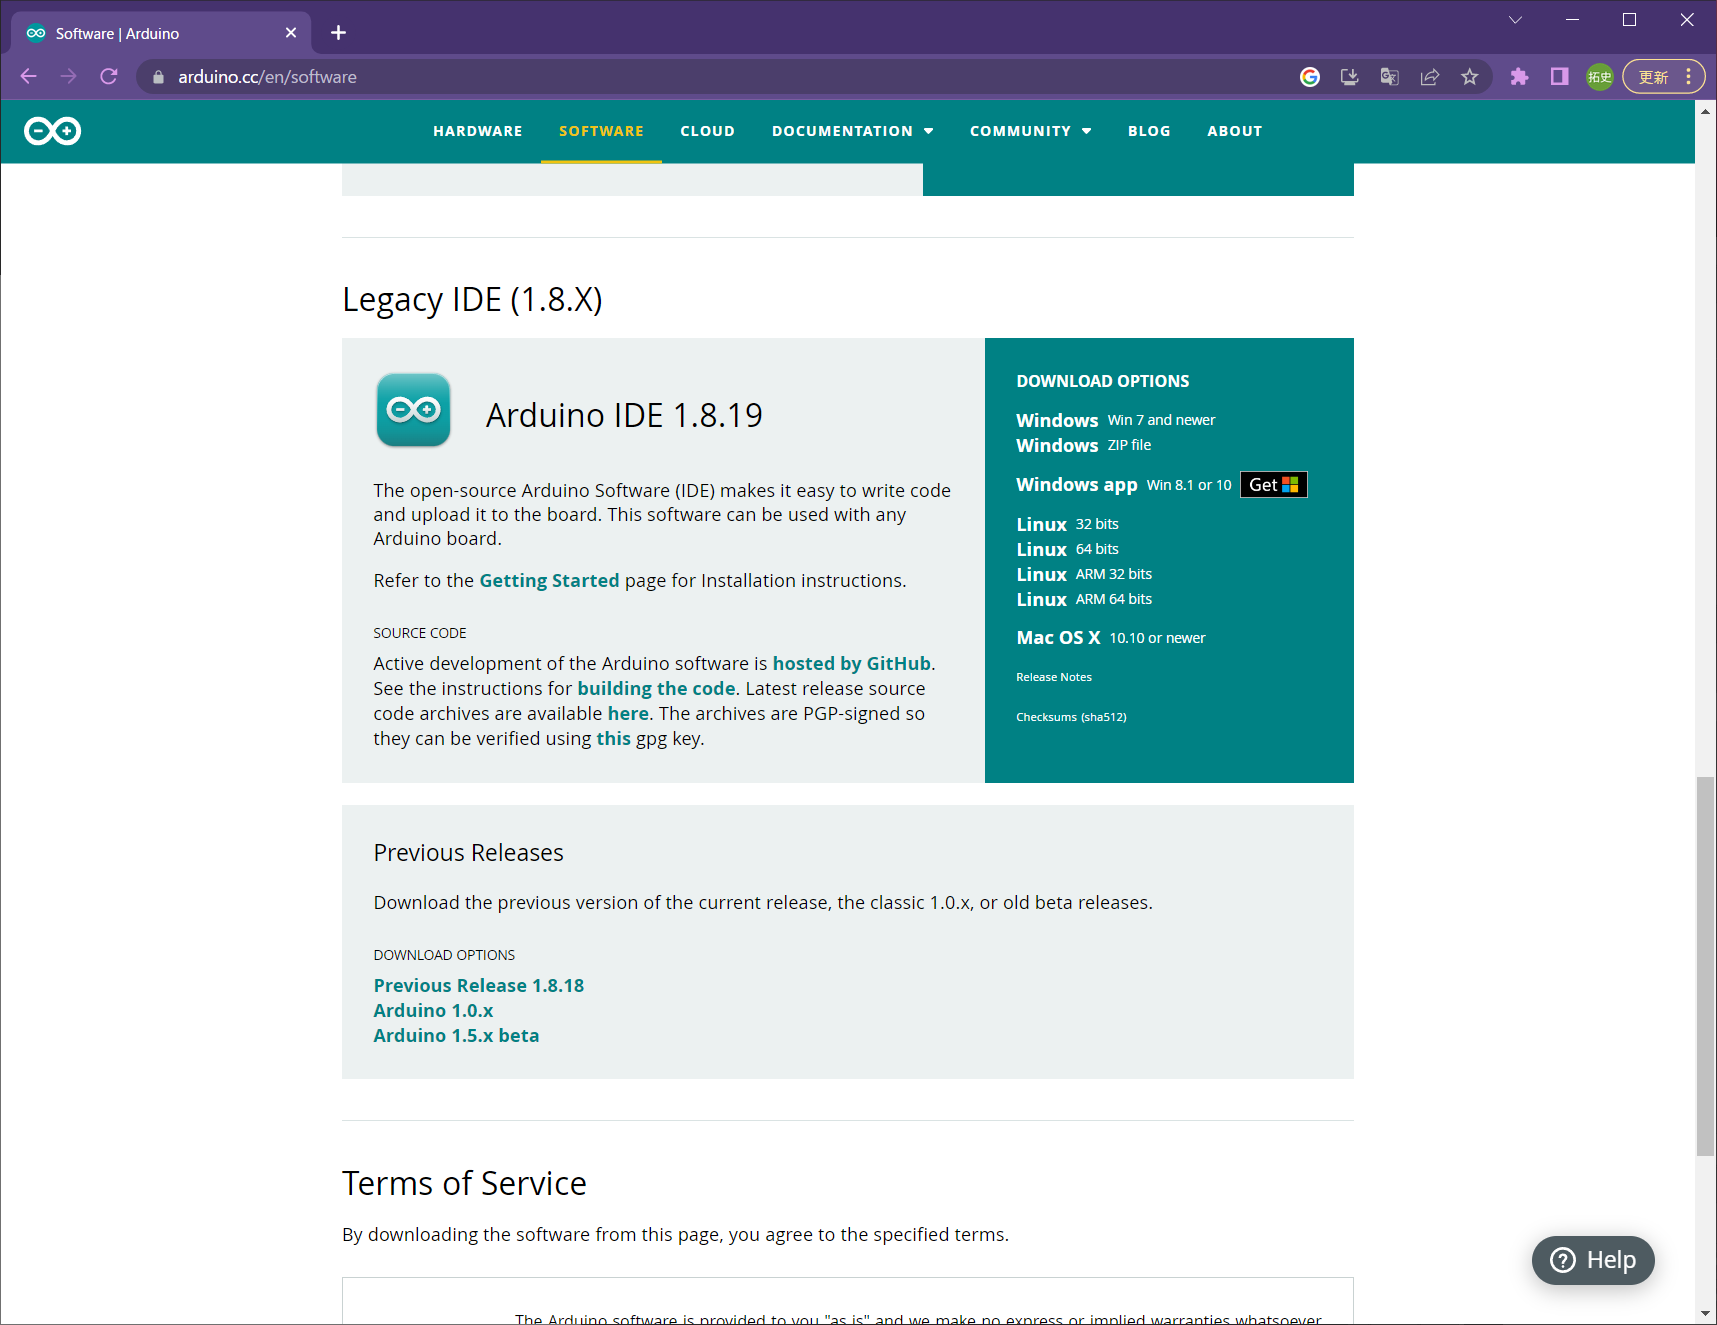
Software | Arduino
For example, the Windows installer is “Windows Win 7 and newer”.
Installation
Run the downloaded file and follow the instructions to install Arduino IDE 1.x.
1.2 - Installing Arduino core for the ESP32
How to install the toolchain for ESP32
This guide explains how to install the compiler and libraries dedicated to the ESP32 for Arduino.
If you have already installed the Arduino core for the ESP32, you can ignore this article.
For detailed installation instructions, please refer to the official documentation (in English).
Adding Board Information
Launch Arduino IDE 1.x and open File -> Preferences from the toolbar.
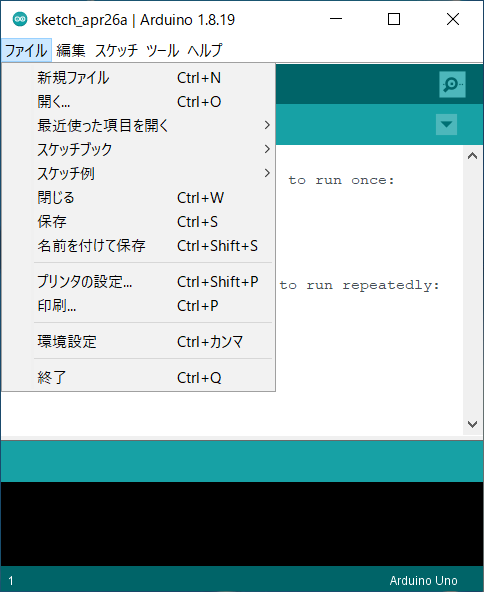
Location of Preferences
Enter the following URL into the Additional Board Manager URLs field and click OK.
https://espressif.github.io/arduino-esp32/package_esp32_index.json
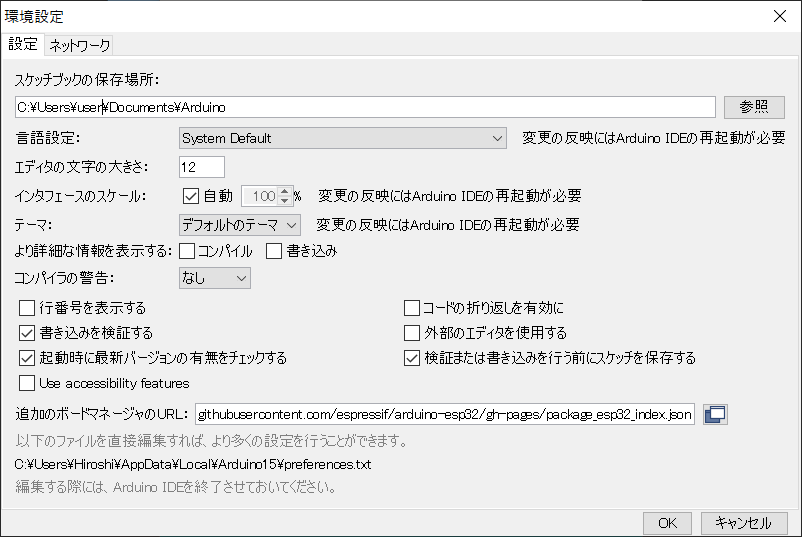
Preferences Window
Installation
Open Tools -> Board: “Arduino Uno” -> Board Manager from the toolbar.
The selected board may not be “Arduino Uno”, but please proceed with the same steps.
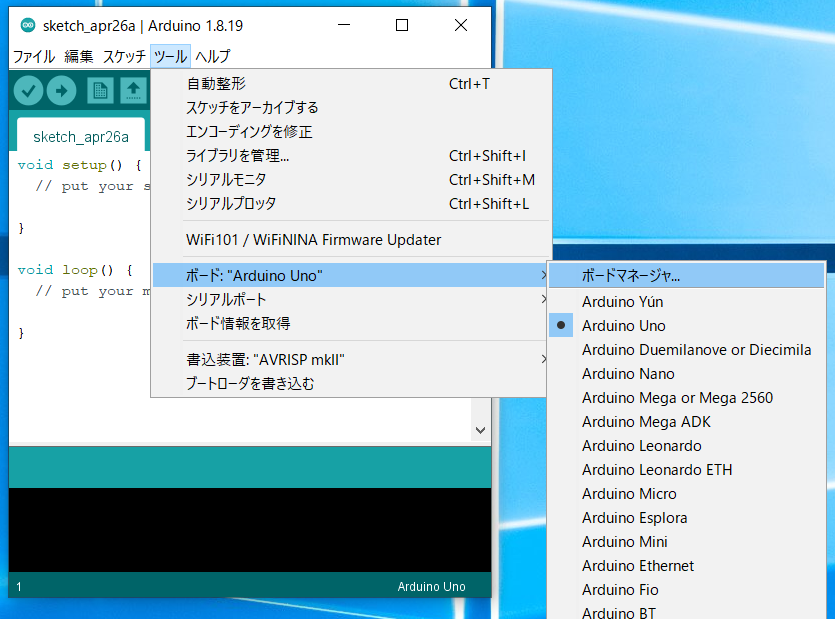
Location of Board Manager
Type “ESP32” in the search box and install the esp32 board definitions.
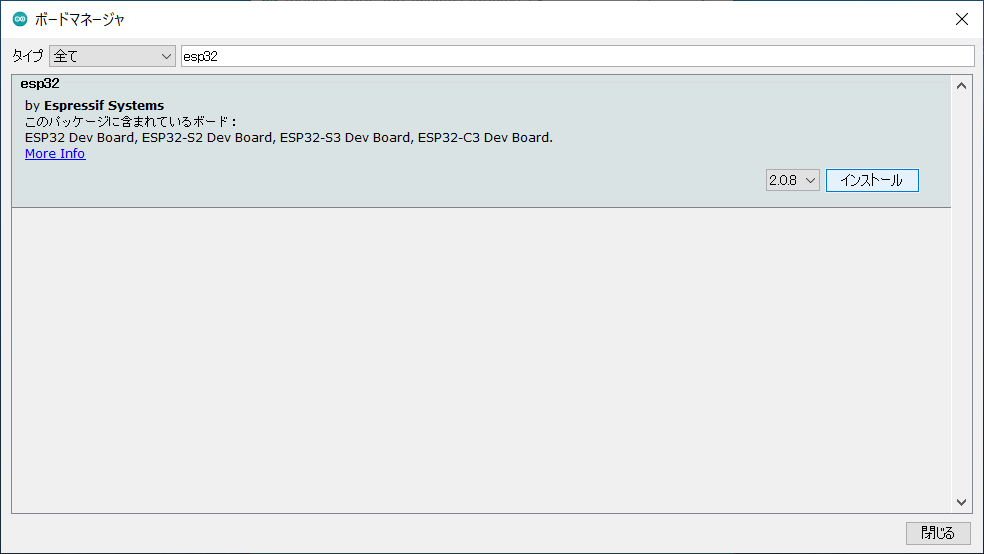
Board Manager
Operation has been confirmed with version
2.0.5 or later through 3.3.0 or earlier.1.3 - Configuring Arduino core for the ESP32
How to configure the toolchain for ESP32
This guide explains how to configure the Arduino core for the ESP32 required for TWELITE SPOT firmware development.
From here on, the content is specific to TWELITE SPOT.
Selecting the Board Type
From the toolbar, select Tools → Board → ESP32 Arduino → ESP32 Dev Module.
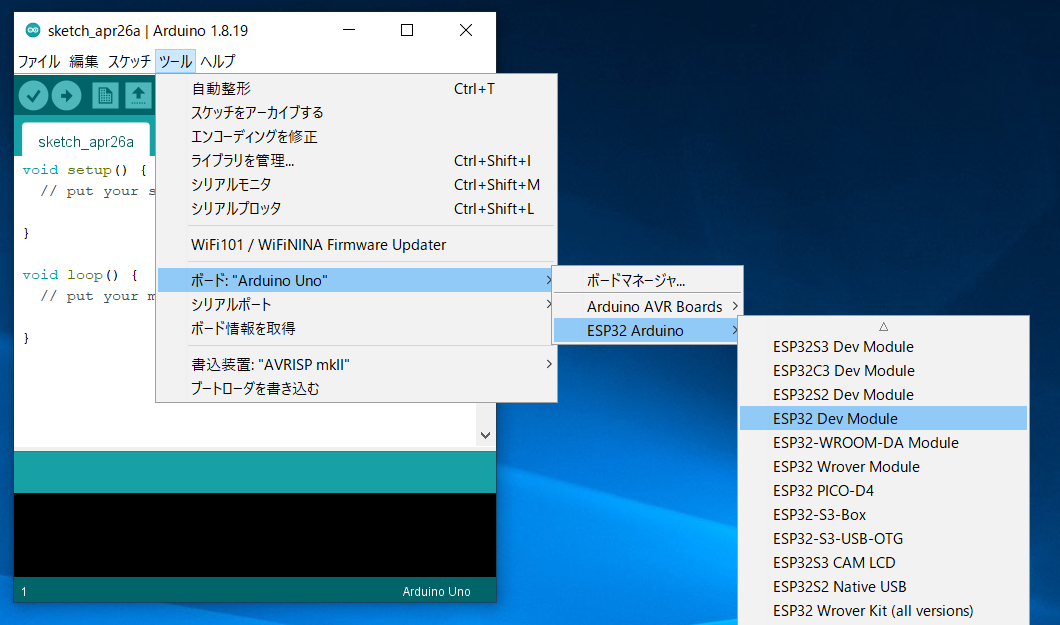
Location of ESP32 Dev Module
Board Settings
Please configure as shown in the image below.
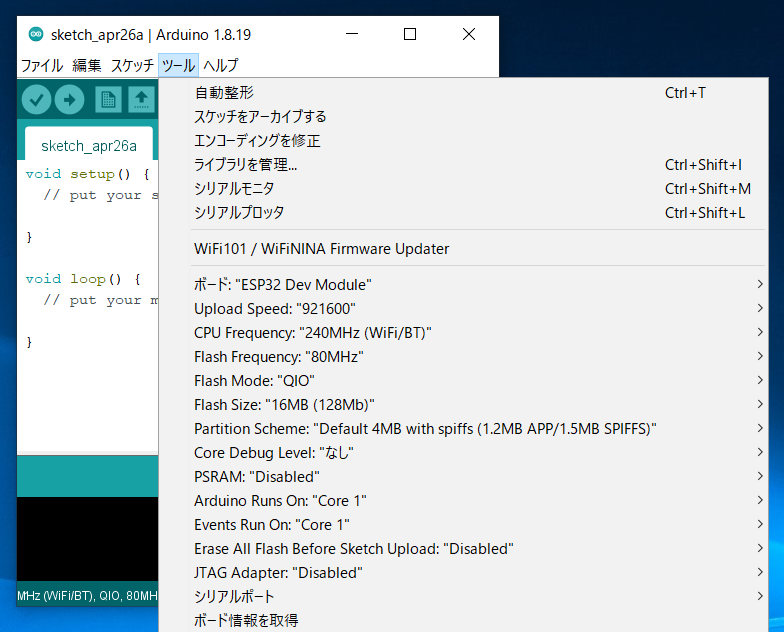
Settings after configuration
By default, the Flash size is set to 4MB (32Mb).
Please change this to 16MB (128Mb).
1.4 - Installing the MWings Library
How to install the MWings library for using TWELITE
This guide explains the installation procedure for the MWings library used with TWELITE.
Installation
Open Sketch -> Include Library -> Manage Libraries…
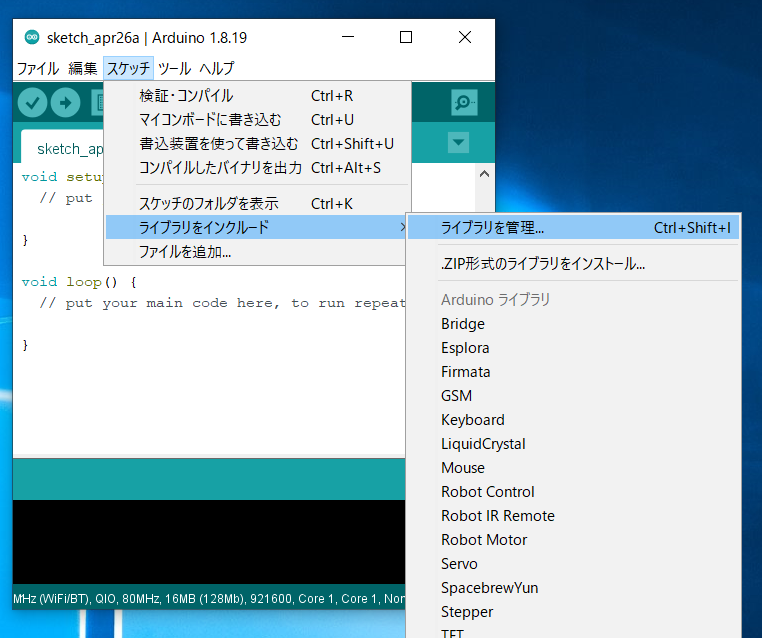
Location of the Library Manager
Type MWings in the search box and install MWings.
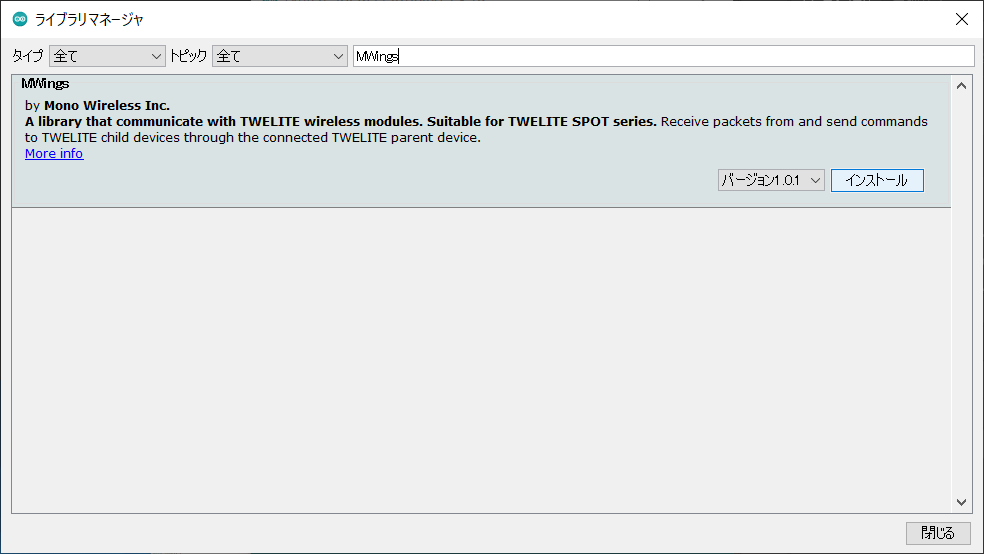
Library Manager
2 - Setting Up Development Environment with Arduino IDE 2.x
Steps for setting up a development environment using Arduino IDE 2.x
This guide outlines the steps for setting up a development environment using Arduino IDE 2.x.
2.1 - Installing Arduino IDE 2.x
Installation procedure for the integrated development environment (IDE)
This guide outlines the steps for installing Arduino IDE 2.x.
If you already have Arduino IDE 2.x installed, you can skip this section.
Download
Open Arduino official download page in your web browser and download Arduino IDE (2.X.X).
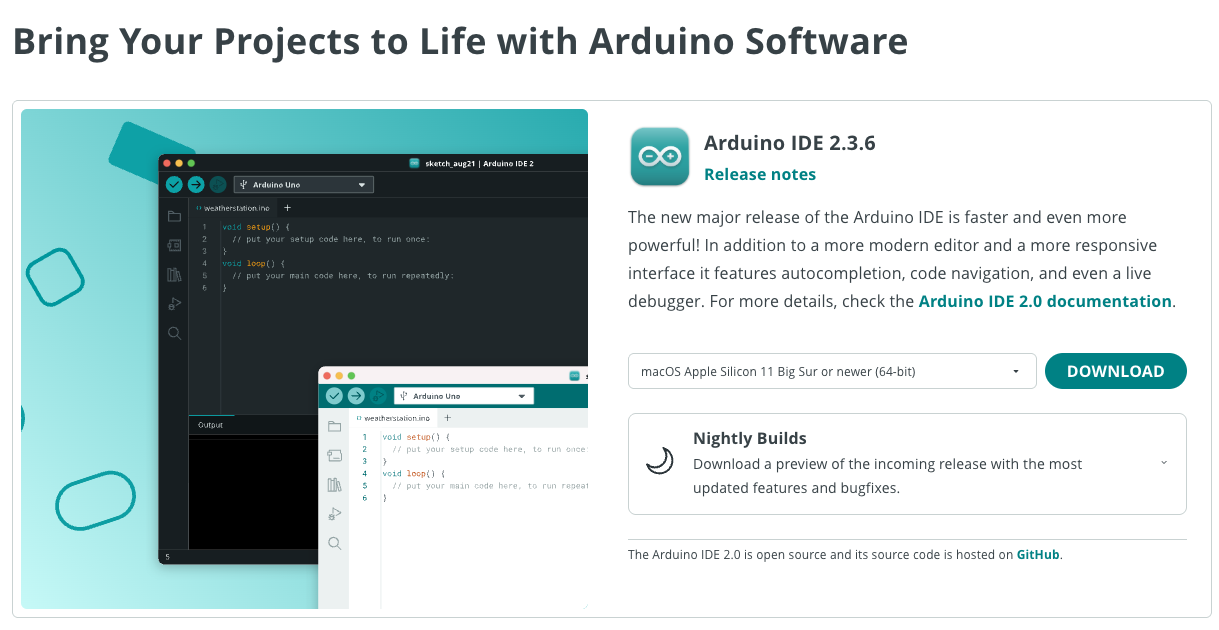
Software | Arduino
Installation
Run the downloaded file and follow the instructions to install Arduino IDE 2.x.
2.2 - Installing Arduino core for the ESP32
Installation procedure for ESP32 toolchain
This guide outlines the procedure for installing ESP32-specific compilers and libraries compatible with Arduino.
If you already have Arduino core for the ESP32 installed, you can skip this section.
For detailed installation instructions, refer to the official documentation.
Adding Board Information
Launch Arduino IDE 2.x and open Preferences from the toolbar.
Enter the following URL in the Additional Boards Manager URLs field and click OK:
https://espressif.github.io/arduino-esp32/package_esp32_index.json
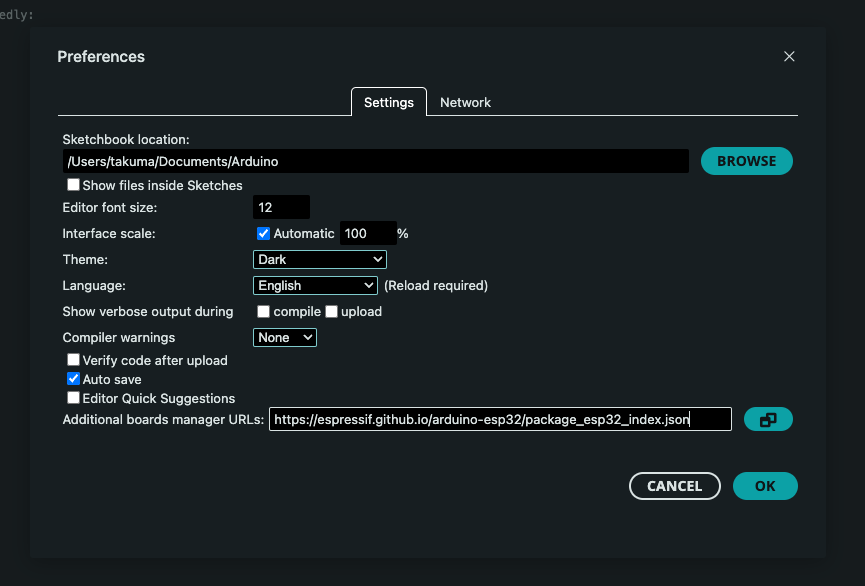
Preferences screen
Installation
Open the Boards Manager from the second icon from the top in the sidebar.
Type “ESP32” in the search box and install the esp32 board definition.
Select
esp32, not Arduino ESP32 Boards.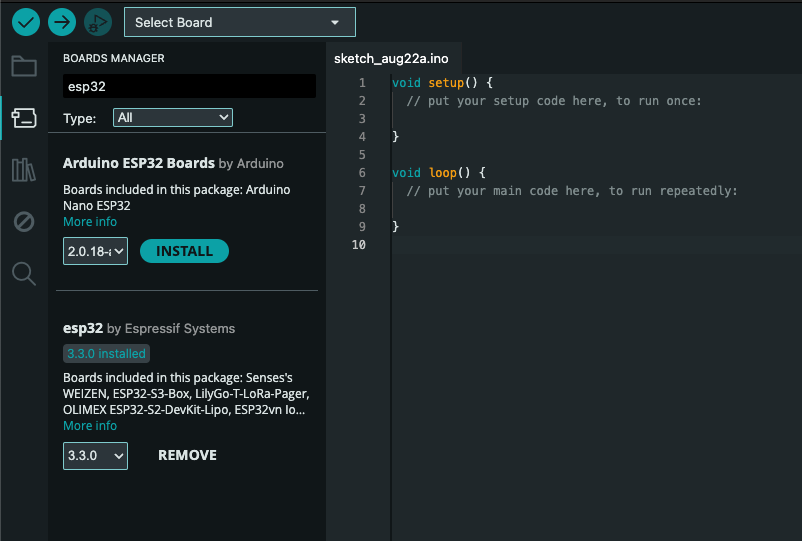
Boards Manager screen
We have verified compatibility with version
3.3.0.2.3 - Configuring Arduino core for the ESP32
Configuration method for ESP32 toolchain
This guide outlines the Arduino core for the ESP32 configuration required for TWELITE SPOT firmware development.
This section contains TWELITE SPOT-specific content.
Board Selection
Select Tools -> Board -> ESP32 Arduino -> ESP32 Dev Module from the toolbar.
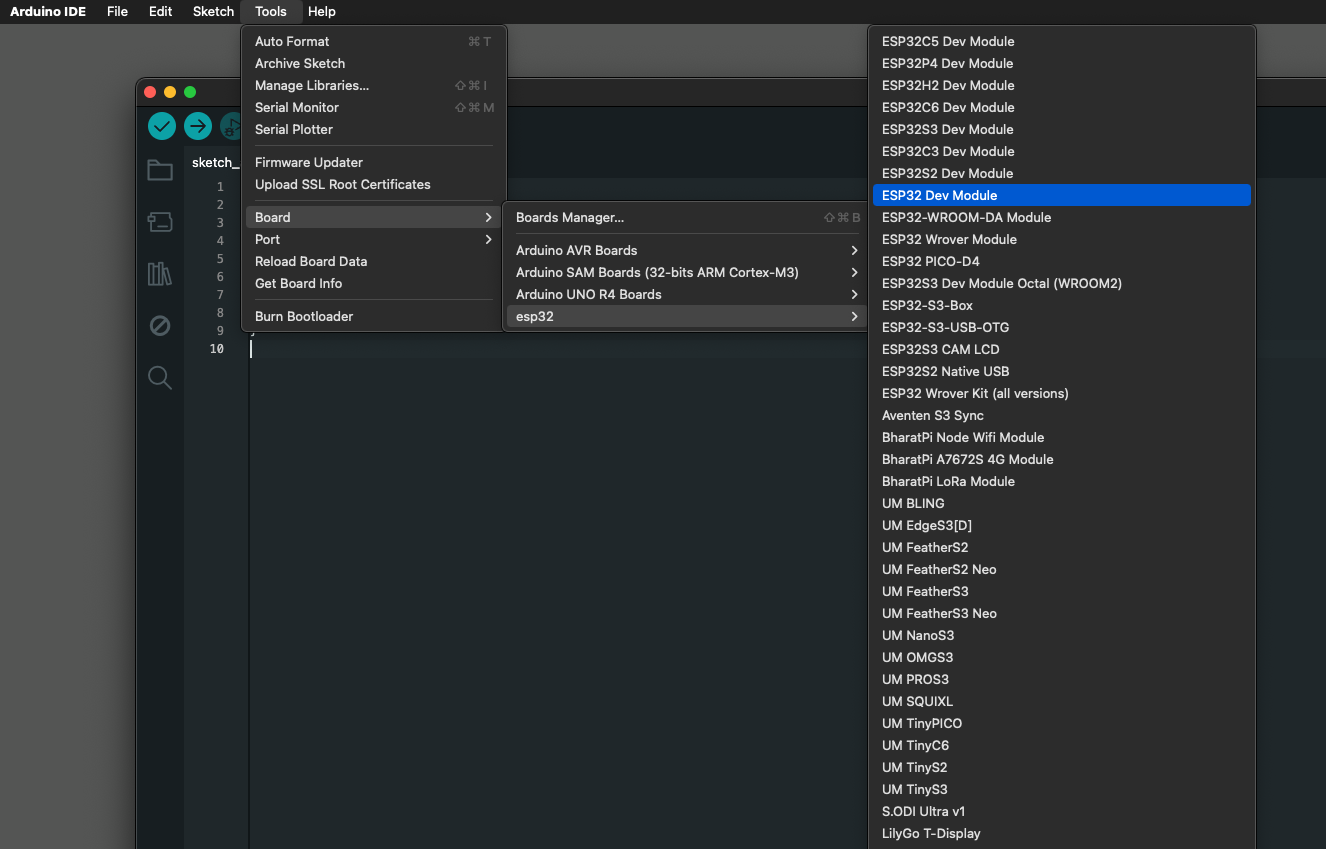
ESP32 Dev Module location
Board Configuration
Configure the settings as shown in the image below:
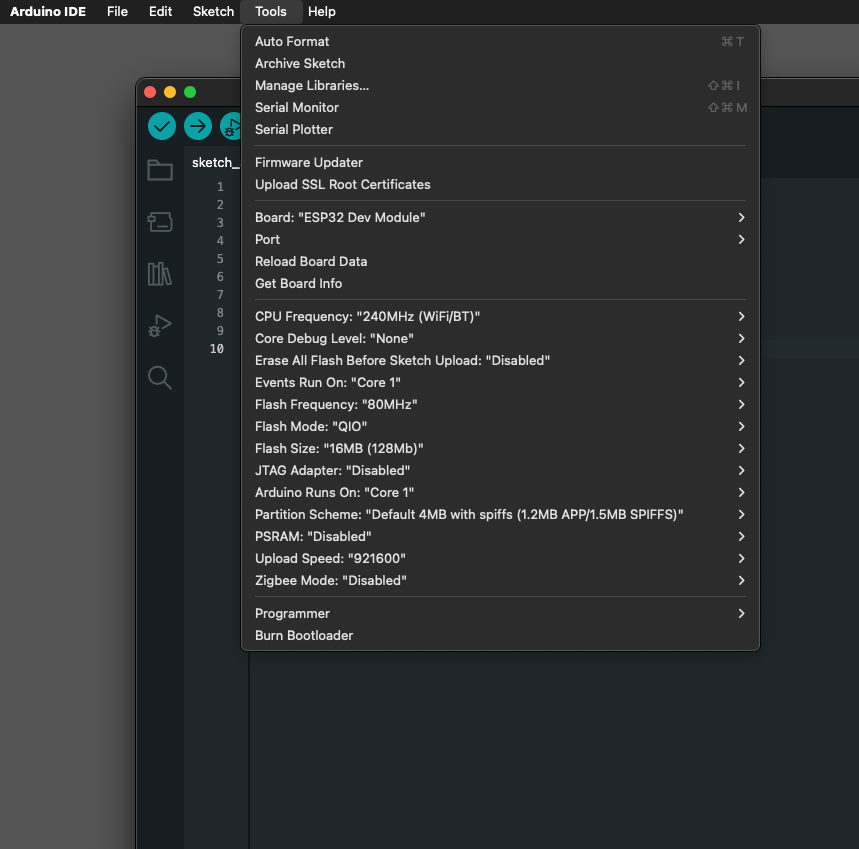
Configuration settings
By default, Flash Size is set to 4MB (32Mb).
Change this to 16MB (128Mb).
If programming fails, try changing
Flash Mode: QIO to Flash Mode: DIO.2.4 - Installing MWings Library
Installation procedure for the MWings library for using TWELITE
This guide outlines the procedure for installing the MWings library required for using TWELITE.
Installation
Open Sketch -> Include Library -> Manage Libraries…
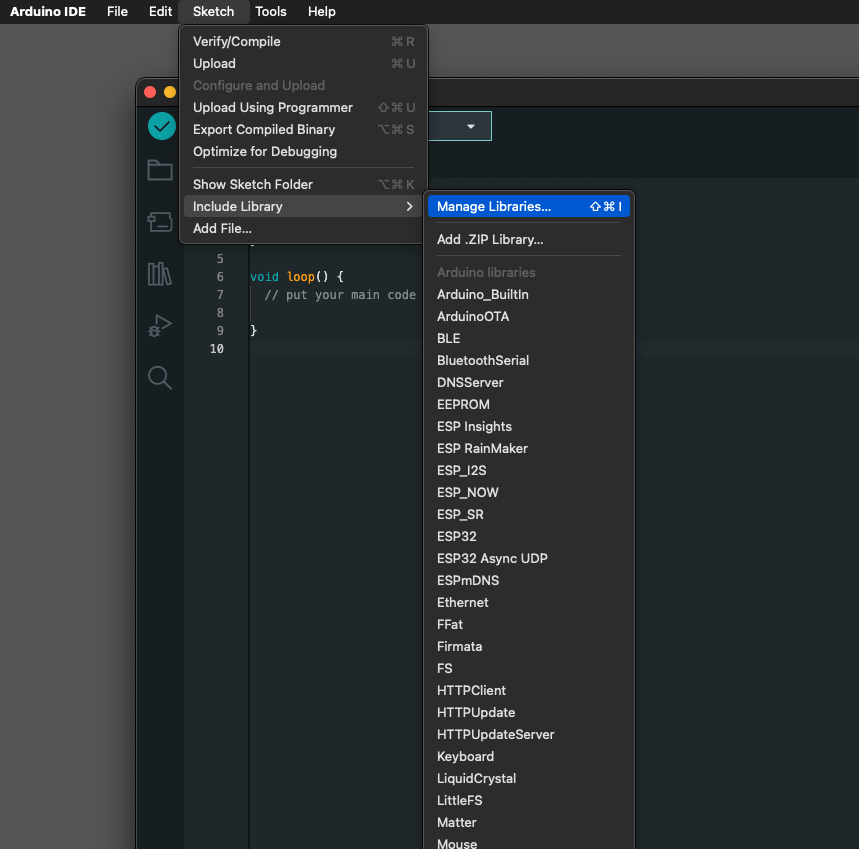
Library Manager location
Type MWings in the search box and install MWings.
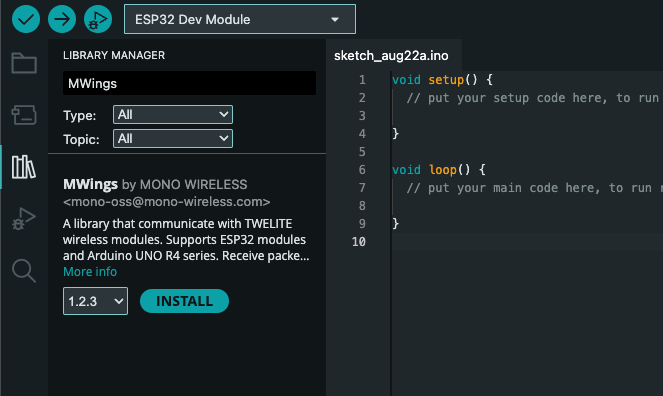
Library Manager