Checking Operation of Aria App
Required Items
- TWELITE CUE
- MONOSTICK
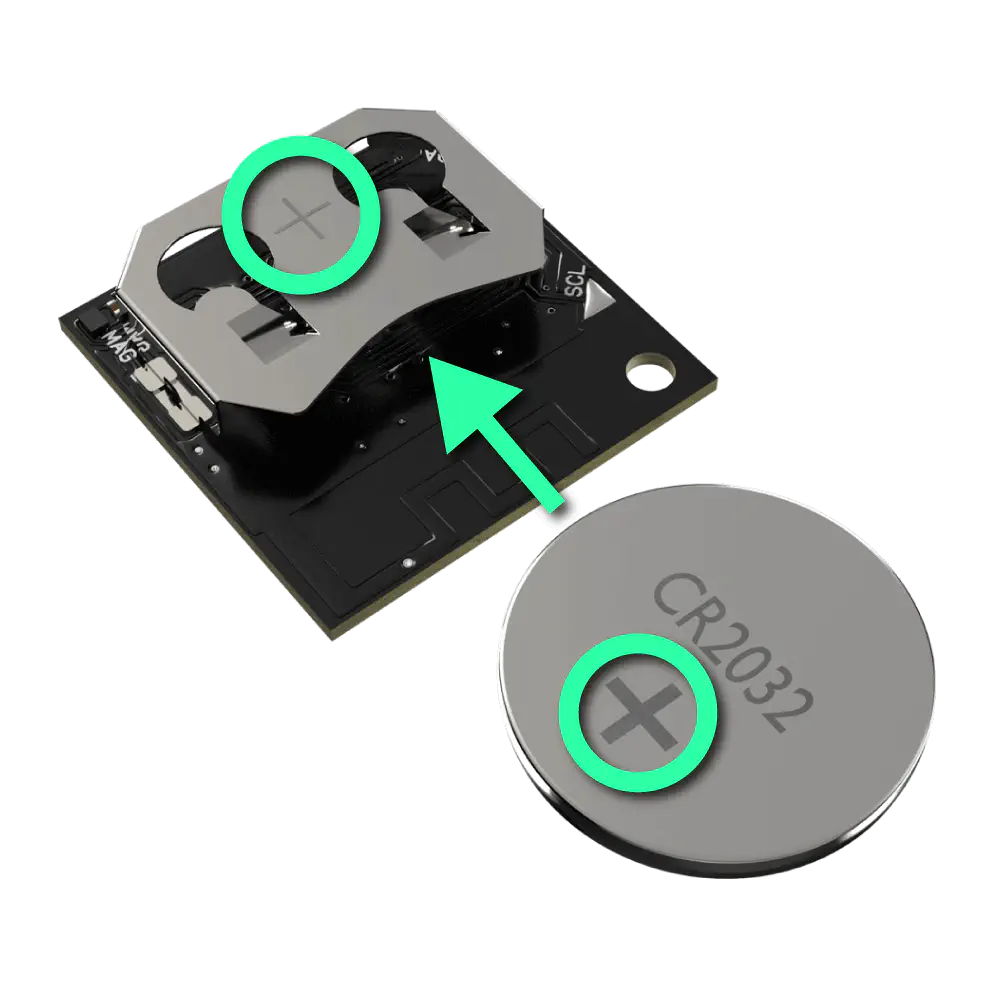
Insert the Battery
Insert the CR2032 battery with the + side aligned with the + side of the battery holder. If the LED on the TWELITE CUE blinks 3 times, it is normal.
After startup, it transmits every 5 seconds, and the LED blinks once during transmission.
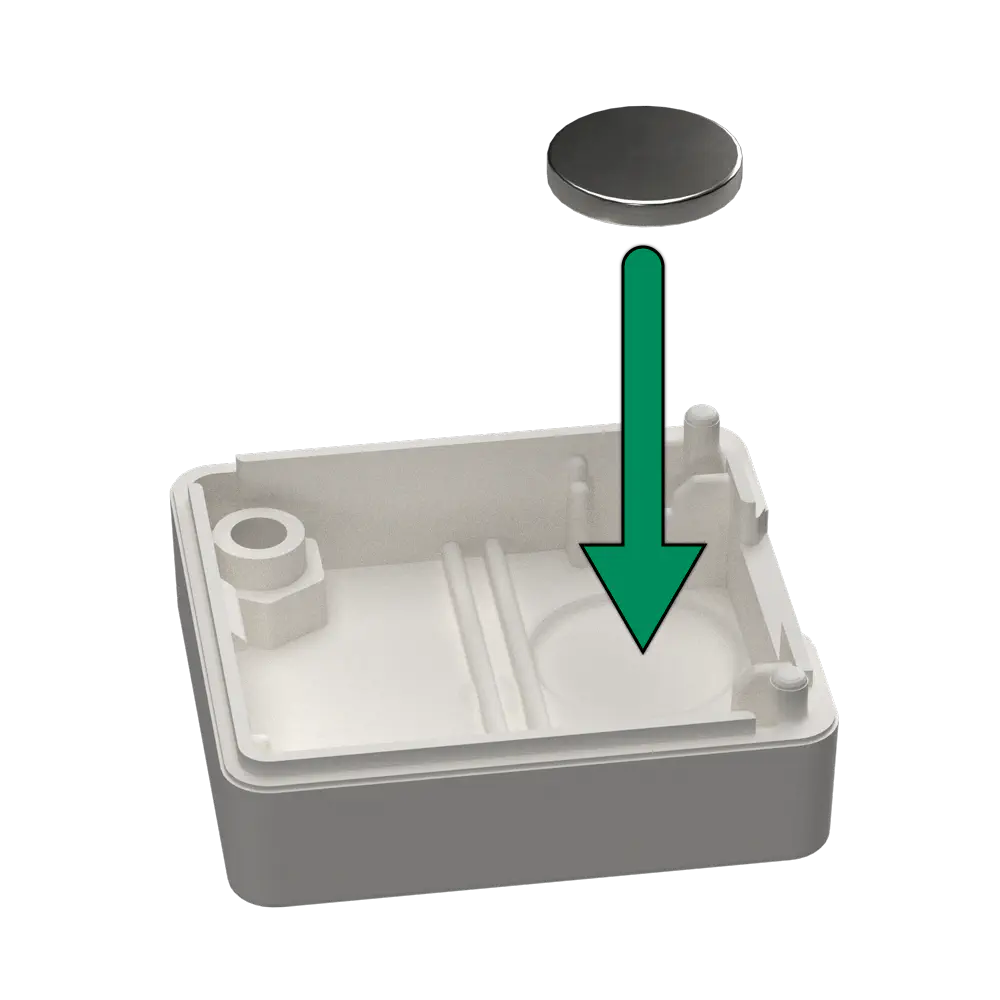
Battery Installation
Also, because the battery holder of TWELITE ARIA is structurally prone to solder joint detachment, please be careful when inserting the battery as follows:
- When removing the coin battery, it is recommended to lightly press the battery holder from above with your finger to reduce force on the solder joints while removing the coin battery.
- When using TWELITE ARIA, it is recommended to use it with a dedicated case that presses the battery holder from above.
Attach Fixing Magnet
By attaching a magnet to the recess at the position shown in the figure, you can stick TWELITE ARIA to a metal surface. Use as needed.
Magnet Installation Location
Insert into Case
Hook the board on the claws on the edge of the case as indicated by the circle marks.
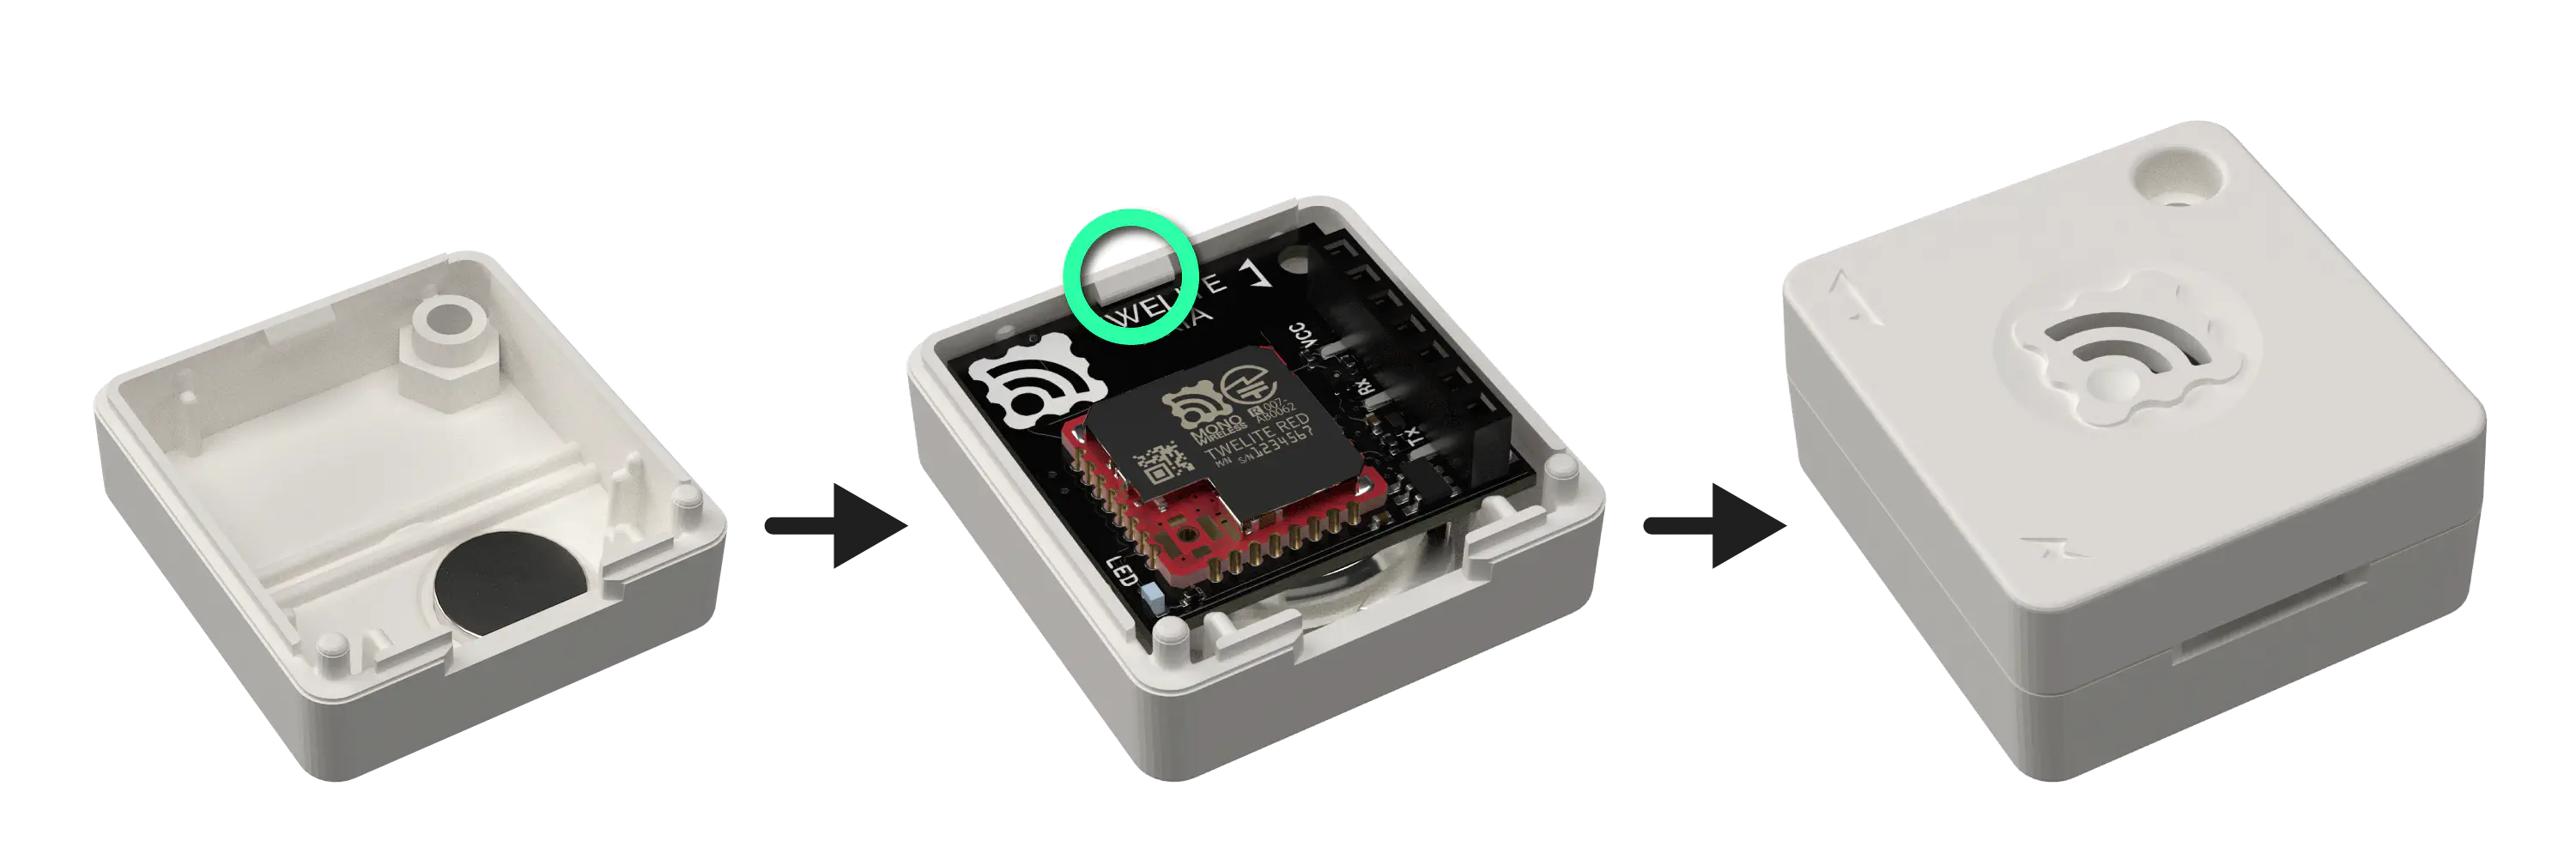
Inserting the Board
Open the Case
Insert a coin into the notch on the case and pry it open.
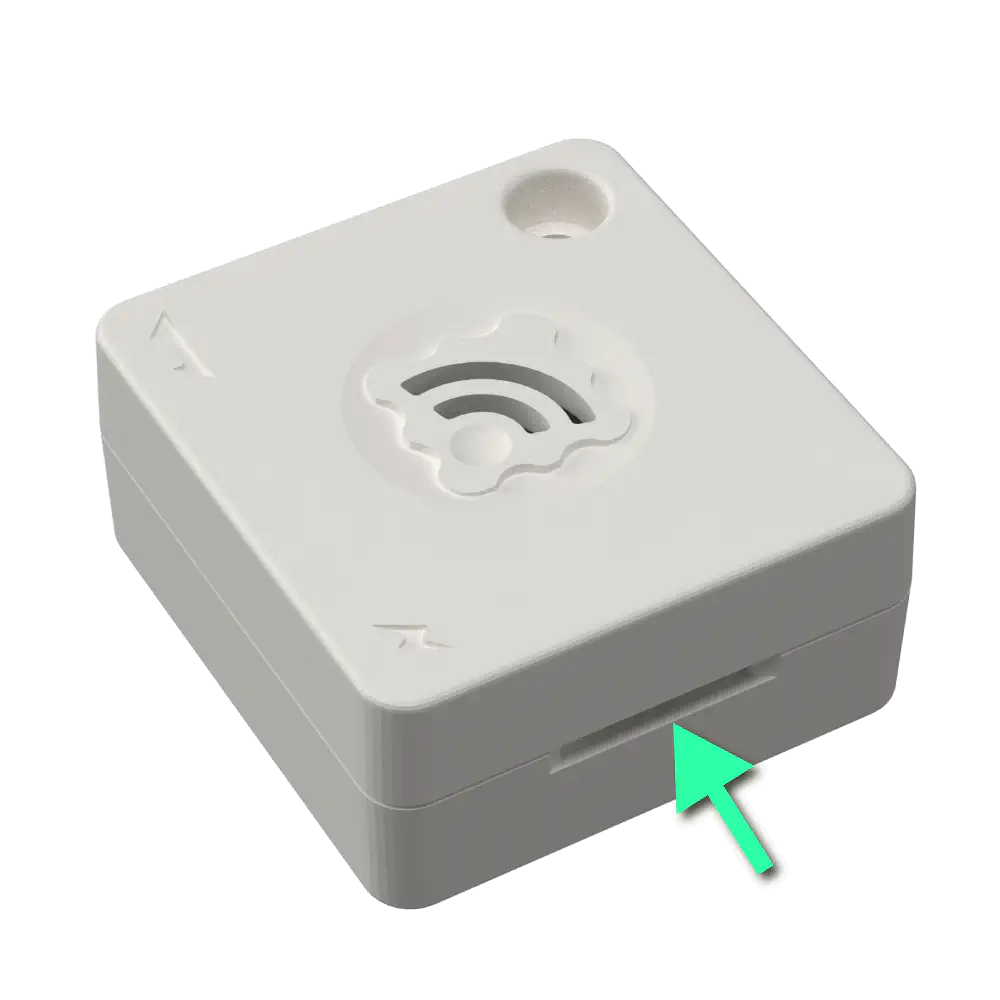
Where to Insert the Coin
Prepare Parent and Repeater
A parent device is required as a communication partner. If you want to extend communication distance, a repeater can be used. You can use MONOSTICK - MonoStick as the parent and repeater devices.
Please write the app version v1-01-4 or later of the Parent/Repeater App Wings to MONOSTICK - MonoStick.
Check Operation
Try moving the TWELITE ARIA or bringing a magnet close, and check the data received by the MONOSTICK connected to the PC.
Prepare TWELITE STAGE SDK
First, install the latest version of TWELITE STAGE SDK on your PC.
Launch TWELITE STAGE APP
- Connect MONOSTICK to the USB port of your PC.
- Double-click the following files inside the MWSTAGE folder of the installed TWELITE STAGE SDK.
・TWELITE_stage.exe (Windows)
・TWELITE_stage.command (macOS)
・TWELITE_stage.run (Linux)
When launched, the MONOSTICK connected via USB will be displayed on the screen. - Select 1: MONOSTICK from the serial port selection screen.
- When the device is selected, the top menu screen of TWELITE STAGE APP will be displayed.
Prepare Parent Device
A parent device is required as a communication partner. You can use MONOSTICK - MonoStick as the parent device.
Please write the Parent/Repeater App Wings to MONOSTICK - MonoStick following the steps below.
- From the top menu, select 2: Rewrite App > 1: Select from BIN.\
- If you are using MONOSTICK BLUE, select App_Wings_MONOSTICK_BLUE_…, and if you are using MONOSTICK RED, select App_Wings_MONOSTICK_RED_…
- After writing is complete, do not enter interactive mode; press and hold the ESC key to return to the top menu.
Select Viewer
- From the top menu, select 1: Viewer > 4: CUE/ARIA Viewer.
- Click the TWELITE ARIA tab.
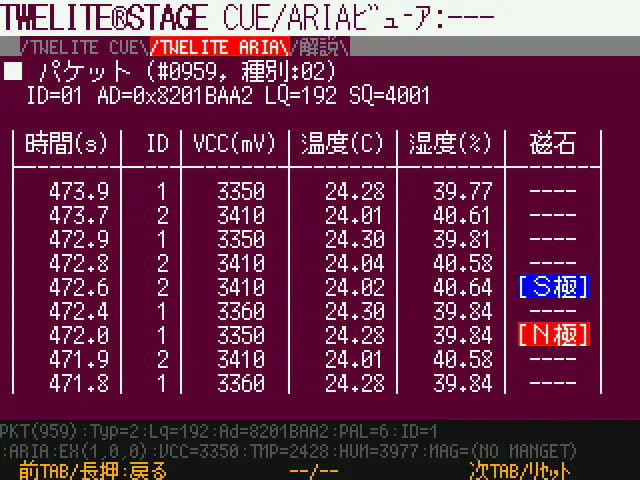
TWELITE ARIA Viewer
Check Operation of TWELITE ARIA
Measure Temperature and Humidity
Temperature and humidity values are updated every 5 seconds.
Detect Magnet
- When the N pole of a magnet is brought close to the magnetic sensor, “[N pole]” is displayed.
- When the S pole of a magnet is brought close to the magnetic sensor, “[S pole]” is displayed.
- When the magnet is moved away from the magnetic sensor, “ —- ” is displayed.
Change Mode
You can change the behavior of TWELITE ARIA by changing the mode.
Please refer to the following page for details.
Change Settings
You can set grouping and transmission frequency changes in interactive mode.
Please refer to the following page for how to enter interactive mode.
Also, please refer to the following page for the items that can be set.
Output Log
You can output data such as temperature and humidity in CSV format to a log using pulse scripts.
Please refer to the following page for details.
Draw Graph
You can view temperature, humidity, and magnetic sensor values as graphs using the PalViewer.
Please refer to the following page for details.