MCUXpresso Environment Setup
Developing with MCUXpresso is not mandatory. You can usually build with the TWELITE STAGE app or a Makefile, but please note the following:
- If you want to use a debugger, etc., you need to build and run with MCUXpresso.
- There is no compatibility with NXP’s template source code or library source code.
- Some of the features provided by MCUXpresso (e.g., memory layout settings, pin definitions) may not work.
- The build definitions may differ from the Makefile provided by the TWELITE STAGE app.
MCUXpresso Environment Setup
- This explanation assumes you are performing a new IDE installation.
- We cannot provide verification or guidance on setting up the tool if you are already using the same IDE from NXP, but due to the nature of the tool, it should be possible by adding the SDK package.
- We cannot provide detailed instructions on how to use this tool through our support. Please refer to the MCUXpresso User Guide and the documentation for the underlying Eclipse integrated development environment.
Tool and SDK Downloads
Please see here.
MCUXpresso IDE - Installation
Run the downloaded MCUXpressoIDE_xx.y.z_nnnn.exe (for Windows, where xx,y,z,nnnn are version identifiers) and follow the on-screen instructions.
- After the installation is complete, launch MCUXpresso IDE.
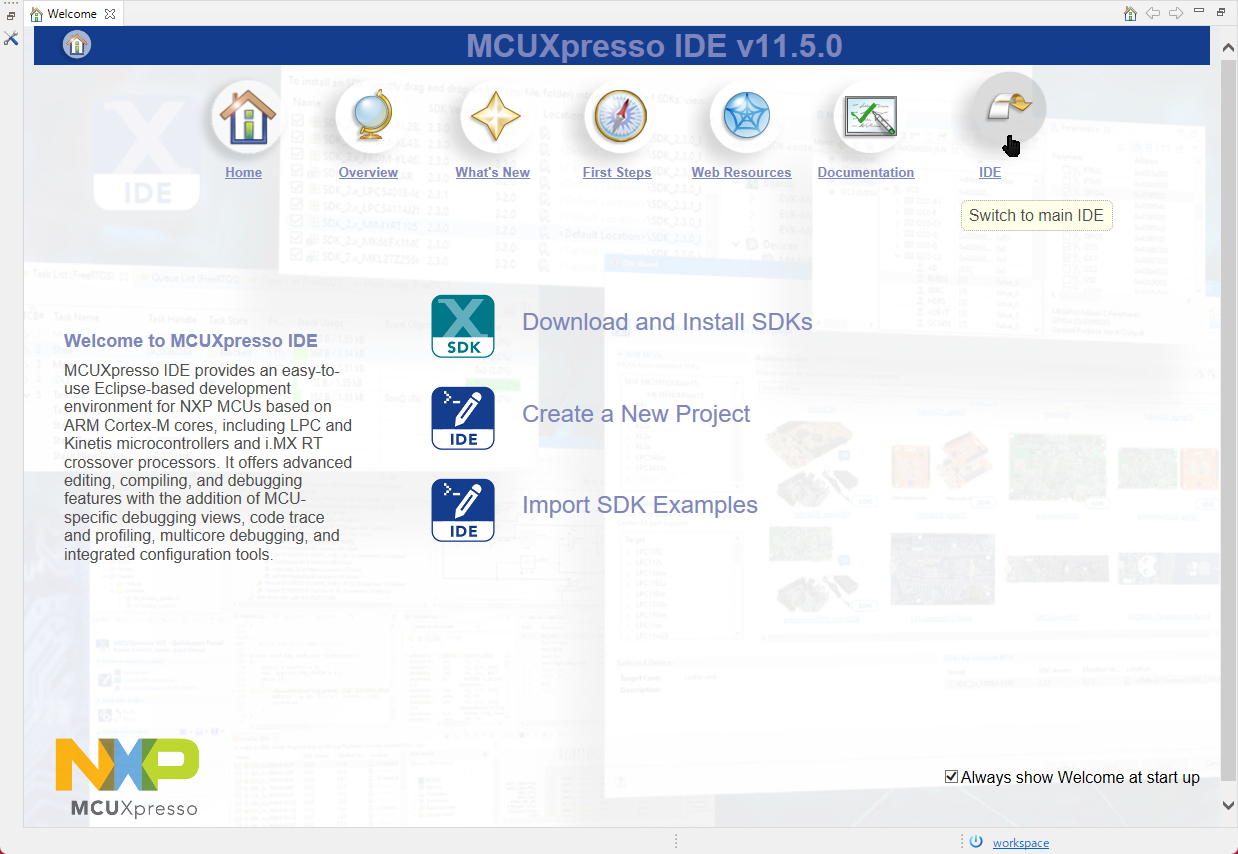
Startup screen
The Welcome screen will be displayed. Although this screen has a menu for SDK installers, please select the IDE.
To display this screen again, select [Help] > [Welcome] from the menu.
The next step shows how to install a downloaded SDK package (the one with the xml file rewritten by the above procedure).
MCUXpresso IDE - SDK Package Installation
If you do not install the SDK package, you will be unable to perform most operations, such as writing TWELITE GOLD firmware from MCUXpresso.
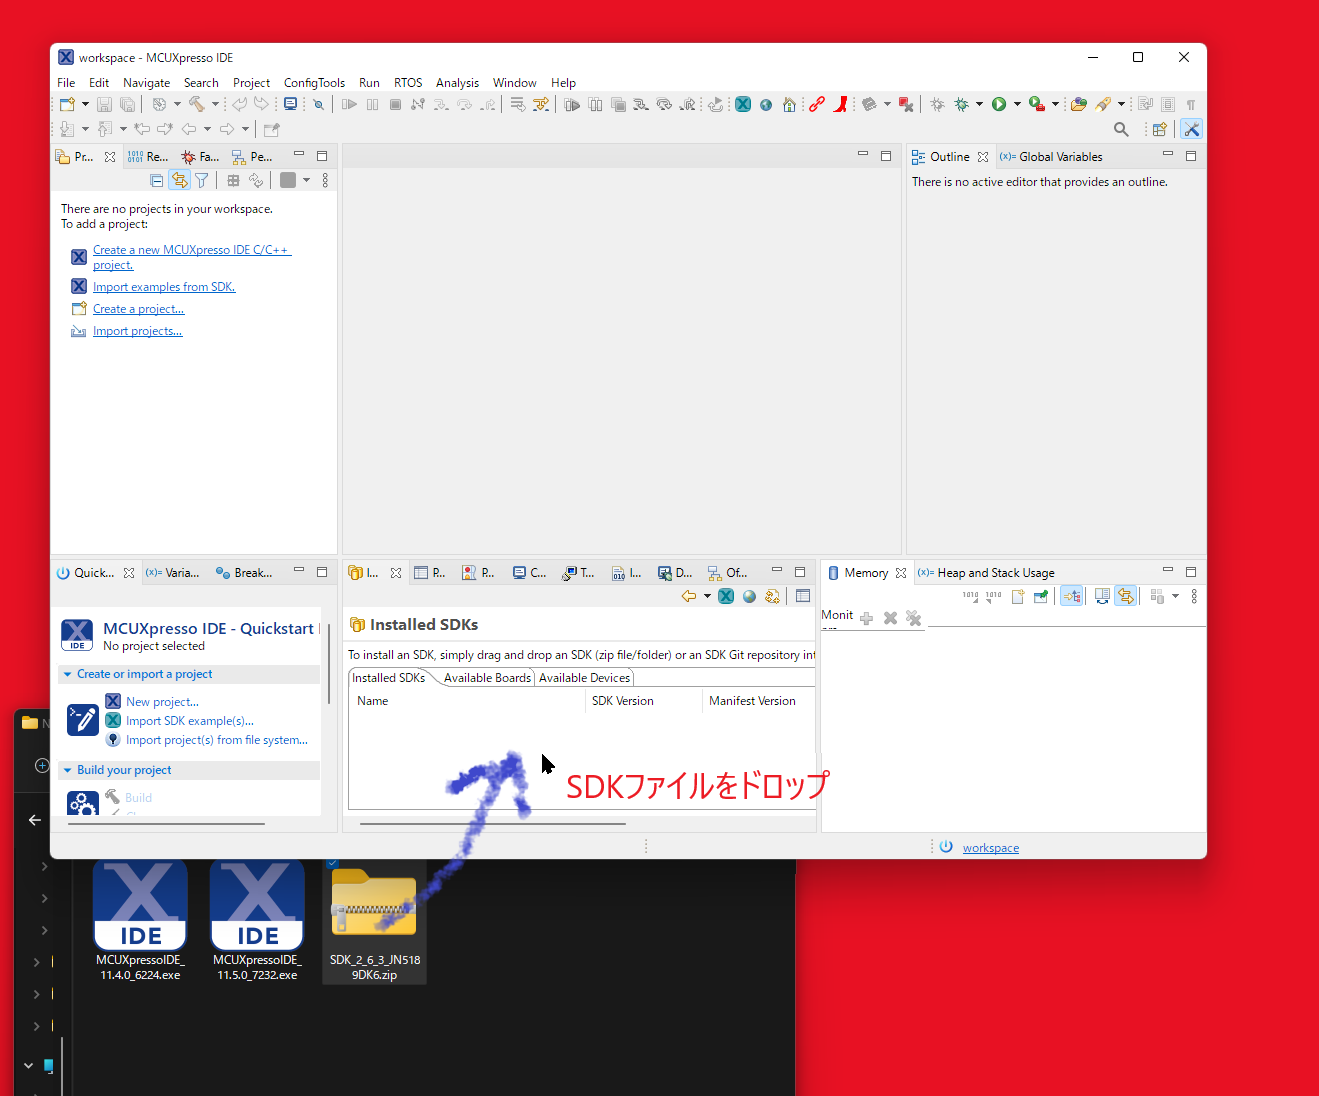
If you selected IDE from the Welcome screen in the previous step, the screen will change to the normal IDE screen. You will perform the SDK package installation on this screen.
- Open the Installed SDK tab (if you can’t find it on the screen, select [Window] > [Show View] > [Installed SDK] from the menu), and drag and drop the downloaded SDK file (in ZIP format) (for Windows). A confirmation dialog will appear, so press the [OK] button.
Drag and drop the SDK ZIP file.
SDK Installation
- This is the screen after the SDK is installed.

Startup screen
It is usually registered in the list with the name SDK_2.x_JN5189DK6 (in the example above, it is SDK_2.6.3_JN5189DK6).
The SDK file is copied to a directory managed by MCUXpresso. You can delete the directory or zip file that was expanded during registration.
If you want to use SDK samples, etc., right-click
SDK_2.x_JN5189DK6in the [Installed SDKs] tab and select [Unzip Archive]. This will expand the registered ZIP file.To view the expanded SDK directory, right-click
SDK_2.x_JN5189DK6in the [Installed SDKs] tab and select [Open Location].
MCUXpresso IDE - Creating a Workspace
A workspace can contain multiple development projects (often a development unit for building a single program, including source code and build intermediates). You can also set dependencies between projects within a workspace and reference projects from each other.
When you first launch MUCXpresso IDE, a workspace is automatically created, but we will prepare a new workspace to store our libraries, etc.
- Create a development directory with no Japanese characters or spaces in the name. Leave the contents empty. Here, we will use
C:\Work\Wks_TWENET(Windows) as an example. - Select [File] > [Switch Workspace] > [Other…] from the menu.
- Enter the workspace directory you created and press the [Launch] button.
MCUXpresso IDE - Copying Libraries and Samples
Copy the archive provided by our company to the workspace directory.
MCUXpresso IDE - Importing Libraries and Samples
To develop applications for TWELITE GOLD, you need to import the necessary libraries and sample code into MCUXpresso.
- From the menu, select [File] > [Import…]. → The Import dialog will open.
- Select [General] > [Existing Projects into Workspace] from the list and press the [Next >] button. → The Import dialog (Import Projects) will open.
- Press the [Browse…] button next to [Select root directory:] and select the workspace directory. → The projects that can be added will be displayed in the [Projects:] list.
- Press the [Finish] button. → The projects will be added to the workspace. A list will be displayed in the [Project Explorer] tab.
- In the [Project Explorer] tab, select all projects and choose [Close Projects] from the right-click menu to close all projects except for TWENETxxx for the time being (this is not mandatory, but it improves workability by making the screen less cluttered).
Python Installation
On Windows, you can skip the Python installation. The Python runtime environment is included under MWSTAGE/Tools, and it is normally called from the ...TWENETmcu/linker/scripts/dk6_image.sh script. If you encounter an error related to Python during the build, you can try installing it separately if needed.
For Mac and Linux, python3 is usually installed by default, so you only need to check for the pycryptodome library and install it if necessary.
Overview
Each project includes a script to embed binary image signature data as a post-build process, which rewrites the binary image after compilation. This rewriting uses a Python script and the pycryptodome library, which must be installed separately.
To successfully build the projects included in the sample, you need the following:
- You must be able to run a Python script from the command prompt with the command name
py -3orpython3.
There are two methods for installing Python on a Windows environment: downloading the installer from python.org or installing from the Microsoft Store. Install Python using either method.
- If you install from python.org, follow the instructions of the installer. Also, be sure to keep track of the installation directory in case you need to set the PATH.
- If you install from the Microsoft Store, it seems to be installed in
%USERPROFILE%\AppData\Local\Microsoft\WindowsApps\. Please use this as a reference.
If you cannot run python3 from the command prompt after installation, check your PATH environment variable. (If the py.exe command can be executed, running py -0p will display the respective installation directories).
For macOS and Linux environments, please refer to general information to install python3.
After installing Python, open the command prompt and type python3 --version to get the version number.
C:\XXX\> python3 --version                <=== Check version after installation
Python 3.10.2
How to Run a Specific Version of Python on Windows
If you have issues with the installed Python version, want to keep it untouched, or want to install a different version (e.g., 3.7 if 3.8 is already installed), consider installing another version.
Note: When you install a different version, the installer may update the PATH, and the python3 command will point to the newly installed version. When installing a new version, it is better not to let the installer set the PATH. Also, the command launched by py.exe may change to the newly installed version.
You can use the py.exe command (which is installed with Python) to switch between Python versions.
C:\XXX\> py -0                          <=== List of installed Pythons
Installed Pythons found by py Launcher for Windows
 -3.8-64 *
 -3.7-64
 -3.10-64
 -2.7-64

<<< Now install Python 3.6 >>> (Note: 3.6 is end of life)
C:\XXX\> py -0
Installed Pythons found by py Launcher for Windows
 -3.8-64 *
 -3.7-64
 -3.6-64                            <=== 3.6 is added
 -3.10-64
 -2.7-64

C:\XXX\> py -3.6                     <=== Try to launch Python 3.6
Python 3.6.8 (tags/v3.6.8:3c6b436a57, Dec 24 2018, 00:16:47) [MSC v.1916 64 bit (AMD64)] on win32
Type "help", "copyright", "credits" or "license" for more information.
>>> ^Z                            <=== Exit with Ctrl+Z [Enter]

C:\XXX\> py -3.6 pip list          <=== Try to run pip for Python 3.6
Package    Version
---------- -------
pip        18.1                      <=== Installed modules are listed
setuptools 40.6.2
You are using pip version 18.1, however version 21.3.1 is available.
You should consider upgrading via the 'python -m pip install --upgrade pip' command.
As shown above, by using the py.exe command, you can run different versions of Python and pip. If you don’t want to touch the Python version in your current environment, you can install a different version from Python.
If you want to use a specific version, add DK6_PY to the project’s [Properties] > [C/C++ Build] > [Build Variables]. The example below sets py.exe -3.6. (Set this for both Release and Debug configurations).
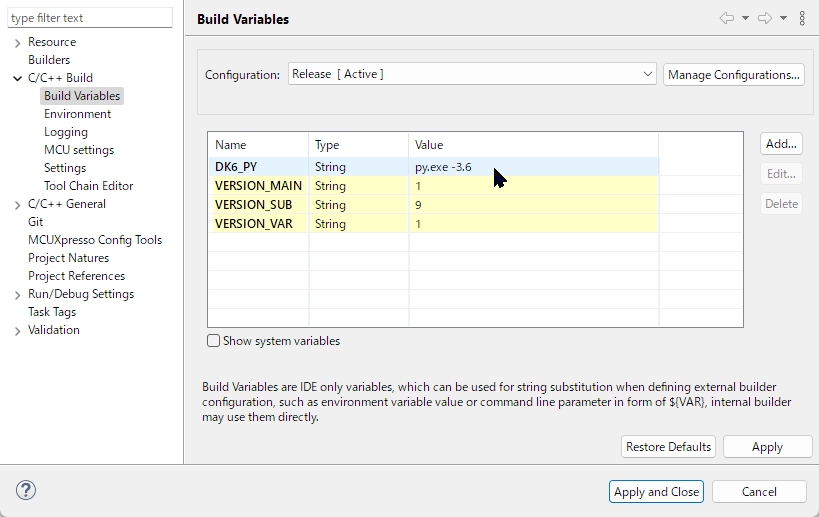
Setting Python version
Installing pycryptodome
This is not required for building the samples and libraries we provide. We do not provide support for firmware-related encryption. Please obtain information from NXP’s official resources and support communities.
Running dk6_image_tool.py may require it for tasks such as signing encrypted firmware. Refer to the example below (Windows environment, using the py.exe command) to install pycryptodome.
C:\XXX\> py -0                          <=== List of installed Pythons
Installed Pythons found by py Launcher for Windows
 -3.8-64 *
 -3.7-64
 -3.10-64
 -2.7-64

<<< Now install Python 3.6 >>> (Note: 3.6 is end of life)
C:\XXX\> py -0
Installed Pythons found by py Launcher for Windows
 -3.8-64 *
 -3.7-64
 -3.6-64                             <=== 3.6 is added
 -3.10-64
 -2.7-64

C:\XXX\> py -3.6                      <=== Try to launch Python 3.6
Python 3.6.8 (tags/v3.6.8:3c6b436a57, Dec 24 2018, 00:16:47) [MSC v.1916 64 bit (AMD64)] on win32
Type "help", "copyright", "credits" or "license" for more information.
>>> ^Z                             <=== Exit with Ctrl+Z [Enter]

C:\XXX\> py -3.6 pip list           <=== Try to run pip for Python 3.7
Package    Version
---------- -------
pip        18.1                       <=== Installed modules are listed
setuptools 40.6.2
You are using pip version 18.1, however version 21.3.1 is available.
You should consider upgrading via the 'python -m pip install --upgrade pip' command.

C:\XXX\> py -3.6 -m pip install pycryptodome <=== Install pycryptodome with pip
Collecting pycryptodome
  Downloading https://files.pythonhosted.org/packages/7e/.../pycryptodome-3.14.0.tar.gz (3.4MB)
    100% |████████████████████████████████| 3.4MB 14.7MB/s
Installing collected packages: pycryptodome
  Running setup.py install for pycryptodome ... done
Successfully installed pycryptodome-3.14.0
You are using pip version 18.1, however version 21.3.1 is available.
You should consider upgrading via the 'python -m pip install --upgrade pip' command.
What to do if you encounter a problem installing pycryptodome
In some situations, if you try to install pycryptodome into an already installed Python environment, an error may occur and a simple solution may not be found.
- Uninstall Python and install it again (if you are okay with destroying the existing installed Python environment).
- Refer to “How to Run a Specific Version of Python on Windows” (described later) and prepare a Python environment separate from the current one.
Upgrading pip
When you run pip3 list, you might see a message suggesting you upgrade pip, as shown below.
C:\XXX\> py -3.X -m pip list        <=== Run pip list, specifying version 3.X
WARNING: You are using pip version 21.2.4; however, version 22.0.2 is available.
You should consider upgrading via the 'C:\Users\...\python.exe -m pip install --upgrade pip' command.
As one way to fix issues like pycryptodome not installing, you can upgrade pip by entering the following command:
C:\XXX\> py -3.X -m pip install --upgrade pip
Specifying the Default Version for the py.exe Command
Create configuration files (C:\Windows\py.ini, C:\Windows\pyc.ini: where C:\Windows is the Windows installation directory) with the following content (the same content for both files). The example below sets 3.8 as the default.
[defaults]
python=3.8