Project Building
There are several ways to build a project.
- Building on MCUXpresso IDE: Used when debugging with MCU-Link. As it is maintained by a semiconductor manufacturer, special functions can be used. However, since the implementation for TWELITE may differ from the standard assumptions of the semiconductor manufacturer, not all functions may be available.
- Building with make: This is the traditional build method.
makecan be called from several tools. The MCU-Link debugger cannot be used.- TWELITE STAGE App: A utility that handles building, writing, and executing. It also has a function to open the target project in VSCode.
- VSCode: Definitions for code interpretation and a Task for building (
make) are provided. Some of the provided apps and samples do not have definitions for VSCode. You need to set environment variables in advance, and we provide batch files and scripts for Windows to set environment variables and launch VSCode. - Command Window on Windows (bash): We provide batch files to launch bash or
cmd.exewith the necessary environment variables set. - From WSL on Windows: We provide batch files and scripts to call the Windows
makeutility from within WSL.
For MCUXpresso
This section explains the process assuming the standard screen layout (C/C++ Perspective). (Reference: About the Screen Layout)
Here, you will build the project and generate an executable binary (.bin) that runs on the microcontroller.
First, open the project you want to build in the [Project Explorer].
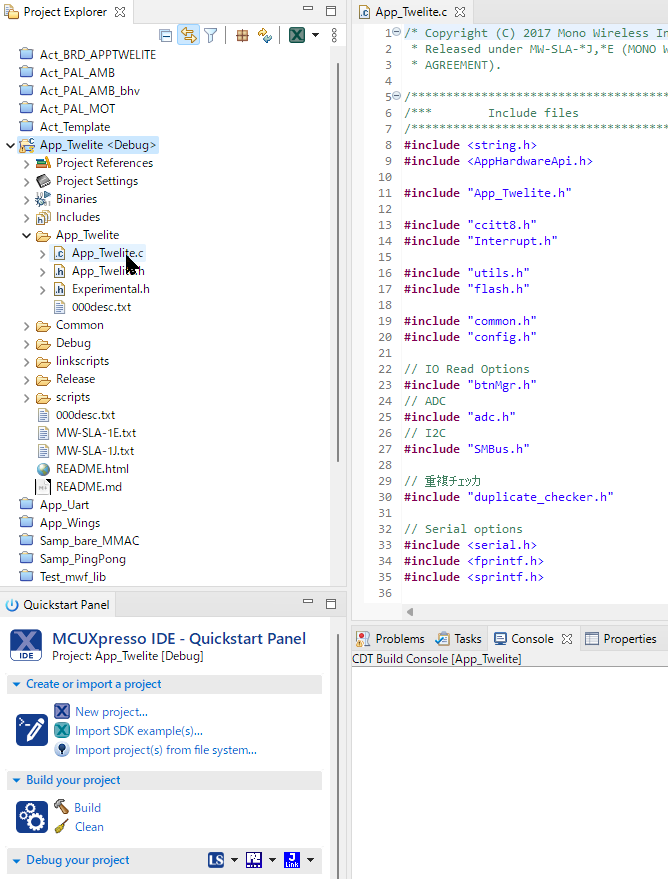
Opening a project
The behavior is different depending on whether the TWENET library is open or closed.
- If the TWENET library is open, it will be rebuilt if necessary. It is recommended to keep it open, as you will often open the library code for debugging.
- If the TWENET library is closed, the build process will be shorter because the library will not be rebuilt.
To build a project, with the target project open, select the build configuration from the hammer icon.
Hammer icon
There are multiple ways to perform build-related operations. Examples are listed below, but please refer to the Eclipse manual for details.
- Building with the selected build configuration
- Click the [Build] icon in the MCUXpresso QuickStart Panel.
- Select [Project] > [Build Project] from the menu.
- Right-click the top-level folder of the project in the [Project Explorer] and select [Build Project] from the menu.
- Cleaning (deleting intermediate files) with the selected build configuration
- Click the [Clean] icon in the MCUXpresso QuickStart Panel.
- Select [Project] > [Clean…] from the menu.
- Right-click the top-level folder of the project in the [Project Explorer] and select [Clean Project] from the menu.
When you run the build, the build progress will be displayed in the [Console].
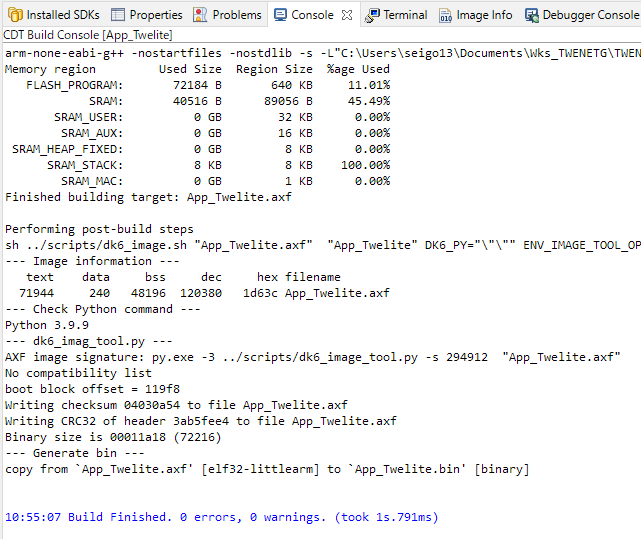
Console screen during build
You can confirm if the build was successful by checking for error messages and the generation of the .bin file.
arm-none-eabi-g++ -nostartfiles -nostdlib -s ...               <=== linker
Memory region         Used Size  Region Size  %age Used
   FLASH_PROGRAM:       72184 B       640 KB     11.01%
            SRAM:       40516 B      89056 B     45.49%
       SRAM_USER:          0 GB        32 KB      0.00%
        SRAM_AUX:          0 GB        16 KB      0.00%
 SRAM_HEAP_FIXED:          0 GB         8 KB      0.00%
      SRAM_STACK:          8 KB         8 KB    100.00%
        SRAM_MAC:          0 GB         1 KB      0.00%
Finished building target: App_Twelite.axf

Performing post-build steps
sh ../scripts/dk6_image.sh "App_Twelite.axf"  "App_Twelite" ...
--- Image information ---                                      <=== elf object
   text	   data	    bss	    dec	    hex	filename
  71944	    240	  48196	 120380	  1d63c	App_Twelite.axf
--- Check Python command ---                                   <=== check version of python interpreter
Python 3.9.9
--- dk6_imag_tool.py ---                                       <=== image signature
AXF image signature: py.exe -3 ../scripts/dk6_image_tool.py -s 294912  "App_Twelite.axf"
No compatibility list
boot block offset = 119f8
Writing checksum 04030a54 to file App_Twelite.axf
Writing CRC32 of header 3ab5fee4 to file App_Twelite.axf
Binary size is 00011a18 (72216)
--- Generate bin ---                                           <=== generate .bin
copy from `App_Twelite.axf' [elf32-littlearm] to `App_Twelite.bin' [binary]
For VSCode
The project directories for the apps and sample code included with MWSDK contain a .vscode directory, but some environment variables need to be set. (Some projects do not have a .vscode directory prepared.)
Here’s how to set environment variables and launch VSCode:
- In the TWELITE STAGE settings, specify the option to open with VS Code, and open the corresponding project from TWELITE STAGE.
- Windows: Launch from
MWSDK/scripts/WIN_CODE.cmd. (You need to have completed the installation so that thecodecommand launches VSCode beforehand. The command prompt window will remain open after execution.) - Windows: Display the command prompt from
MWSDK/scripts/WIN_CODE.cmdand run thecodecommand. (You need to have completed the installation so that thecodecommand launches VSCode beforehand.) - Windows: Display the WSL prompt from
MWSDK/scripts/WIN_WSL.cmdand run themwcode.shcommand. (WSL needs to be pre-installed. This is a method outside the scope of support inquiries. Please refer tomwcode.shdirectly for its content.)
| Environment Variable | Content | Example |
|---|---|---|
MWSDK_ROOT | MWSDK’s root directory | C:/Work/MWSTAGE/MWSDK/ |
MWSDK_ROOT_WINNAME | Above, Windows name | C:\Work\MWSTAGE\MWSDK |
MWSDK_TWENET_LIBSRC | Directory to the library | C:/Work/MWSTAGE/MWSDK/TWENET/current/ |
MWSDK_MAKE_JOBS | Number of parallel jobs | -j8 |
MWSDK_MAKE_DISABLE_LTO | LTO enabled/disabled | DISABLE_LTO=1 or DISABLE_LTO=0 |
Recommended Plugins on VSCode
- C/C++
- C/C++ Extension Pack
Operations on VSCode
- C/C++ Configuration (displayed as TWELITE ??? in the bottom right of the status bar) ⇒ Select the target for code interpretation. (TWELITE BLUE/RED/GOLD)
- The code interpretation in the editor is solely for the purpose of improving workability. It usually does not match errors that occur during compilation, so please only use the editor’s code interpretation errors as a reference.
- When interpreting code in GOLD, many interpretation errors may appear. If workability is poor, changing the settings to BLUE/RED is an option.
- From the Terminal menu, select Run Task… ⇒ Build or clean.
Command Line
or this batch file sets the environment variables required for execution.
For bash
Run MWSDK/scripts/WIN_BASH.cmd (msys bash).
A screen like the following will be displayed. The line starting with MyName@MyPC will vary depending on your installation.
MyName@MyPC /c/Work/MWSTAGE/MWSDK
MWSDK$
To build Act_samples/BRD_APPTWELITE, you would perform the following operations:
MyName@MyPC /c/Work/MWSTAGE/MWSDK
MWSDK$ cd Act_samples/BRD_APPTWELITE/build

MyName@MyPC /c/Work/MWSTAGE/MWSDK/Act_samples/BRD_APPTWELITE/build
MWSDK$ make TWELITE=GOLD
...
!!!TARGET=BRD_APPTWELITE_GOLD_L1305_V0-2-1.bin

MyName@MyPC /c/Work/MWSTAGE/MWSDK/Act_samples/BRD_APPTWELITE/build
MWSDK$
For cmd.exe
Run MWSDK/scripts/WIN_CMD.cmd (Windows’ cmd.exe).
Microsoft Windows [Version 10.0.22621.1848]
(c) Microsoft Corporation. All rights reserved.

C:\Work\MWSTAGE\MWSDK>
To build Act_samples/BRD_APPTWELITE, you would perform the following operations:
C:\Work\MWSTAGE\MWSDK>cd Act_samples\BRD_APPTWELITE\build

C:\Work\MWSTAGE\MWSDK\Act_samples\BRD_APPTWELITE\build>make TWELITE=GOLD
...
!!!TARGET=BRD_APPTWELITE_GOLD_L1305_V0-2-1.bin

C:\Work\MWSTAGE\MWSDK\Act_samples\BRD_APPTWELITE\build>
Building from WSL
This feature is not subject to support inquiries.
We provide a script to call the Windows build environment from WSL, not for building on Linux.
First, you need to have WSL installed so that it works.
Run MWSDK/scripts/WIN_WSL.cmd. The WSL command window will be displayed.
MyName@MyPC /mnt/c/Work/MWSTAGE/MWSDK
$
To build Act_samples/BRD_APPTWELITE, you would perform the following operations:
MyName@MyPC /mnt/c/Work/MWSTAGE/MWSDK
$ cd Act_samples/BRD_APPTWELITE/build/
MyName@MyPC /mnt/c/Work/MWSTAGE/MWSDK/Act_samples/BRD_APPTWELITE/build
$ mwbash.sh make TWELITE=GOLD
...
!!!TARGET=BRD_APPTWELITE_GOLD_L1305_V0-2-1.bin
MyName@MyPC /mnt/c/Work/MWSTAGE/MWSDK/Act_samples/BRD_APPTWELITE/build
$
mwbash.sh is a script that executes make from the bash environment mentioned above.
Reference: We also provide mwcode.sh to launch VSCode for Windows. Specify the project folder containing .vscode as the first argument.
MyName@MyPC /mnt/c/Work/MWSTAGE/MWSDK/Act_samples/BRD_APPTWELITE
$ mwcode.sh .