Building Act
An application program written with the MWX library is called an act. First, build and write it.
- About the build folder structure
- Building with Visual Studio Code (referred to as VSCode)
make command. For details, please refer to the explanation of the Makefile.make or gcc). You will need to configure settings to suppress these warnings. Whether to operate the program with warnings suppressed should be decided by the customer or system administrator after consultation.About the build folder structure
Open the folder where you installed MWSDK (MWSDK_ROOT, e.g., C:\MWSDK). It has the following structure:
MWSDK_ROOT
  |
  +-ChipLib      : Semiconductor library
  +-License      : Software license agreement
  +-MkFiles      : makefile
  +-Tools        : Compiler and other tools
  +-TWENET       : TWENET/MWX library
  +-Act_samples  : Act samples
  ...
Act files are stored under Act_samples. (Some parts are omitted below)
Act_samples
  |
  +-CoreAppTwelite    : Act for the board with the same structure as App_TweLite
  +-PAL_AMB           : Act for environmental sensing PAL
  +-PAL_MAG           : Act for open/close sensing PAL
  +-PAL_MOT           : Act for motion sensing PAL
  ..
  +-Parent-MONOSTICK  : Parent act for MONOSTICK
  +-PingPong          : PingPong act
  +-PulseCounter      : Act using pulse counter
  +-act0              : Scratch (just to try writing) act
These acts are simple examples that serve as a reference for writing MWX library programs, but many acts have the following functions:
- Acquire sensor values
- After acquiring sensor values, send a wireless packet to the parent device
- After sending is complete, sleep for a fixed time (or wait for an interrupt)
The Parent-MONOSTICK act receives and displays packets. This parent act outputs in ASCII format. (It starts with : like :00112233AABBCC...FF[CR][LF], and the middle part expresses bytes in hexadecimal with two ASCII characters. The ending ?? is also two characters representing a byte called LRC checksum. Reference: ASCII format)
When actually running, try the following combinations.
| Parent | Child | Explanation |
|---|---|---|
BRD_APPTWELITE | BRD_APPTWELITE | The parent device boots with M1 pin set to LOW (GND level). In normal mode (always running), you can verify operation like App_Twelite. |
PingPong | PingPong | Operates with two child devices. When one sends a Ping packet, the other returns a Pong packet. |
Parent-MONOSTICK | Others | You can verify packet transmission from child acts. |
Now, let’s look inside the PingPong folder among the acts.
Act_samples
  +-PingPong
    +-PingPong.cpp   : Act file
    +-build          : Build folder
    +-.vscode        : VSCode configuration files
A .cpp file with the same name as the folder is always required directly under the folder.
.cpp file. For larger projects, refer to the Makefile explanation to split into multiple files for building.PingPong.cpp directly under the PingPong folder. If you rename the folder, be sure to rename the .cpp file to the same name as the folder.Next, open the build folder.
Act_samples
  +-PingPong
    +-build
      +-Makefile        : makefile
      +-build-BLUE.cmd  : Build script for TWELITE BLUE (Windows)
      +-build-RED.cmd   : Build script for TWELITE RED (Windows)
      +-build-clean.cmd : Delete obj_* files
Scripts and Makefile required for building are stored here.
By running make TWELITE={BLUE or RED} in the folder containing this Makefile, the build is executed. Building in VSCode also internally calls make.
Building with TWELITE STAGE app
Using the TWELITE STAGE app, you can build, write, and run. Here, we explain from launching the TWELITE STAGE app up to building.
0. Connect TWELITE
Connect MONOSTICK or TWELITE R to your USB port.
TWELITE is a delicate electronic component, so handle it with care. Below are typical precautions.
Especially when using TWELITE R, often the electronic board is exposed without a case, which may cause unintended shorts or noise leading to malfunction of the USB device.
In such cases, quitting the application and unplugging/replugging the USB device usually recovers it. Worst case, USB device or PC damage may occur.
Handle the board carefully.
- Circuit mistakes
- Check the circuit again before powering.
- Be careful of reverse battery insertion or overvoltage.
- Static electricity
- Even voltages that are not felt can cause semiconductor failure. Simple measures like touching metal before work, wristbands, or dedicated mats have significant effects.
- Shorts caused by metal objects
- Keep metal objects away from the board. Cluttered clips may cause shorts, and batteries could discharge heavily and heat dangerously.
1. Launch TWELITE STAGE app
Launch the executable TWELITE_Stage.{extension} in the {TWELITE SDK installation} folder (Reference: TWELITE STAGE app manual).
Below is a screen example during TWELITE STAGE app operation. There is a main screen on the left and a command prompt screen, but operate the main screen. The command prompt shows various info and input data from the TWELITE microcontroller serial port but is usually not used.
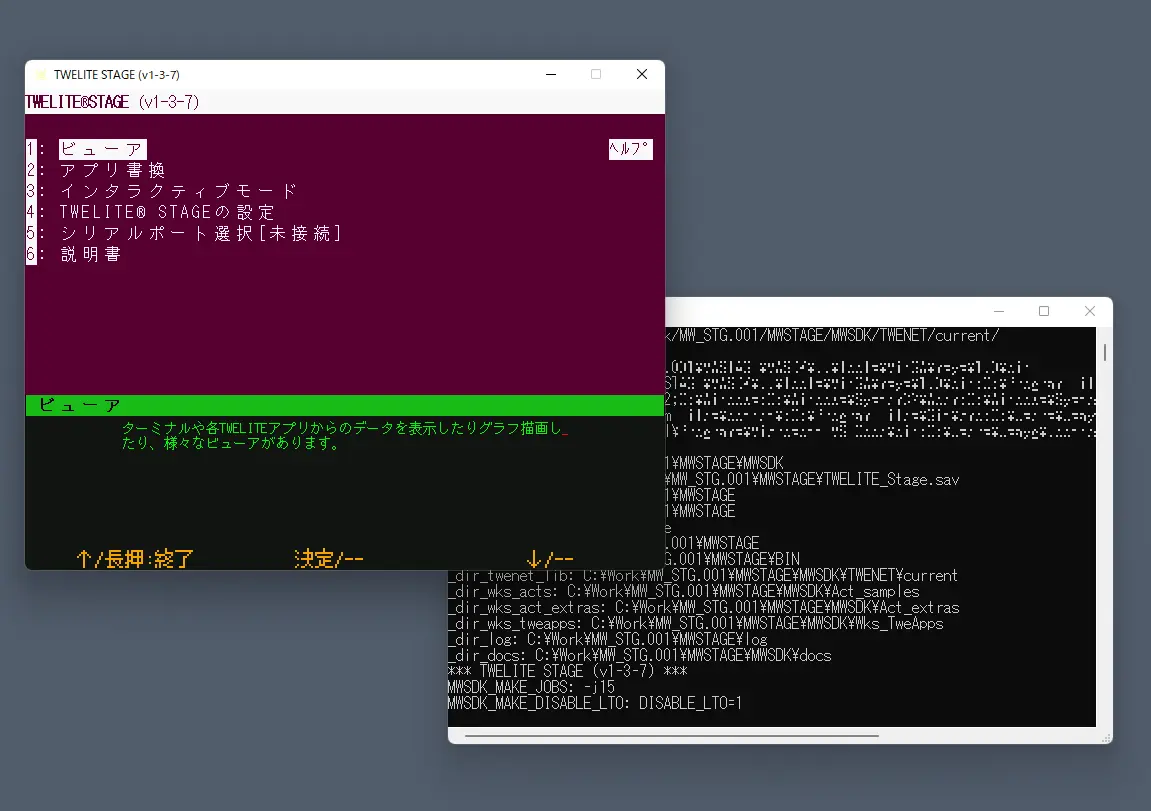
Screen example
Main operations on the main screen are:
- Left mouse click (select)
- Right double-click (go back to previous screen)
- Quickly press
ESCtwice, or once on some screens (go back) - Hold
Alt(⌘)key (help screen) - Normal keyboard input (follow screen instructions)
(Reference: TWELITE STAGE app manual)
2. Select serial port
This screen appears first when launching the TWELITE STAGE app. If TWELITE R or MONOSTICK is connected beforehand, it will be listed here. Select the TWELITE device to operate. You can also select it later by other operations.
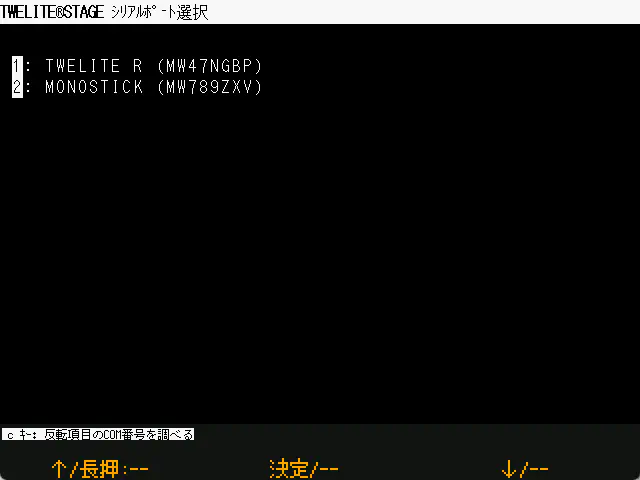
Serial port selection screen
(Reference: TWELITE STAGE app manual)
3. Main menu
After exiting the serial port selection screen, the main menu appears. Select the “App write” menu to build and write.
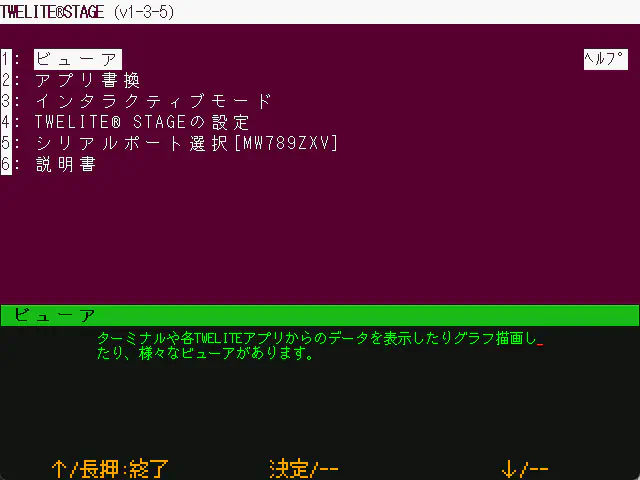
Main menu
(Reference: TWELITE STAGE app manual)
4. App write menu
Before selecting the app write menu, confirm TWELITE connection and serial port selection. You can check the serial port selection status by holding the Alt(⌘) key to display the help screen.
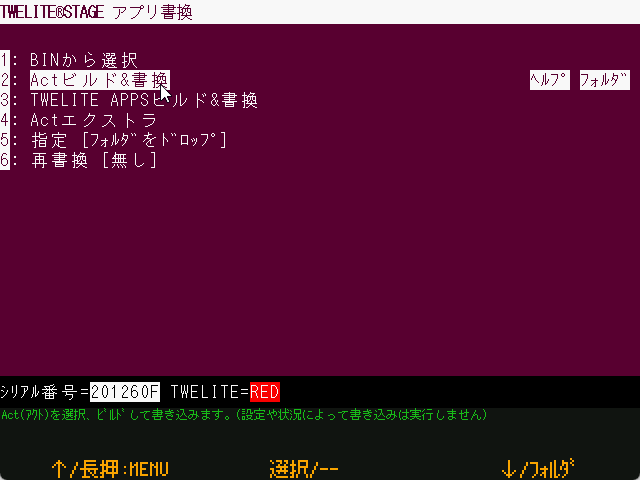
App write menu
Projects accessible from the TWELITE STAGE app are categorized. The right Help shows related info in a browser. The Folder opens the project folder.
If TWELITE is connected, the model is identified when selecting the menu. (The app internally builds according to the identified TWELITE model.)
Alt(⌘) + 0 in the TWELITE STAGE app, and check USB connections. Some USB errors require restarting your computer.(Reference: TWELITE STAGE app manual)
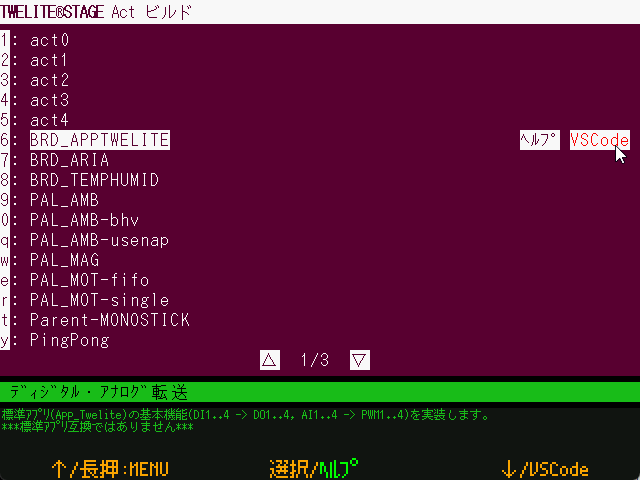
4. Select project
Here, select “act build & write” from the app write menu.
App write menu
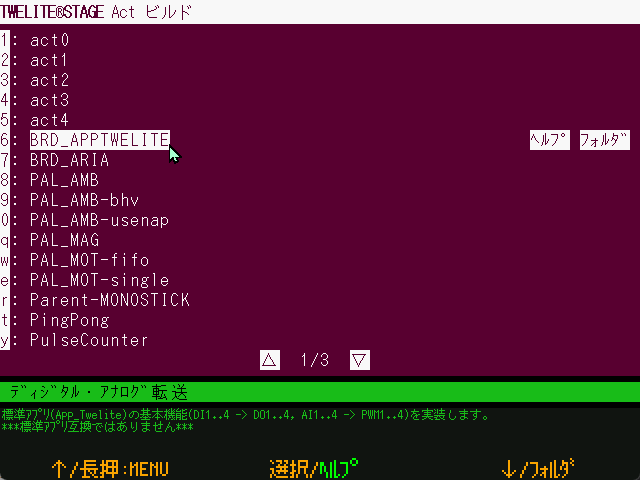
5. Build & write
Here, select BRD_APPTWELITE in the project selection screen.
When selected, writing proceeds as shown in the screen example below. If an error appears, follow the instructions or go back and retry.
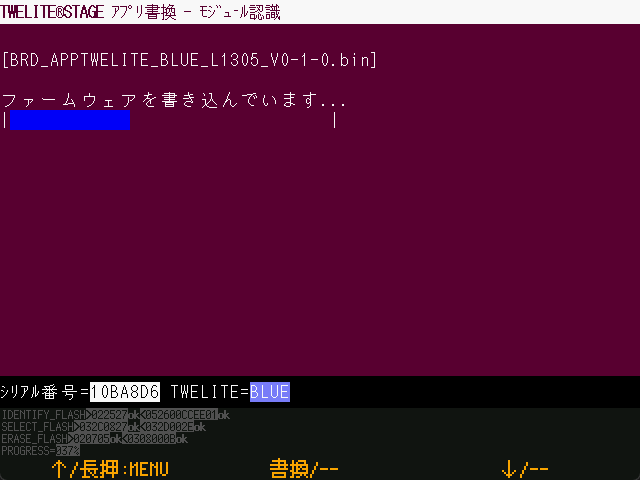
Writing in progress (with verify setting)
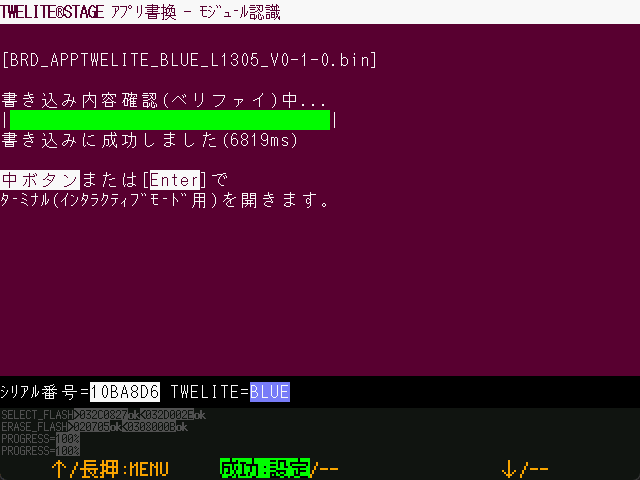
Write complete
(Reference: TWELITE STAGE app manual)
6. Move to interactive mode
After writing completes successfully, it proceeds to interactive mode (settings screen). The screen appears only if the firmware supports interactive mode.
In interactive mode, you can configure various settings such as the TWELITE wireless channel.
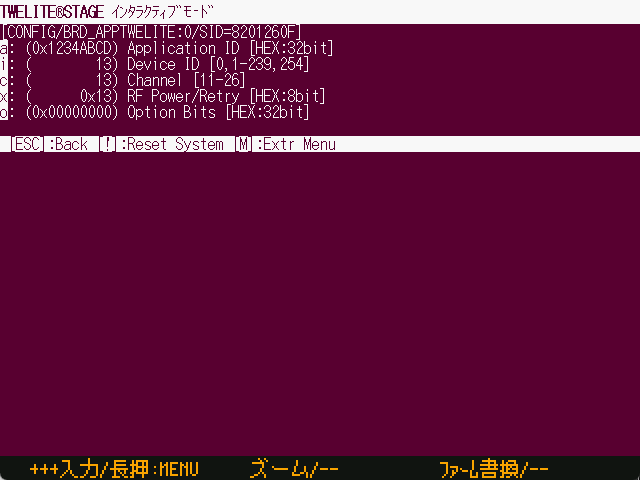
Interactive mode
(Reference: TWELITE STAGE app manual)
7. Terminal screen
Return to the root menu and select “Viewer” → “Terminal”.
A very simple serial terminal. You can check messages from TWELITE and send messages to TWELITE.
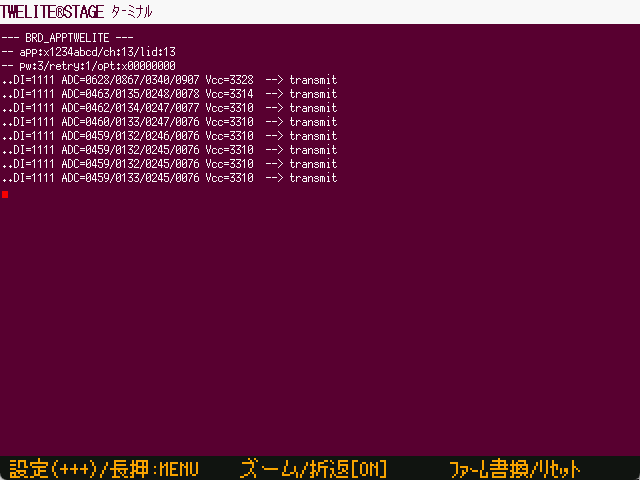
Terminal screen
The screen shows messages sent wirelessly approximately every second. You can also enter + + + to enter interactive mode screen.
(Reference: TWELITE STAGE app manual)
Building with VSCode
VSCode is a powerful editor for source editing, but you can also build firmware for TWELITE microcontrollers within VSCode.
Launch VSCode from the project list under the “Build & Write” menu in the TWELITE STAGE app.
Press the [VSCode] button on the right of the build list.

VSCode settings
This requires configuration in the TWELITE STAGE app.
Set “Open folder with code (VSCode)” to 1 in STAGE settings.
Open with VSCode
TWELITE_Stage_VSCode.{extension} with this setting enabled is distributed by default.If VSCode is already running, necessary settings may not be reflected. In that case, close VSCode and launch it again from the TWELITE STAGE app.
Because system environment variables are used for info reflection, problems may occur when running multiple TWELITE STAGE instances referencing different library folders simultaneously. If the environment variable MWSDK_ROOT is set correctly in the VSCode terminal, builds are expected to work properly.
VSCode build tasks
Open the workspace you want to build first. The workspace included with the TWELITE STAGE SDK has build task definitions.
Below is an example with an English interface, showing the opened workspace.
Open [Terminal>Run Task...].
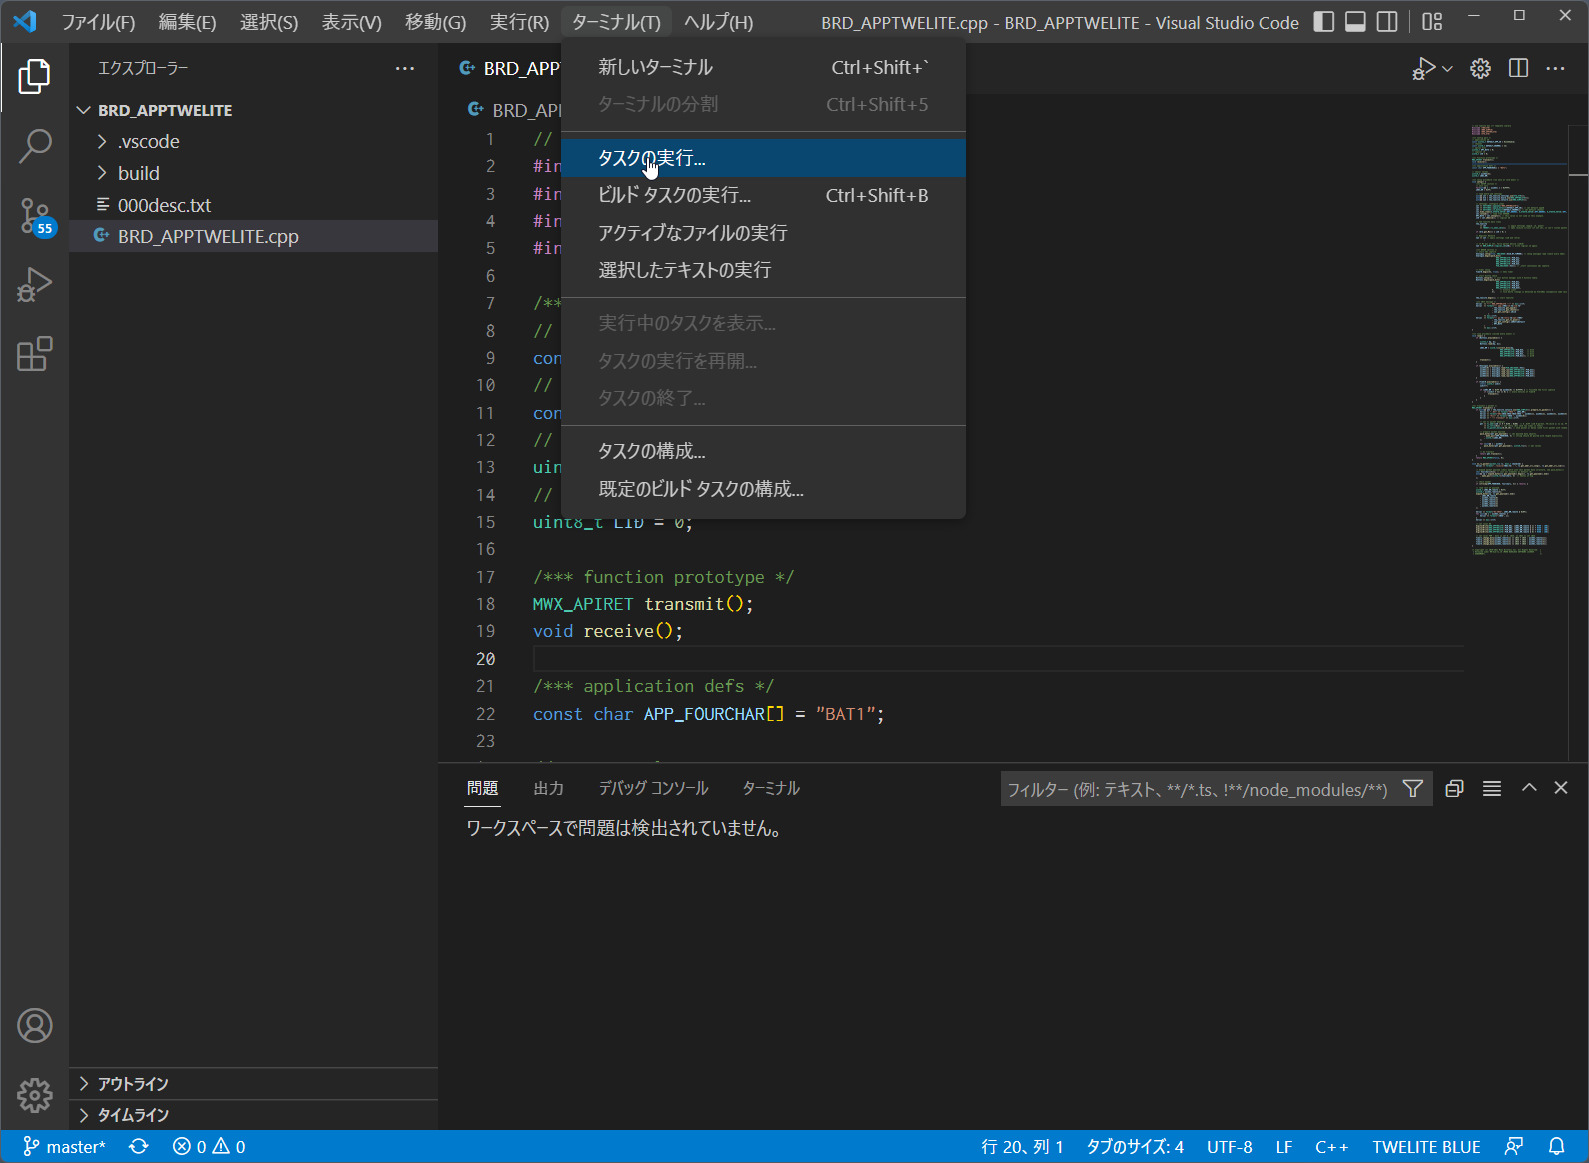
Run task menu
Select the TWELITE wireless module type (BLUE/RED) and act name to build. In the example below, Build for TWELITE BLUE is selected. The build starts immediately after selection.
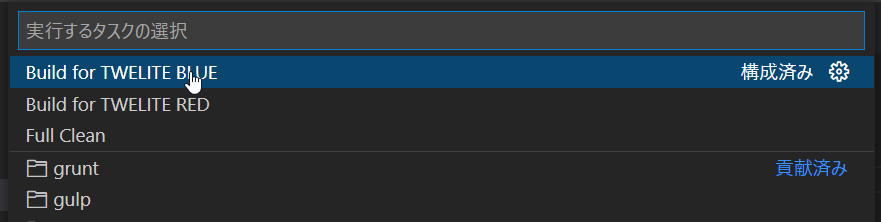
Select build task
Build progress is output in the terminal at the bottom.
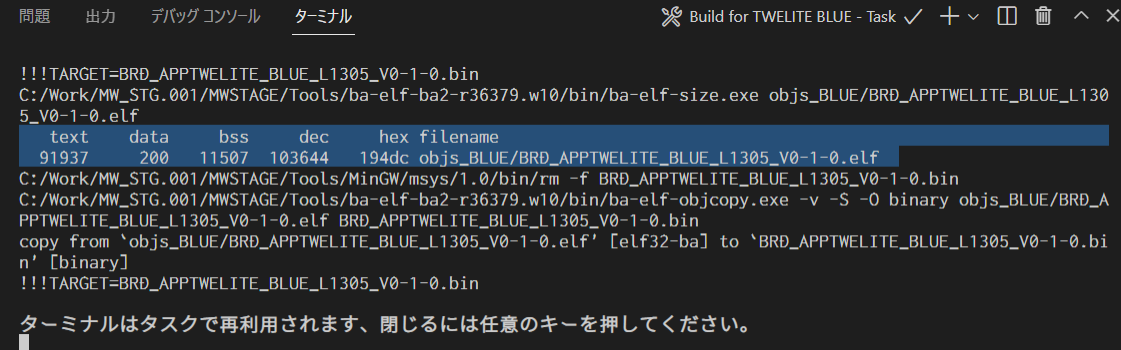
Build progress
If built correctly, a message showing the .elf file generated with size info (text data bss dec hex filename) appears as shown in the inverted part of the example.
Also, a BIN file (e.g., BRD_APPTWELITE_BLUE_???.bin) should be created under the build folder. Please check.
The VSCode task definition includes a conversion for folder names incompatible with Windows file system (e.g., /c/User/... to C:/User/...).
The conversion rule in .vscode/tasks.json is not perfect but rewrites drive name parts in output messages to a format recognized by VSCode. This allows error file names and line numbers to be displayed in VSCode from compile messages.
...
"windows": {
    "command": "sh",
    "args": [
        "-c", "make TWELITE=BLUE 2>&1 | sed -E -e s#\\(/mnt\\)?/\\([a-zA-Z]\\)/#\\\\\\2:/#g"
    ],
If the build fails, first check the error messages. Messages containing the word error often help identify the cause easily.
Also, try cleaning (deleting intermediate files in objs_??? folders) and rebuilding. (If intermediate files from other environments remain, all operations including make clean may fail.)
Building from command line
Additional information for building from the command line.
Linux, macOS environment
Run make in a window running bash or zsh (or other shell). Confirm the environment variable MWSDK_ROOT is set correctly. For example, if installed at /work/MWSDK, add the following to ~/.profile or similar:
MWSDK_ROOT=/work/MWSDK
export MWSDK_ROOT
Run make from the command line. If make is missing, install the package.
On Linux, install via package manager (APT example):
sudo apt install makeor
sudo apt install build-essentialOn macOS, included in Command Line Tools for Xcode.
xcode-select --install
Windows environment
Run {MWSTAGE SDK installation}/MWSDK/WIN_BASH.cmd. Environment variables and make utility are set.
Build
Build as follows:
cd $MWSDK_ROOT
cd Act_samples/PingPong/build
pwd
/mnt/c/MWSDK/Act_samples/PingPong/build

ls
... list files

rm -rfv objs_*
... delete intermediate files just in case

make TWELITE=BLUE
... build for BLUE

make -j8 TWELITE=BLUE
... parallel build for BLUE (8 processes)
Command examples
See the Makefile explanation for details.
make TWELITE=BLUE: Build for TWELITE BLUEmake TWELITE=RED: Build for TWELITE REDmake cleanall: Delete intermediate files
About intermediate files
When building, objs_??? folders are created containing intermediate files. These files depend on the build environment, so leftover files from other environments cause make errors and build failures.
objs_??? folders directly may resolve make errors.