Basics of Firmware Development with ESP32
ESP32 can build a system using wireless LAN on its own. For example, you can display data on a hosted web page, send data to a server within the LAN via WebSocket, or send REST API requests to cloud services.
TWELITE SPOT is a product that combines this ESP32 with TWELITE, enabling the use of many small, low-power wireless tags.
First, let’s try Hello World to learn the basics of firmware development for ESP32.
We will set up the development environment, create and write the Hello World sketch, and verify its operation.
What You Need
-
Wireless LAN Gateway TWELITE SPOT
- USB-C cable for power
- USB AC adapter (capable of supplying 1A or more)
-
USB Adapter TWELITE R3 (Please purchase if you do not have one 👉 List of retailers)
- USB-C cable for communication
- 💻 Computer
Setting Up the Environment
1. Install the IDE 🚛
If you have not installed Arduino IDE on your computer, please download and install it from the Arduino official download page (IDE 1.x or 2.x).
Please install Arduino IDE 1.x.
Although the latest Arduino IDE 2.x can also write sketches similarly to Arduino IDE 1.x, as of May 2023, the Java-based plugin does not work, so the Legacy IDE is recommended.
2. Install the Toolchain 🚚
If you have not installed Arduino core for the ESP32 in Arduino IDE, add the following URL to the Board Manager URLs and install the esp32 board definition.
https://espressif.github.io/arduino-esp32/package_esp32_index.json
3. Configure the Board Settings ⚙️
Configure Arduino core for the ESP32 to match TWELITE SPOT.
Select the Board Type
From the toolbar, select Tools -> Board -> ESP32 Arduino -> ESP32 Dev Module.
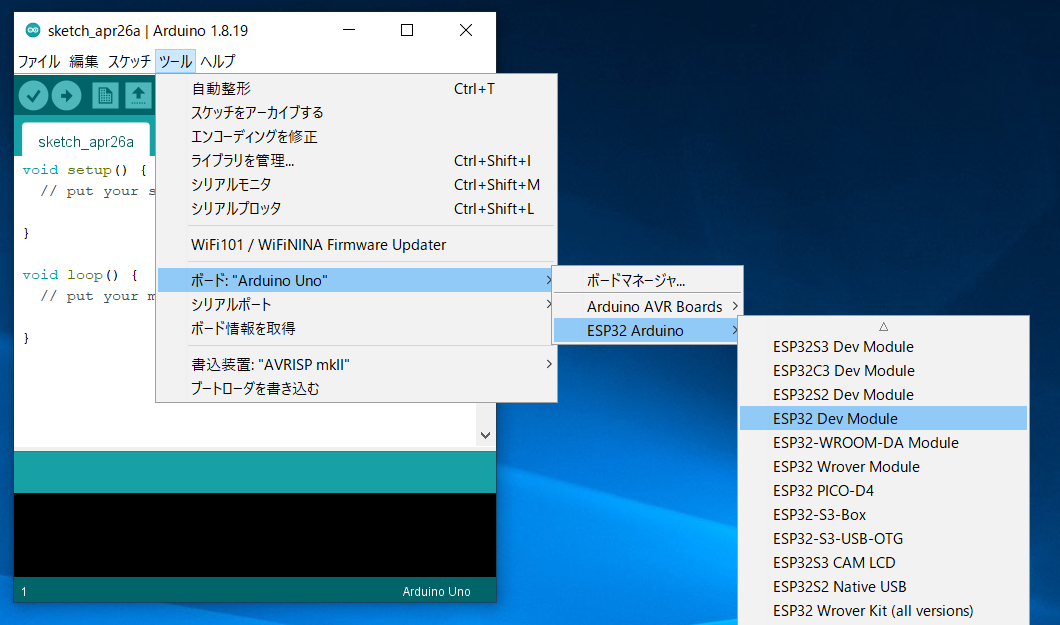
Location of ESP32 Dev Module
Configure Board Settings
Configure as shown in the figure below.
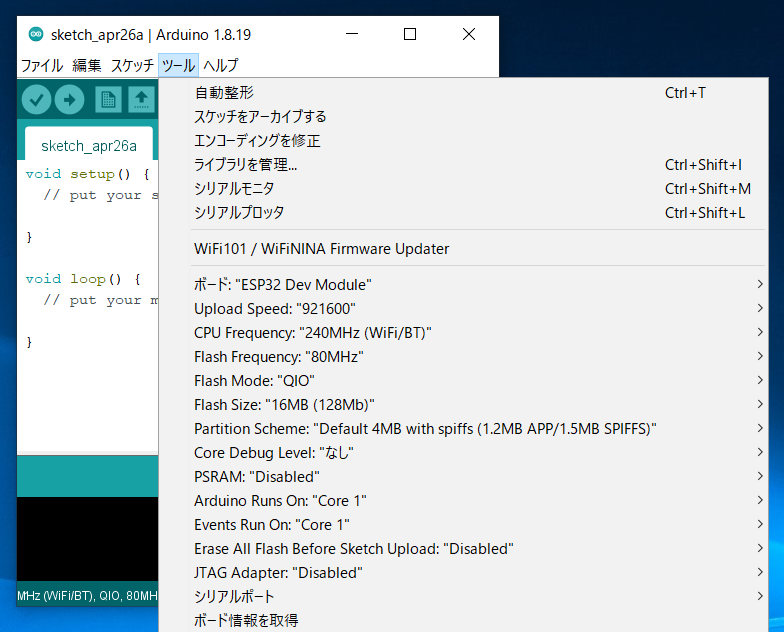
Settings after configuration
Flash size from 4MB (32Mb) to 16MB (128Mb).Prepare TWELITE SPOT
1. Remove the Cover ⛏️
Remove the cover on the top of the TWELITE SPOT case.
Switches and connectors will be exposed.
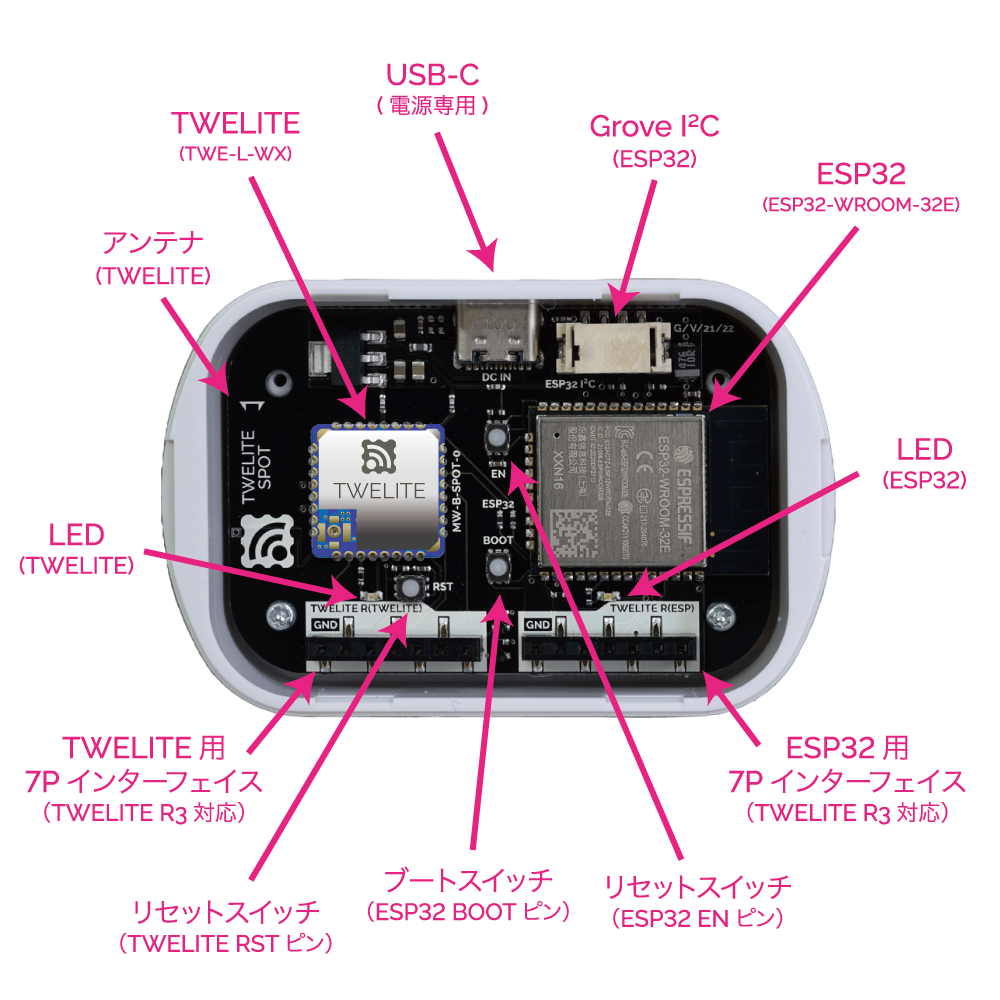
Names of each part
2. Connect TWELITE R3 / R2 🔌
Connect TWELITE R3 / R2 to the 7P interface for ESP32 (marked ESP32).
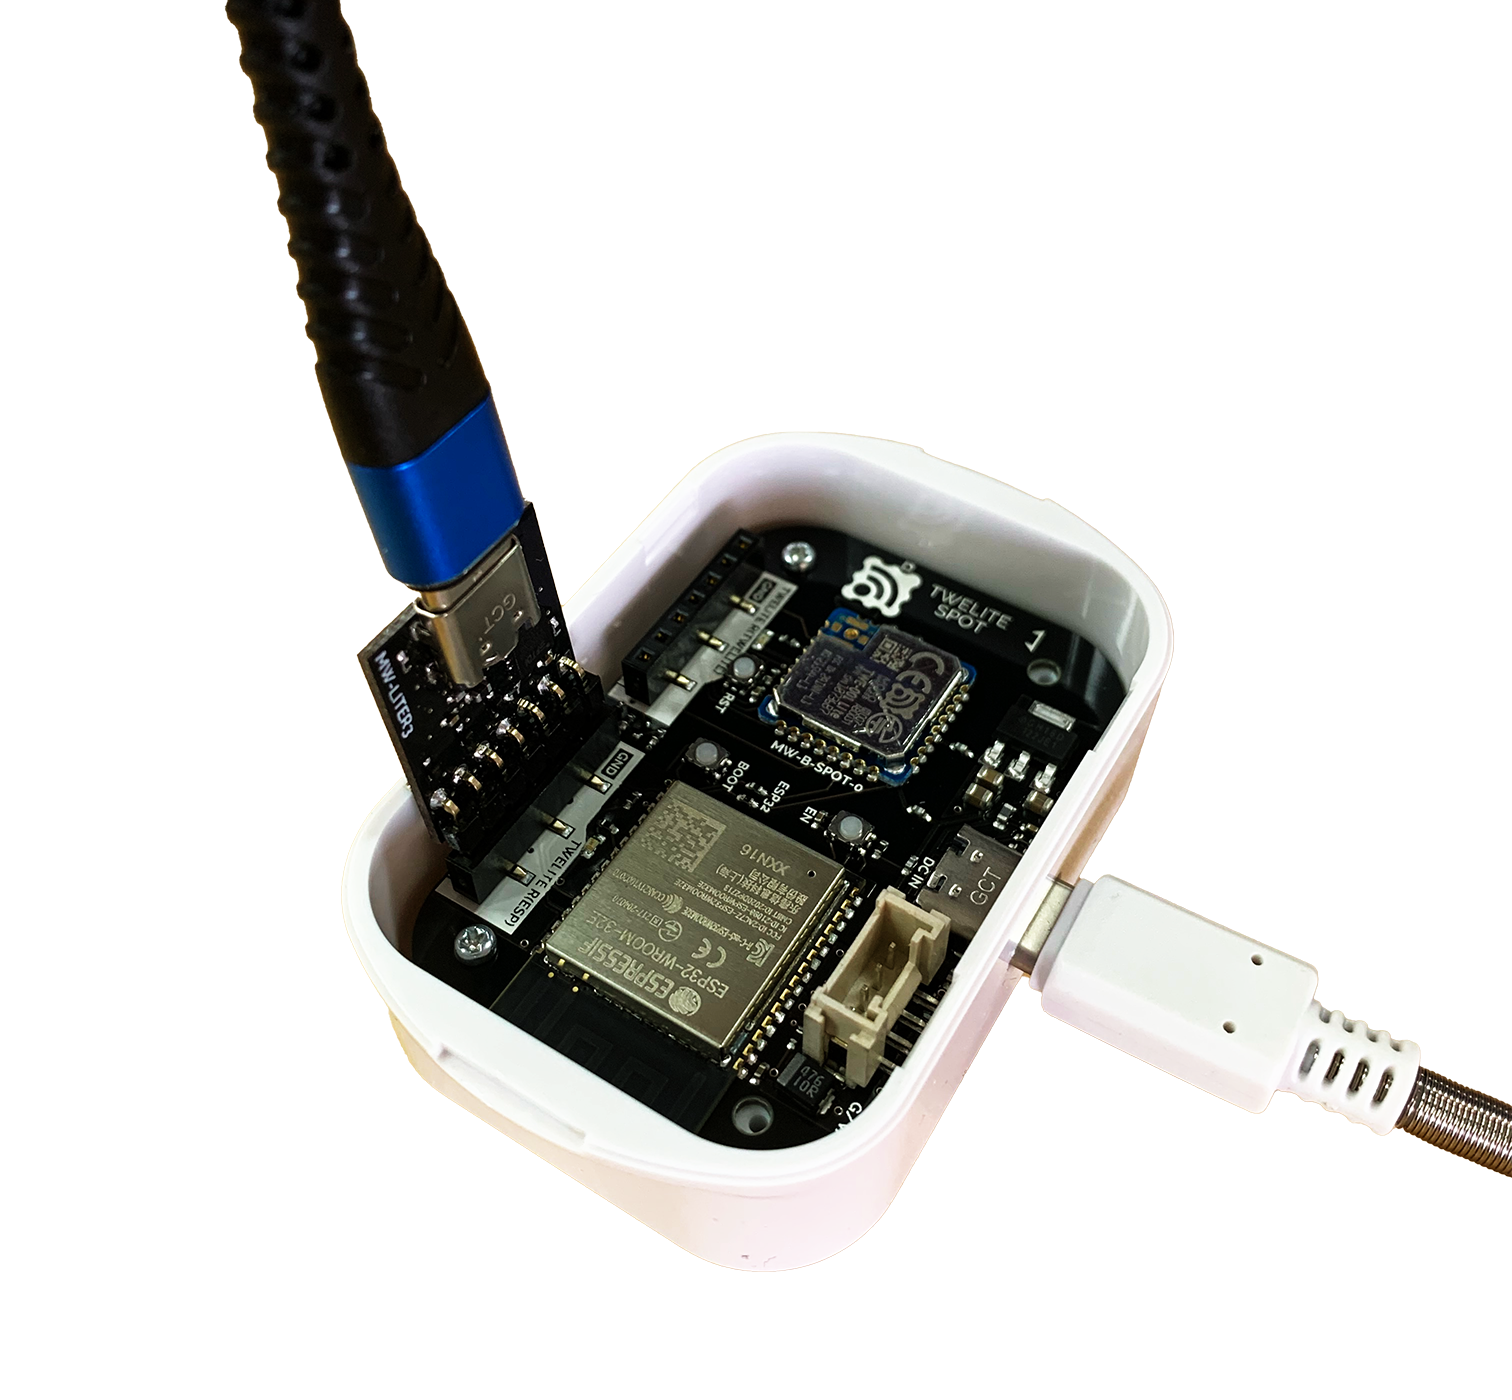
Connection example (ESP32)
Always connect TWELITE R3 / R2 to TWELITE SPOT in the same orientation as shown above. Connecting in the wrong orientation may damage TWELITE SPOT or TWELITE R3 / R2.
Tip 👉 Face the surface of TWELITE R3 / R2 towards the connection target.
3. Connect USB-C Power ⚡
Supply 5V power to the USB-C connector on the side.
Run the Sketch
In Arduino, programs/projects are called sketches.
1. Create the Sketch 👨💻
Create a Hello World sketch that outputs a string from ESP32 to the serial port and displays it on the Arduino IDE serial monitor.
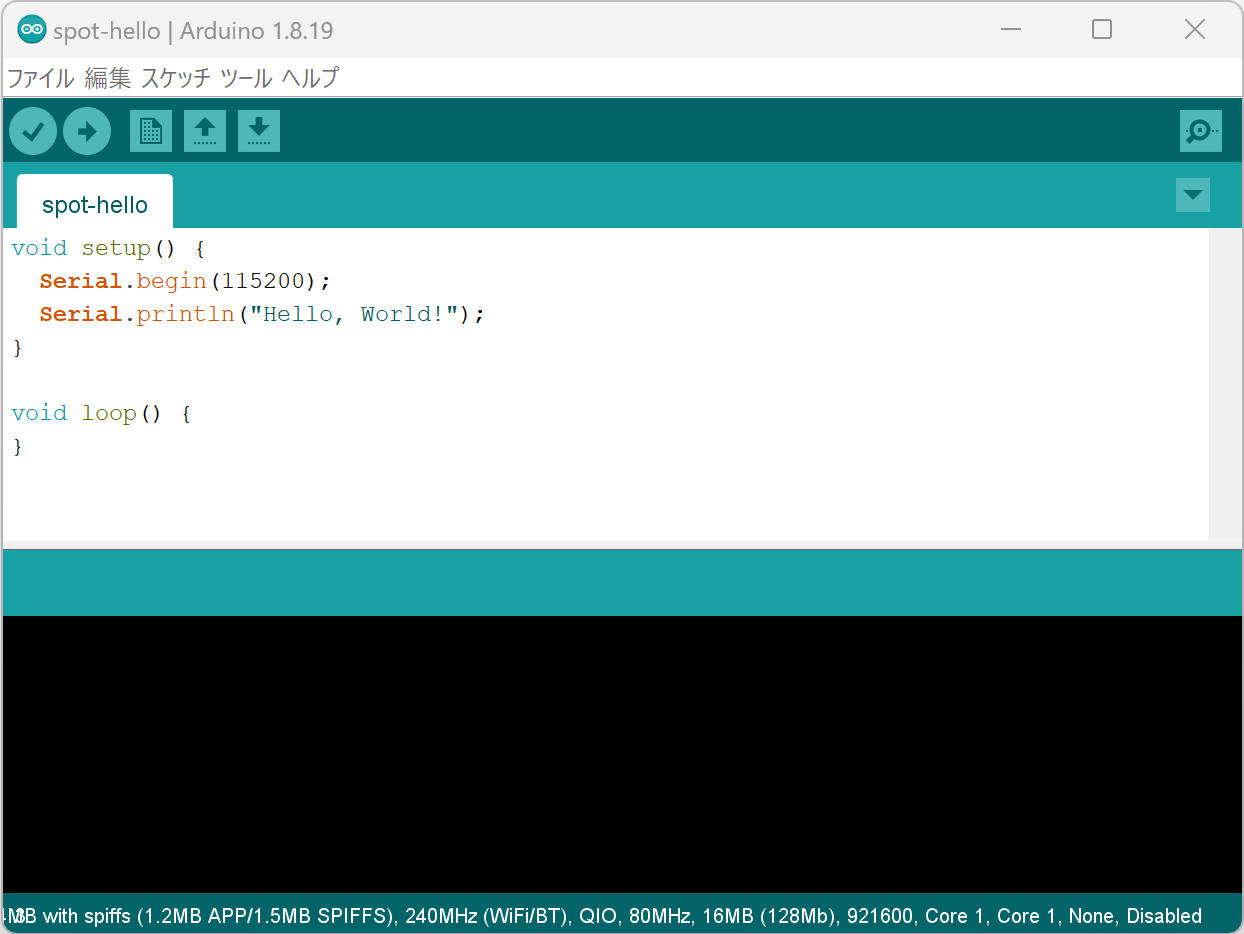
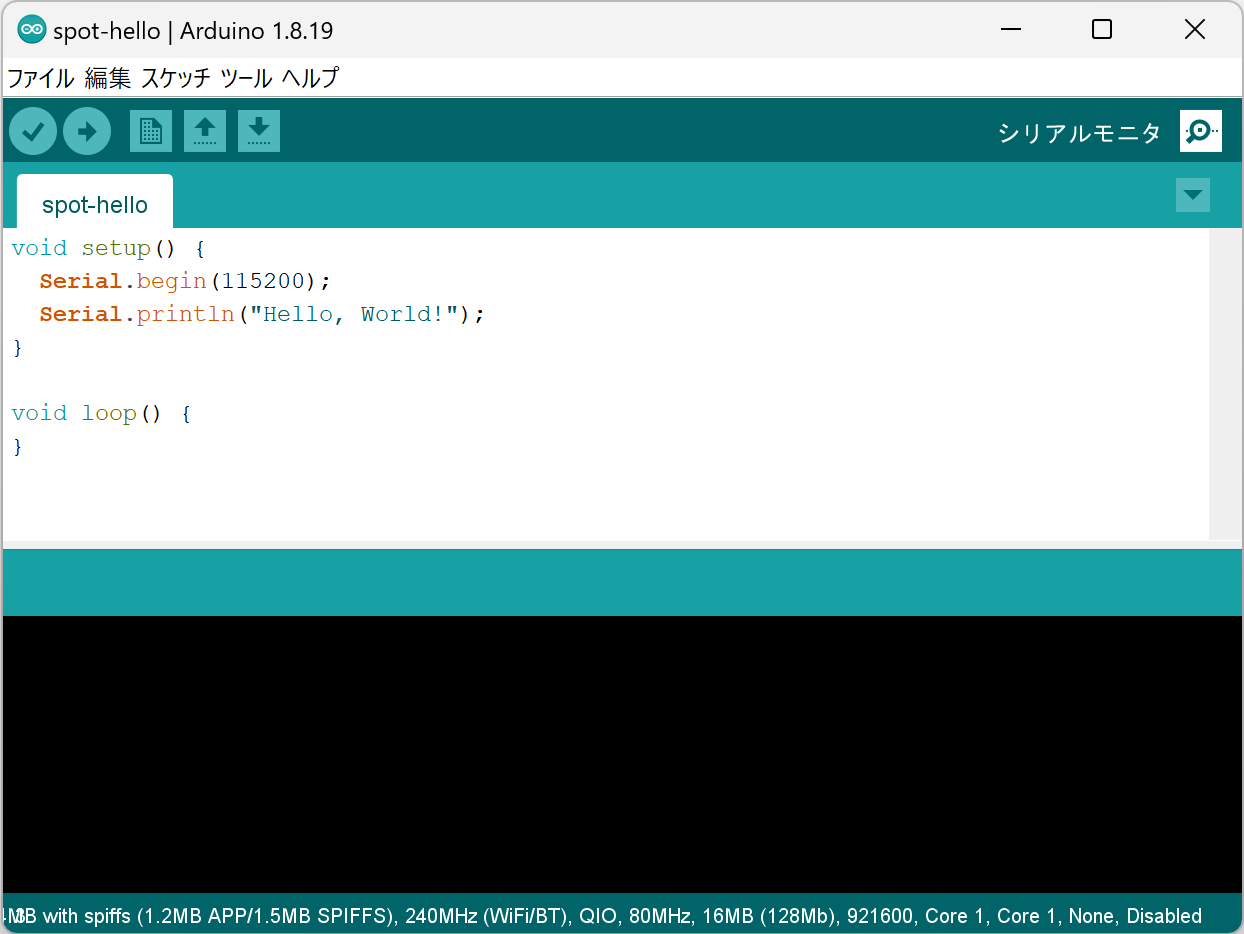
Sketch creation screen
Start Arduino IDE and enter the following code.
void setup() {
  Serial.begin(115200);
  Serial.println("Hello, World!");
}

void loop() {
}
The contents of setup() run only once at startup. The contents of loop() run repeatedly without end.
On the second line, the baud rate (communication speed) of the serial port is set to 115200bps.
Serial.begin(115200);
On the third line, the string "Hello, World!" is output to the serial port.
Serial.println("Hello, World!");
Serial.println() automatically appends a newline (CRLF) at the end.2. Write the Sketch ⚒️
Select the Serial Port
From the Tools -> Serial Port menu, select the port for the connected device (TWELITE R series).
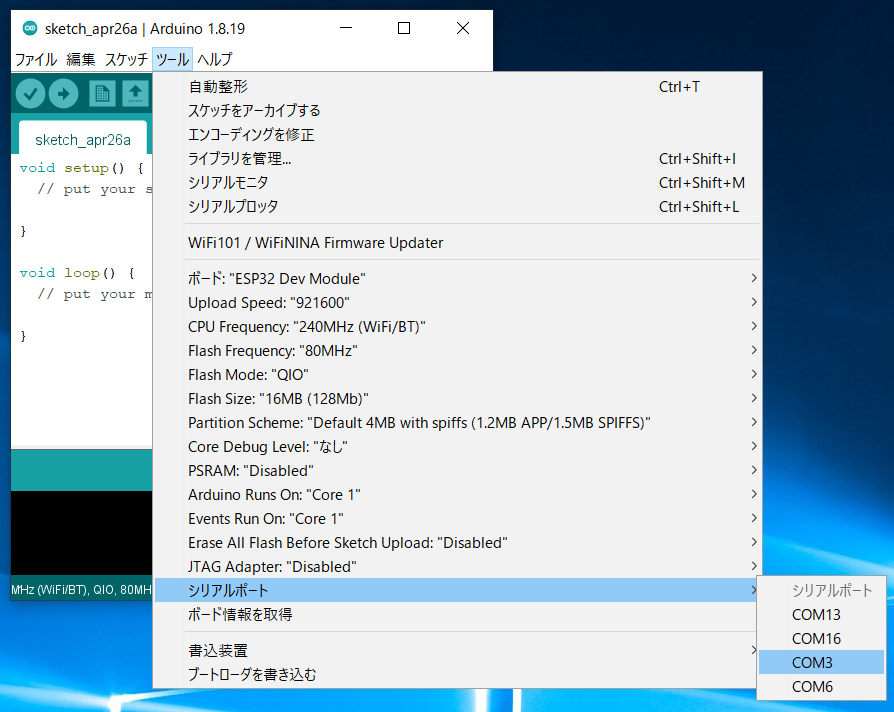
Serial port selection
COM?, and on macOS/Linux, like /dev/tty?.Start ESP32
Start ESP32 in programming mode.
Press the ESP32 reset switch EN(RST) and the ESP32 boot switch BOOT, then release them in the order EN(RST) -> BOOT.
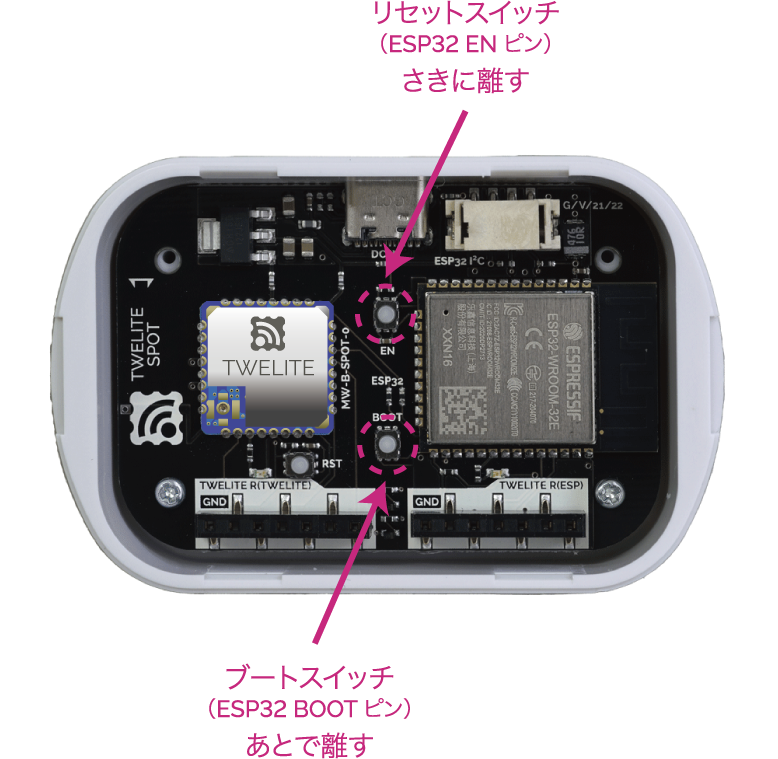
Button locations
BOOT.Write the Sketch
Click the Upload button on the Arduino IDE toolbar.
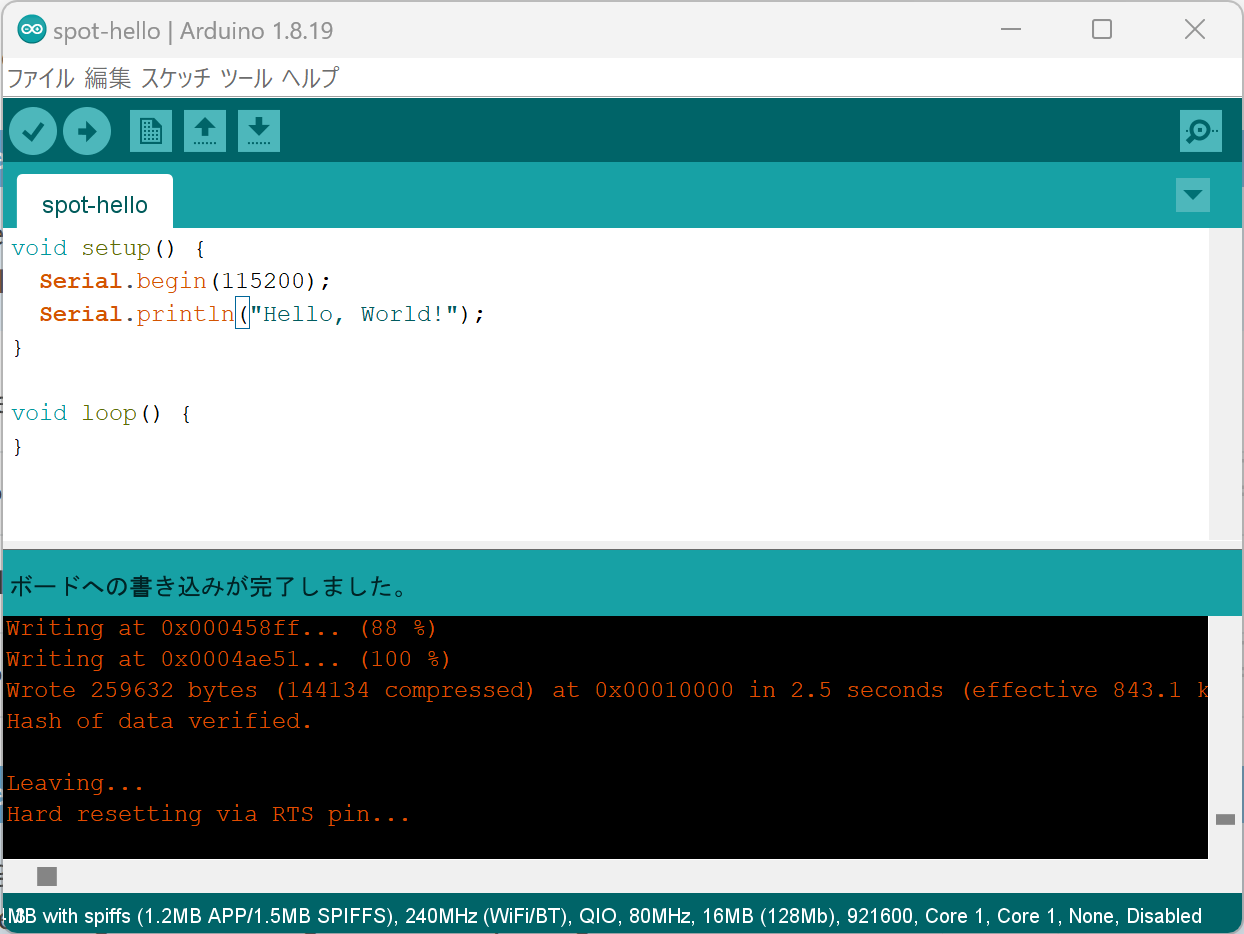
Upload completion screen
3. Open the Serial Monitor 🖥️
Open the Screen
Click the Serial Monitor button at the top right of Arduino IDE.
Serial monitor button at top right
Configure Settings
Set the baud rate at the bottom right of the serial monitor screen to 115200.
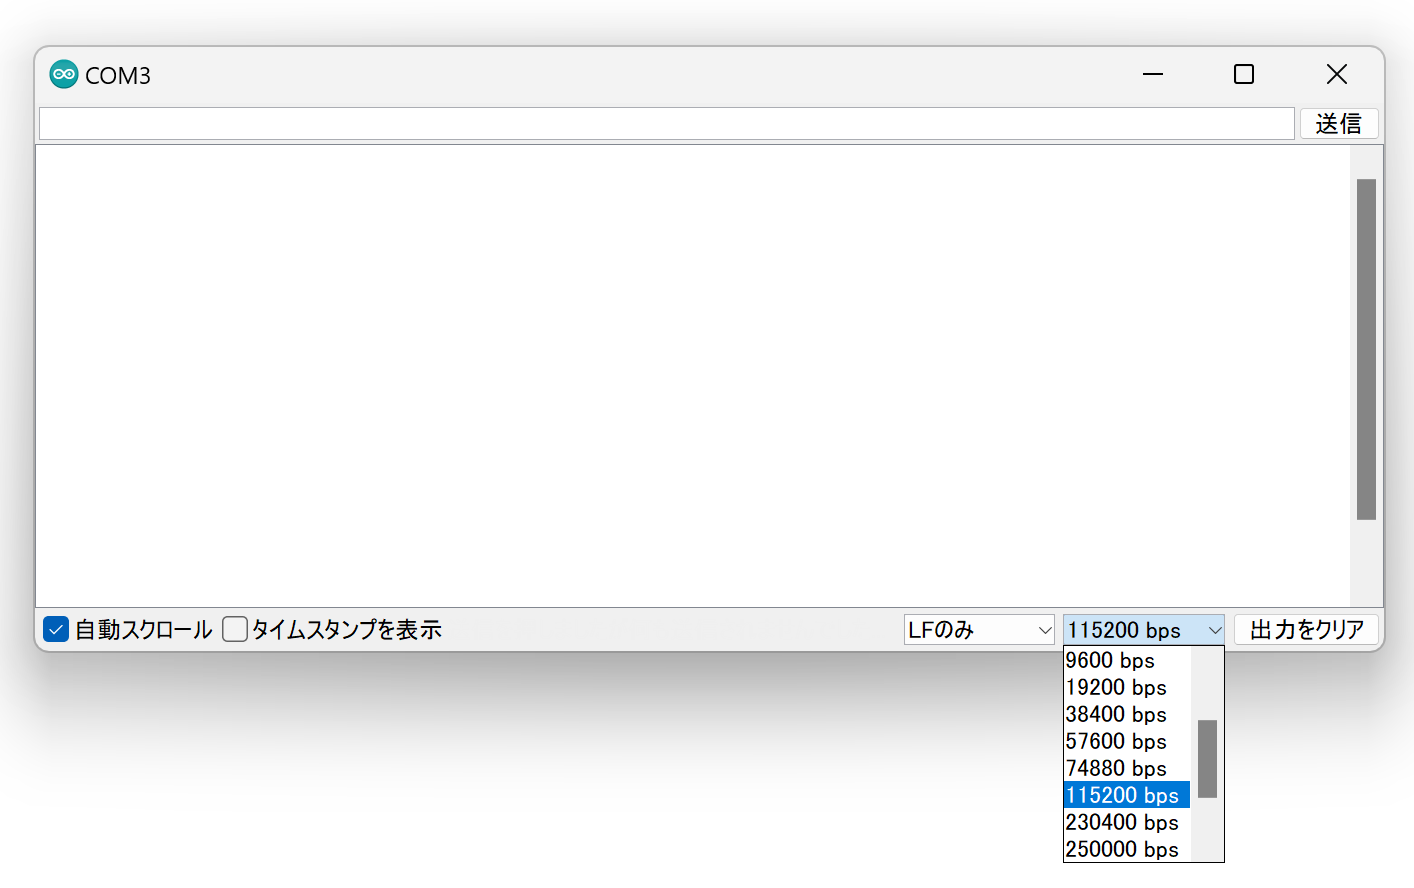
Baud rate setting
4. Run the Sketch 🚀
Restart ESP32
After writing is complete, press and release the ESP32 reset switch EN(RST) on TWELITE SPOT to reset ESP32.
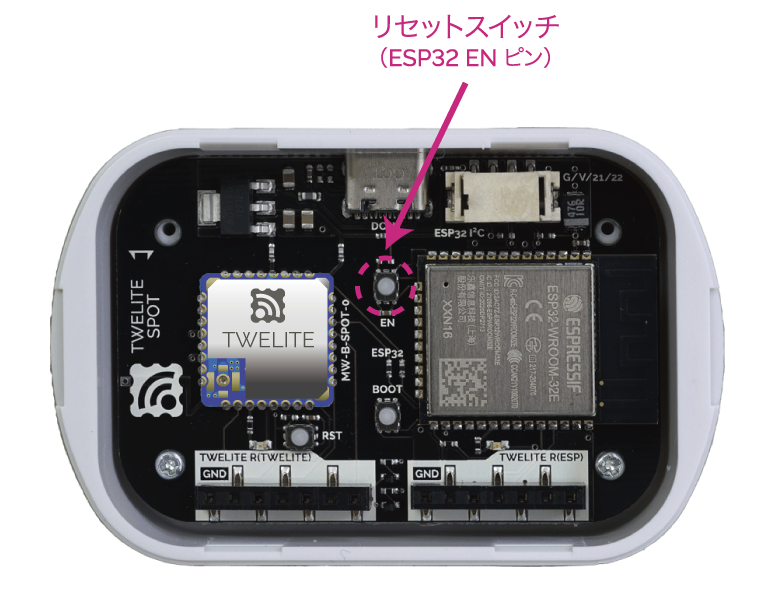
Reset switch location
Check the Serial Monitor
If the following string is displayed on the serial monitor, it was successful.
Hello, World!
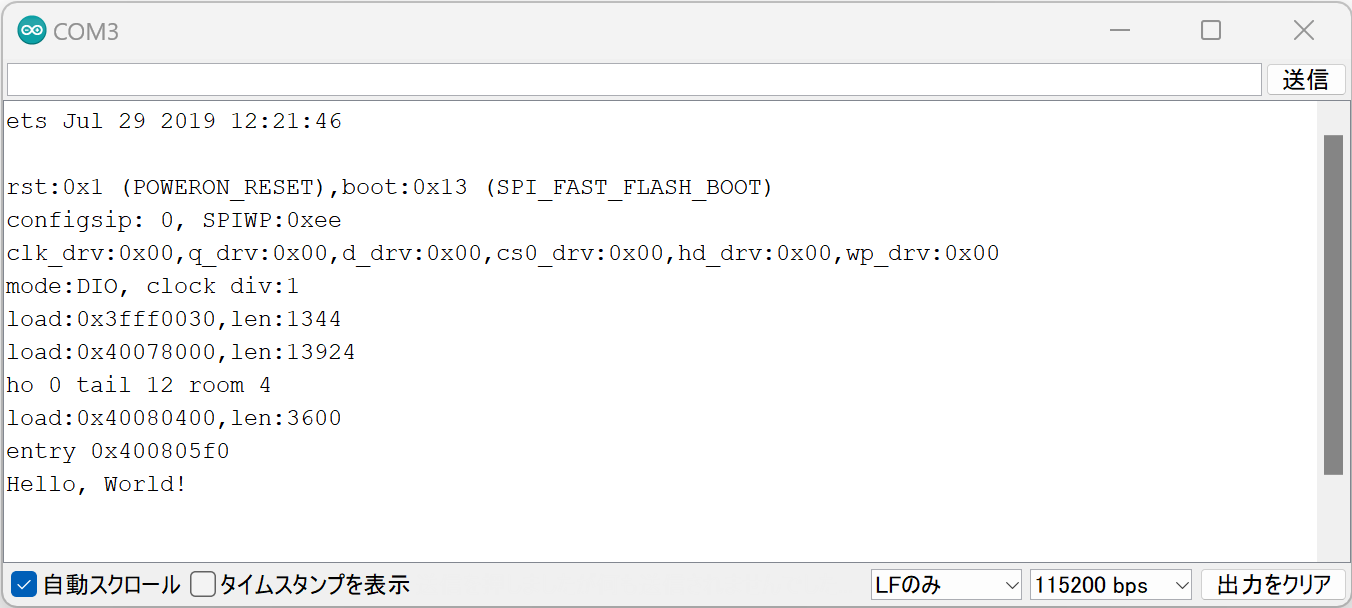
Successful Hello World output